background image


2.6


I

NTERNAL 

3.5”


D

EVICE 

I

NSTALLATION


With the front bezel facing you, swing the front door open. It can swing 270º so the door is parallel with 
the side of the case. You can see there are four 5.25” and one 3.5” external drive bays. Inside the case 
there are two 3.5” drive cages, which can house up to six hard drives.  

Note

: We recommend using the lower HDD cage to maximize cooling and quiet computing. 


Upper HDD Installation 

1.   Remove the thumbscrew holding the upper HDD cage. 
2.   Pull the HDD cage from its position by pulling the ring toward you. 
3.   There are two HDD trays inside the cage. Squeeze the metal clips on each side of the tray and slide 

the tray out. 

4.   Mount your hard drive into the drive tray with the special screws provided. Don’t over-tighten the 

screws as this will reduce the vibration and noise dampening ability of the silicone grommets.  

Note

: Always mount the HDD with the thicker side of the silicone grommets facing up. 

5.   Slide and lock the tray back into the cage. 
6.   Slide the cage back into the case and fasten the thumbscrew. 
7.   Find the right Molex or SATA connector on the power supply and connect it to the hard drive. 
8.   Repeat the same procedure for the other drives. 
 

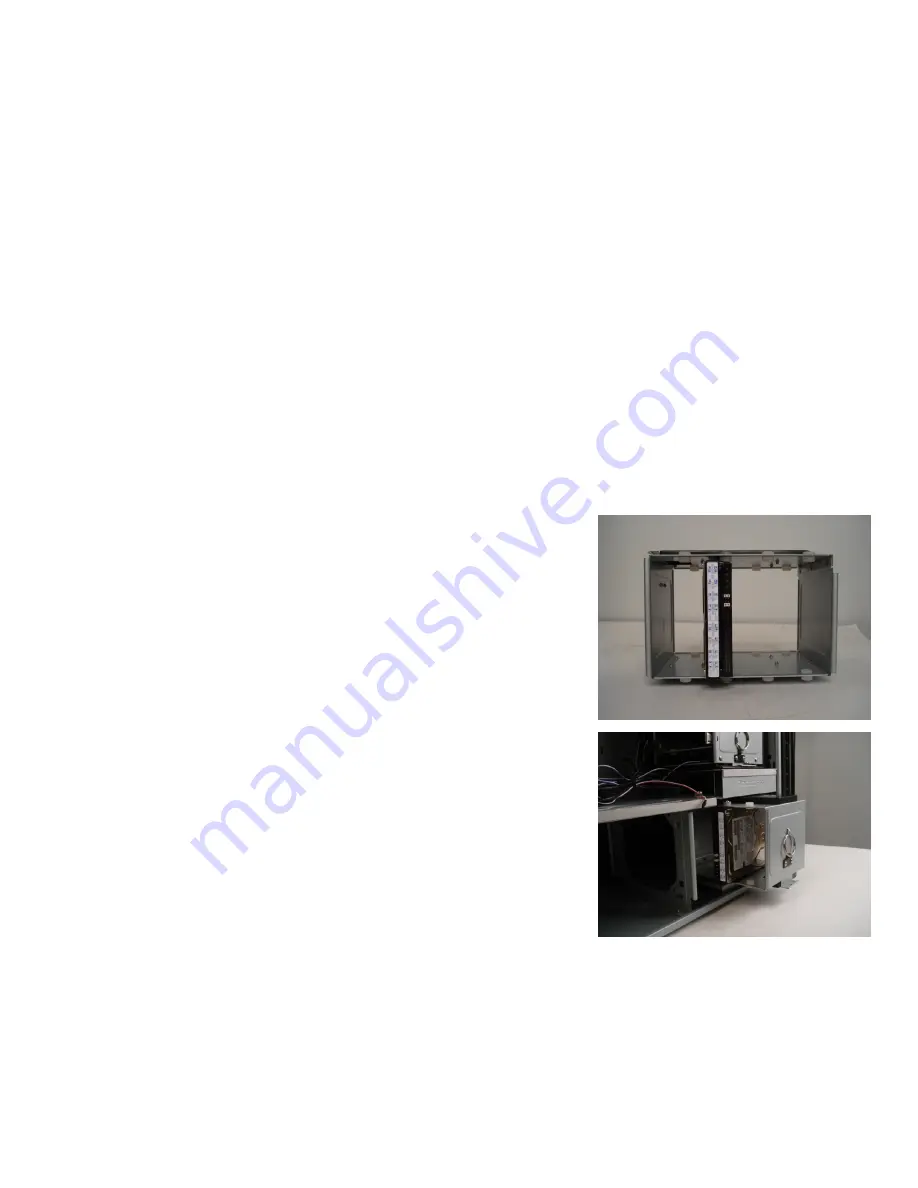
Lower HDD Installation 

1.   Remove the thumbscrew holding the lower HDD cage. 
2.   Pull the HDD cage from its position by pulling the ring towards 

you. 

3.   You can mount up to four hard drives inside the cage. They are 

mounted vertically with the silicone grommets sitting at both 
sides. 

4.   Mount your hard drive into the drive cage with the special screws 

provided. Don’t over-tighten the screws as this will reduce the 
vibration and noise dampening ability of the silicone grommets.  

Note

: Always mount the HDD with the thicker side of the silicone 

grommets facing up. 

5.   Slide the cage back into the case and fasten the thumbscrew. 
6.   Find a Molex or SATA connector on the power supply and connect 

it to the hard drive. 


Содержание P193

Страница 1: ...P193 USER S MANUAL...

Страница 2: ...2 5 Motherboard Installation 5 2 6 Internal 3 5 Device Installation 6 2 7 External 3 5 Device Installation 7 2 8 External 5 25 Device Installation 7 CONNECTING THE FRONT I O PORTS 3 1 USB 2 0 Ports 8...

Страница 3: ...components and has a long enough power harness to reach your motherboard and peripheral devices We recommend our CP Series TruePower Series or Signature Series power supplies for the latest ATX speci...

Страница 4: ...mber 120mm TriCool fan 1 x Front optional 120mm fan mount for HDD 1 x Middle optional 120mm fan mount for video cards Drive Bays 11 Drive Bays 4 x External 5 25 drive bays 1 x External 3 5 drive bay 6...

Страница 5: ...ool box attached to the upper HDD cage containing more hardware screws brass standoffs spare silicone grommets etc 2 2 POWER SUPPLY INSTALLATION Most power cables can be routed behind the motherboard...

Страница 6: ...3 Use the cable ties provided to hold them in place 4 Feed the cables back through the insertion point nearest the destination of the cable Connect the cable and then pull the slack back to the right...

Страница 7: ...mmets Note Always mount the HDD with the thicker side of the silicone grommets facing up 5 Slide and lock the tray back into the cage 6 Slide the cage back into the case and fasten the thumbscrew 7 Fi...

Страница 8: ...Connect a small 4 pin connector from the power supply to the 4 pin connector on the floppy drive 2 8 EXTERNAL 5 25 DEVICE INSTALLATION There are four 5 25 drive bays and 8 drive rails 1 Carefully rem...

Страница 9: ...a SATA connector on a cable attached to the front ports This internal SATA connector is designed to connect to a standard SATA connector on your motherboard This will allow high speed external hard di...

Страница 10: ...tton connector Before performing any work please refer to your motherboard manual or your motherboard manufacturer s website to be sure of the pin out needed for your connector We strongly recommend m...

Страница 11: ...d Voltage 12V Operating Voltage 10 2V 13 8V Speed RPM Input Current Air Flow Static Pressure Acoustic Noise Input Power High 2000 0 24A Max 2 2 m min 79 CFM 2 5mm H2O 0 10 inch H2O 30 dBA 2 9W Medium...

Страница 12: ...ay start as low as 4 5V to 5V Connecting a TriCool fan set on Medium or Low to a fan control device may result in the fan not being able to start because the already lowered voltage from the fan contr...

Страница 13: ...ter at least once a month initially The frequency will change depending on environmental conditions and system usage as users whose systems run 24 7 will likely have to check more often than those who...

Страница 14: ...tel 31 0 10 462 2060 fax 31 0 10 437 1752 Customer Support US Canada 1 800 22ANTEC customersupport antec com Europe 31 0 10 462 2060 europe techsupport antec com www antec com Copyright 2009 Antec Inc...

Отзывы: