


4-10
Uploading a Job from the Panel,
Continued
Step 4. Start Upload at
PC
1.
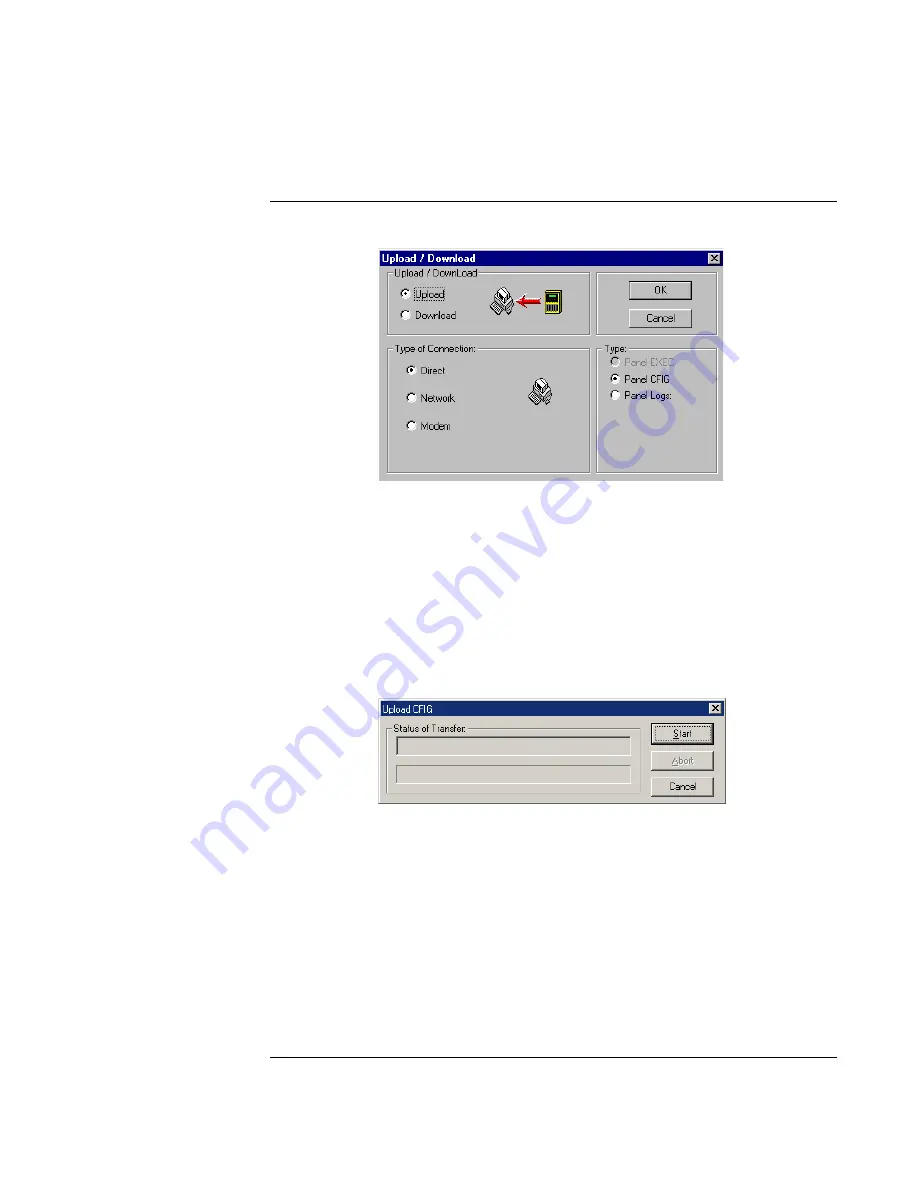
Click on the Transfer menu. When the selections appear, choose Transfer. A window
similar to the one shown in Figure 4-14 appears.
Figure 4-14. Upload/Download Dialog
2.
Select the following radio button options in the window’s panels.
•
Upload
•
Direct
•
Panel CFIG
3.
Click OK. The dialog shown in Figure 4-15 appears, prompting you to begin the upload.
Figure 4-15. Upload Dialog
Click on the Start button to begin the upload. One of the following occurs, depending on
whether a job by the same name already exists in the PC's
\APJOBS
folder.
If Job Name Already Exists on PC. If a job by the same name already exists in the APJOBS
folder on the PC, the programmer generates a prompt asking whether you want to write over
the existing file. If you do not want to write over the existing file, click on No. Another dialog
appears, giving you the opportunity to rename the job. If you want to overwrite the exististing
job, click on Yes button. A dialog similar to the one shown in Figure 4-16 appears, indicating
Continued on next page
the progress of the file transfer.


