


I
I
R
R
-
-
R
R
E
E
M
M
O
O
T
T
E
E
K
K
E
E
Y
Y
P
P
A
A
D
D
4
|
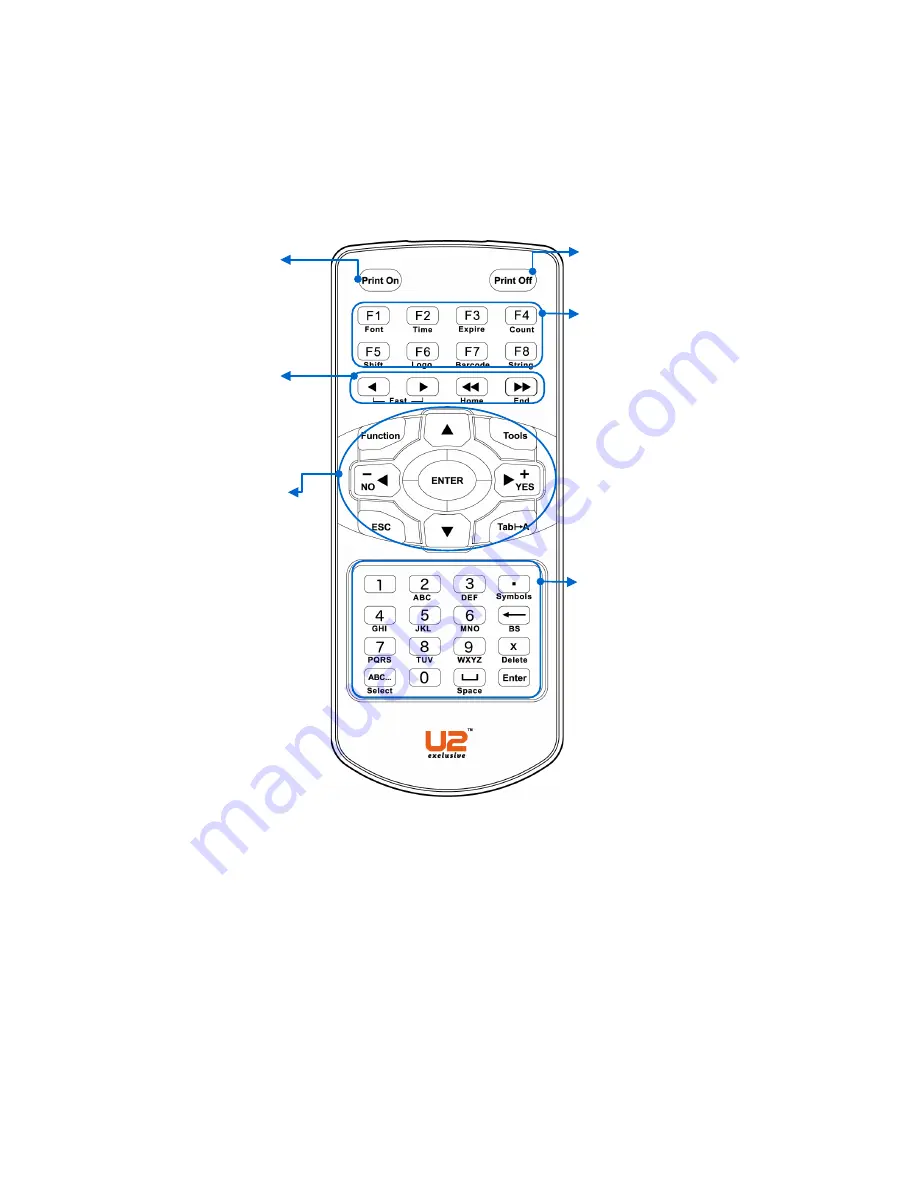
IR-REMOTE KEYPAD
IR-Remote Keypad
Basic operation and most
frequent used keys:
§
FUNCTION
: Managing various
settings.
§
TOOLS
: Managing various
handy options.
§
ENTER
: To confirm, modify or
advance to next screen.
§
ESC
: Back to previous screen
or quit action.
§
◀
/
▶
/
▼
/
▲
Navigation and
selection Keys
Enter Characters:
§
0~9:
Input alphabetic letters or
numeric number.
§
▪
(Symbols):
Input symbols.
§
←
(BS):
Delete the preceding
character and shift back the
cursor one position.
§
×(Delete):
Discard the
character ahead of cursor’s
position.
§
ABC…
:
Numbers and letters
shift.
Input variable objects in a message:
F1. Select fonts
F2. Select time and date format
F3. Select expiration date format
F4. Input the Counter Code
F5. Input the Shift Code
F6. Input Logo
F7. Input the Barcode
F8. Input the String
Fast Move Keys:
◀
/
▶
,
◀◀
/
▶▶
: Position the
cursor
Print On: Start Printing
Print Off: Stop Printing
Содержание U2 SMART
Страница 4: ...III CONTENT Production Counter 33 ...


