Connecting your Camera and Accessories to the HoloSpec
4
Refer also to your camera user manual
Setting up Solis for the HoloSpec
5
1. Insert the power cable from the power supply into the power
connector at the rear of the camera. Secure in position using
the screwlock.
2. Insert the mains cable into the camera power supply unit.
3. Connect the USB cable to the camera and an available USB
port on the PC.
4. If a shutter is installed, connect the SMB to BNC trigger cable
between the camera and the shutter driver.
5. Switch on the camera.
6. Start your software.
7. View and adjust the acquisition settings as required.
8. Start acquiring data.
Troubleshooting
Camera is not recognized by PC
• Check that the camera power and USB cables are connected securely and the mains power cable is inserted.
• Check that the drivers have been installed properly
(Control Panel /System/Hardware /Device Manager /Imaging Devices).
Connecting your Camera and Switching it on
Ensure that the Camera ON/OFF switch is in the OFF
position AND your PC is switched OFF.
6
MAN-08932
HOSG 1217 R1
For additional troubleshooting information please refer to the user manual
For further technical information about the Andor HoloSpec go to:
www.andor.com/spectrographs
You can find the latest user manuals on
MyAndor (http://my.andor.com/login.aspx)
?
Refer also to your Solis software guide
1. Launch your Solis Software.
2. Navigate to
Hardware/Spectrograph Setup
.
3. Select “Andor” in the
Manufacturer
field.
4. Select “HoloSpec” in the
Spectrograph
field.
5. Click the
HoloSpec Setup
button.
6. Click
Add
, then enter the “calibration coefficents” that can be
found on the supplied Performance Sheet.
7. Click the checkbox
Enable calibration
, then click
OK
on the
grating and spectrograph dialogs to exit the setup menu.
8. Select your desired camera acquisition settings and take an acquisition – the calibration will be applied.
Configuring Solis for the HoloSpec
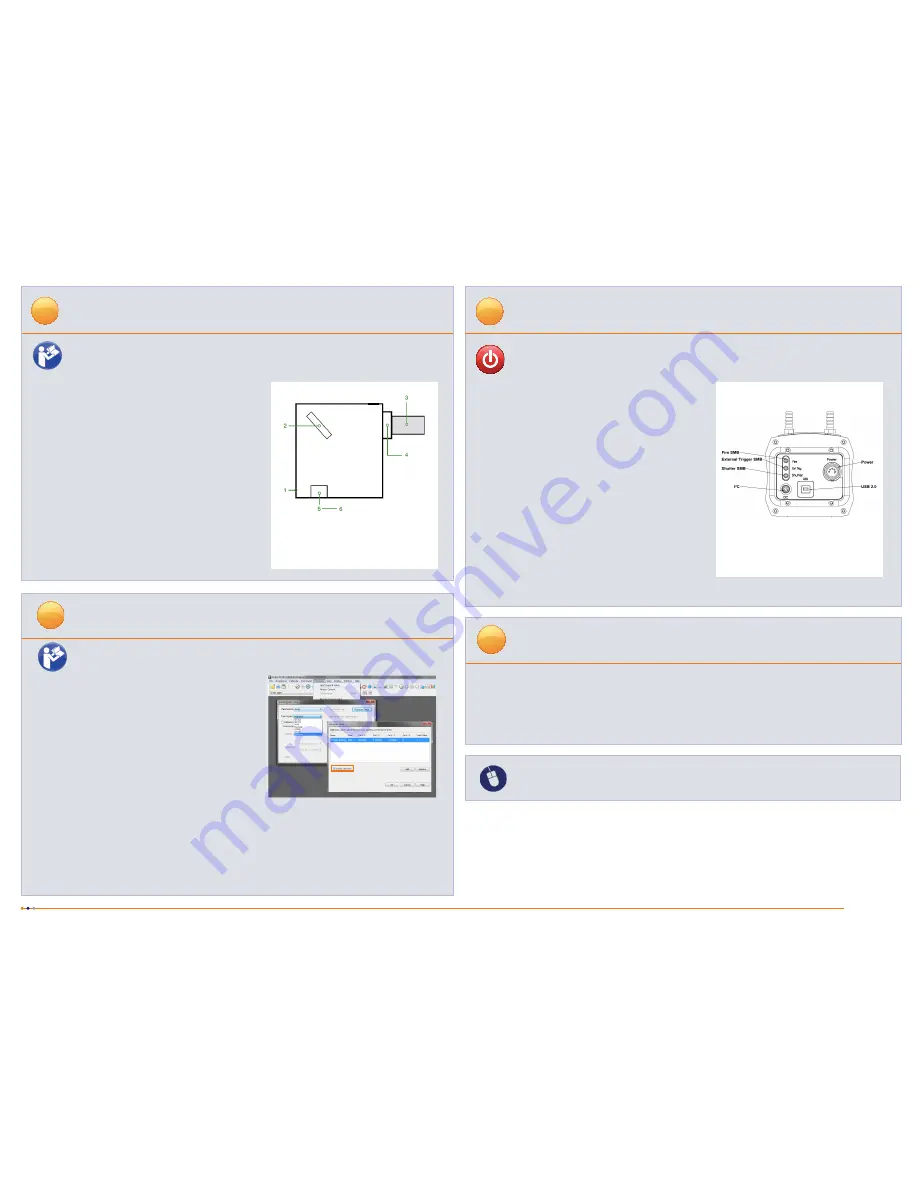
Camera Rear Panel Connections
Above:
Rear panel shown for Newton camera.
Refer to camera User Guide. Connections may
vary with camera model.
Additional Software Functions (See the HoloSpec Hardware Guide for details of these procedures)
• Small shifts in calibration can be accommodated using the pixel offset, found in the
HoloSpec Setup
dialog.
• A new calibration can be calculated easily using a calibration lamp and the
Calibrate/Manual X-Calibration
dialog.
• Units can be changed, e.g. from nanometers [nm] to Raman shift [cm
-1
], in the
Calibrate/Change Units
dialog.
The HoloSpec is supplied with camera, detector flange,
grating and input slit pre-installed and aligned for ease of
use
.
• If you need to install a different slit or grating accessory please
refer to the HoloSpec User Guide for instructions.
• Do not adjust any lenses or components other than as
described in the HoloSpec User Guide.
F/1.8i HoloSpec models
• F/1.8i HoloSpec models are fitted with an additional
holographic notch filter.
• If you need to install a different notch filter please refer to the
HoloSpec User Guide for instructions.
1.
HoloSpec-F/1.8
4.
Detector flange
2.
Grating
5.
Input slit/adaptor
3.
Detector (camera)
6.
Additional input
accessory
HoloSpec Components
Adjustment of Camera Focus
• It is possible to adjust the focus of the camera, if required,
using the camera focus thumbwheel on the HoloSpec.


