3
/
12
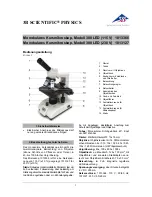
Structure diagram
Assembly
1. Bend the spotlights down(⑤), so that they are out of the way.
2. Screw the locking ring(⑥) all the way on to the optical bracket(①).
3. Screw the optical bracket(①) on to the base(⑦). Once you have done so, it is likely the
bracket will not be aligned over the base(⑦). Unscrew it until it is aligned, and then turn the
locking ring(⑥) clockwise until it is tight. (After doing so, it will still be possible to hold the
base and turn the bracket if sufficient force is applied, but it will not spin freely.)
4. Loosen the small thumbscrews(④) on the optical bracket(①).
5. Slide the microscope in to the ring of the optical bracket about 3/4" (2 cm), so that the
ridged section of the microscope is entirely above the ring.
Содержание ADSM201
Страница 1: ...HDMI Microscope ADSM201 User Manual...
Страница 8: ...7 12 ADSM201 8 8 ADSM201 9 9 HDMI 10 USB 10...
Страница 10: ...9 12 ADSM201 1 USB LED USB 2 3 LED 4...


