


English
- 46 -
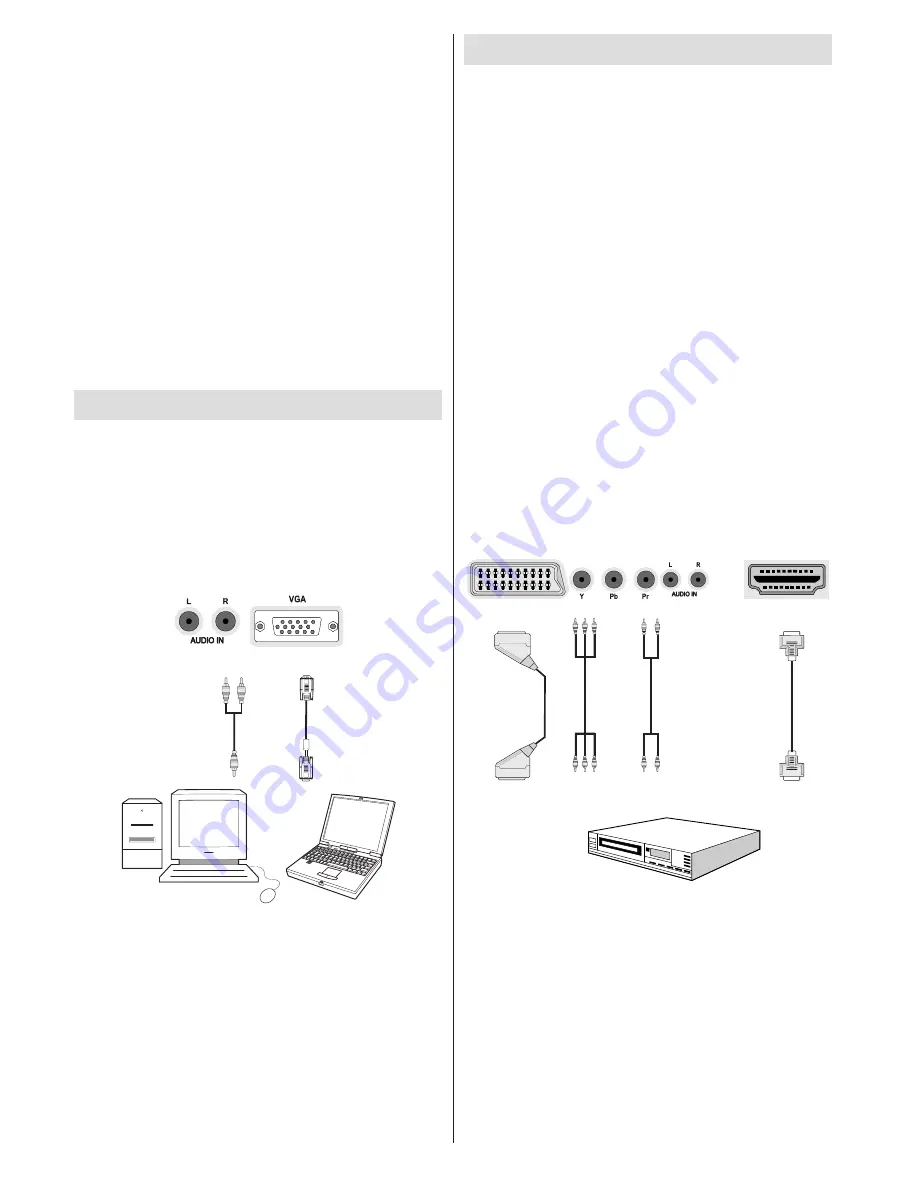
Connecting to a DVD Player
If you want to connect a DVD player to your LCD
TV, you can use connectors of the TV set. DVD
players may have different connectors. Please refer
to your DVD player’s instruction book for additional
information. Power off both the TV and the device
before making any connections.
Note: Cables shown in the illustration are not
supplied.
If your DVD player has an HDMI socket, you can
•
connect via HDMI. When you connect to DVD player
as illustrated below, switch to HDMI source. See,
“Input Selection” section.
Most DVD players are connected through
•
COMPONENT SOCKETS. Use a component video
cable to connect video input. For enabling audio,
use a component audio cable as illustrated below.
When the connection is made, switch to YPbPr
source. See, “Input selection” section.
You may also connect through the BAV IN. Use a
•
RCA cable as shown below.
Note: These three methods of connection perform the
same function but in different levels of quality. It is not
necessary to connect by all three methods.
HDMI
HDMI
inputs
Scart sockets
Component
video
inputs
Component
audio
inputs
DVD Player
then 2 partition, crash may occur. First partition of
usb disk is used for PVR ready features. And also
it must be formatted as primary partition to be used
for PVR ready features.
Multipartition HDDs are supported until two
•
partitions.
Some stream packets may not be recorded because
•
of signal problems, so sometimes video may freezes
during playback.
Record, Play, Pause, Display (for PlayListDialog)
•
keys could not be used when teletext is ON. If a
recording starts from timer when teletext is ON,
teletext is automatically turned off. Also teletext
usage is disabled when there is ongoing recording
or playback.
Radio record is not supported.
•
The TV can record programmes up to ten hours.
•
Connecting the TV to a PC
For displaying your computer’s screen image on your
LCD TV, you can connect your computer to the TV set.
Power off both computer and display before making
any connections. Use 15-pin D-sub display cable to
connect a PC to the LCD TV. When the connection
is made, switch to PC source. See “Input selection”
section. Set the resolution that suits your viewing
requirements. Resolution information can be found
in the appendix parts.
PC audio cable
(not supplied)
PC VGA cable
(not supplied)
Audio inputs of the TV
PC input of the TV
Audio output of the PC
Monitor output of the PC
Note: If you connect a PC to the TV using HDMI
connection, radio interference may occur. Therefore
this type of connection is not recommended. You
should use VGA connection instead.
Содержание L4222FDC PVR
Страница 111: ...50224991...


