background image


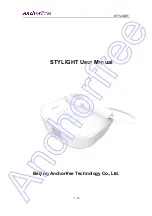
STYLIGHT 

  12 / 15


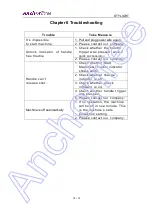
Chapter 6 Troubleshooting 

Trouble 

Take Measure  

It’s impossible   
to start mach ine; 

1. Pull and plug power wire again; 
2. Please contact ou r company; 

Unlock  ind icato r  of  handle 
has troub le 

1. Check whether the handle 

trigge r wa s pre sse d twice 

in 

quick succession

2. Please contact ou r company; 

Handle can ’t 
release shot; 

1. Check whether Start 

Machine&  Trouble  indicator 
sho ws white ; 

2. Check whether cha rge 

indicato r is on; 

3. Check whether unlock 

indicato r is on; 

4. Check whether handle trigger 

was p ressed; 

5. Please contact ou r company; 

Machine is off automatically 

1. If no operation, the  machine 

will be off in one minute. This 
is the mach ine’s sa fe 
protection settin g. 

2. Please contact ou r company; 


Содержание STYLIGHT

Страница 1: ...STYLIGHT 1 15 STYLIGHT User Manual Beijing Anchorfree Technology Co Ltd ...

Страница 2: ...er 3 Specifications 7 3 1 Technical Specifications 7 3 2 Working Environment 7 Chapter 4 Operation 8 4 1 Packing Check Installation 8 4 2 Operation 8 Chapter 5 Daily Maintenance 11 Chapter 6 Troubleshooting 12 Chapter 7 Clinical Guide 13 7 1 Working Mechanism 13 7 2 Notes 13 7 3 Treatment Procedure 13 7 4 Effective Result of Treatment 14 7 5 Uncomfortable Feeling 14 ...

Страница 3: ...STYLIGHT 3 15 Chapter 1 Machine Parts 1 1Parts 1 The Host 2 Charge Indicator 3 Unlock Indicator 4 Handle 5 Start Machine Trouble Indicator 6 Function Area 7 Parameter Display Area 1 2 4 5 7 6 3 ...

Страница 4: ...STYLIGHT 4 15 8 Total Shots Error Code Display Area 9 Power Socket 10 Shot Outputting 11 Trigger 12 Refrigeration Area 8 9 10 11 12 ...

Страница 5: ...STYLIGHT 5 15 1 2 Packing List The Host 1 User Manual CD 1 Power Cable 1 Goggles 1 ...

Страница 6: ... handle stand if not using it 5 Keep crystal clean 6 It is prohibited to touch crystal during operation for avoiding burned 2 2 Electrical Safety 1 The local power supply shall be AC230V 10 50Hz 1Hz AC110V 10 60Hz 1Hz Optional 2 No person is permitted to disassemble the machine or any inner parts unless he is authorized by our company Warning It is prohibited to use cooling gel for this machine 2 ...

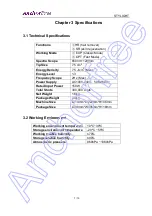
Страница 7: ... Energy Level 1 3 Frequency Scope 2Hz Max Power Supply AC100V 240V 50Hz 60Hz Rated Input Power 150W Total Shots 300 000 shots Net Weight 1 6kg Package Weight 2 4kg Machine Size L214mm W220mm H106mm Package Size L308mm W305mm H118mm 3 2 Working Environment Working environment temperature 10ºC 30ºC Storage environment temperature 20ºC 55ºC Working relative humidity 70 Storage relative humidity 90 At...

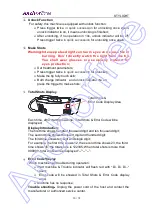
Страница 8: ...hine Trouble indicator will be on 3 Parameter display area will show parameters 4 Charge indicator will be on Charge Indicator If charge indicator is on it means machine has finished charge If charge indicator is off it means machine is charging Start Machine Trouble Indicator After machine is turned on Start Machine Trouble indicator will be white After machine is turned on if machine has trouble...

Страница 9: ...ency after 3s make 5 shots once again make shots like this Release the trigger Make shots continually for one minute unlock indicator will be off the handle stops making shots press trigger twice in quick succession for unlocking once again SR EXP Press the trigger once Make one shot OPT Long press the trigger Make shots continually with 2Hz frequency Release the trigger Make shots continually for...

Страница 10: ... indicator are on press the trigger to make shots Total Shots Display Each time after starting machine Total Shots Error Code will be displayed Display Introduction The first time shows hundred thousand digit and ten thousand digit The second time shows thousand digit and hundred digit The third time shows ten digit and single digit For example the first time shows 12 the second time shows 23 the ...

Страница 11: ...er 5 Daily Maintenance After each treatment turn off machine and unplug the power cord of the host 5 minutes after turning off machine wipe the shot outputting and refrigeration area of the handle with a wet towel After wiping return the handle to the handle stand of the host Warning No person is permitted to disassemble the machine or any inner parts unless he is authorized by our company ...

Страница 12: ...ce in quick succession 2 Please contact our company Handle can t release shot 1 Check whether Start Machine Trouble indicator shows white 2 Check whether charge indicator is on 3 Check whether unlock indicator is on 4 Check whether handle trigger was pressed 5 Please contact our company Machine is off automatically 1 If no operation the machine will be off in one minute This is the machine s safe ...

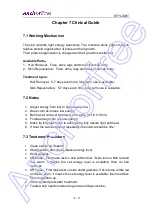
Страница 13: ...ep color skin uses low energy 3 Before hair removal treatment shave the hair to 2 3mm 4 Forehead and chin use low energy 5 Make tip fully touch skin to ensure skin fully absorb light and heat 6 If treat the same skin part repeatedly the interval shall be 30s 7 3 Treatment Procedure 1 Clean skin to be treated 2 Start machine and adjust relative energy level 3 Wear goggles 4 HR Mode First make test ...

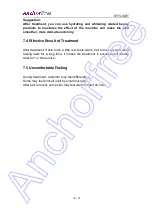
Страница 14: ... 4 Effective Result of Treatment After treatment if skin turns a little red feels warm hair turns curly and warm feeling lasts for a long time it means the treatment is successful Normally treat for 1 2 times once 7 5 Uncomfortable Feeling During treatment customer may feel differently Some may feel himself is bit by small mosquito After hair removal some skin may feel warm for half an hour ...

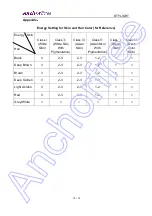
Страница 15: ...hite Skin Class Ⅱ White Skin With Pigmentation Class Ⅲ Asian Skin Class Ⅳ Asian Skin With Pigmentation Class Ⅴ Brown Skin Class Ⅵ Deep Color Skin Black 3 2 3 2 3 1 2 1 Deep Brown 3 2 3 2 3 1 2 1 Brown 3 2 3 2 3 1 2 1 Deep Golden 3 2 3 2 3 1 2 1 Light Golden 3 2 3 2 3 1 2 1 Red 3 2 3 2 3 1 2 1 Grey White ...

Отзывы: