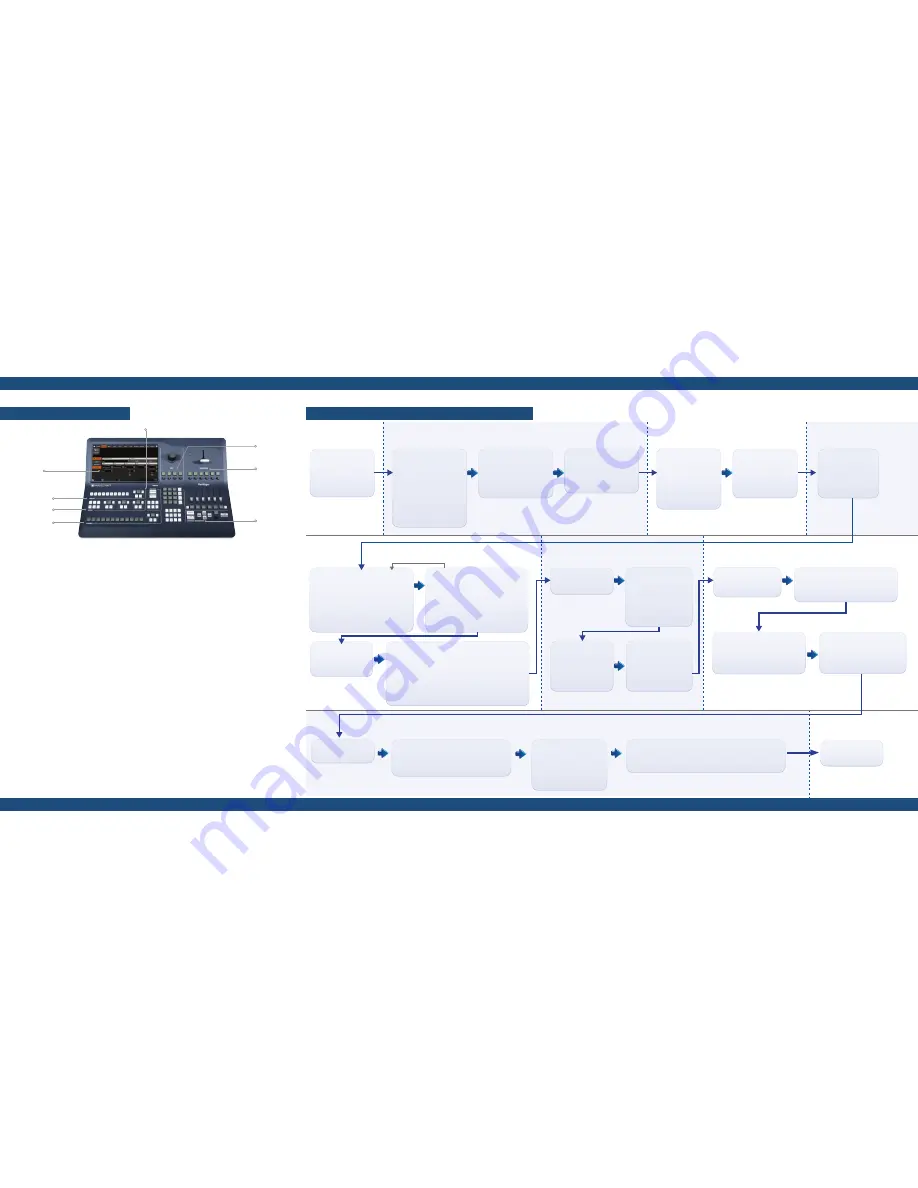
FRONT PANEL DESCRIPTION
SETTING UP THE VERTIGE™ & CONFIGURING A SHOW
1- Touch screen
The 15’’6 wide touchscreen comfortably displays on
the same page the representation of the Program
& Preview of a typical scene (Blend + 2 satellites).
The representation of the whole scene will allow you
to work on multiple layers from different screens at
the same time (to change background sources, for
example). The representation of both Program &
Preview states will allow you to switch presets at any
time (even during an effect) like with the
LiveCore™
series
.
2- Preset section
This section allows you to save and load your
scene presets. 10 preset keys and a page browsing
mechanism allows you to organize and access up to
100 presets.
3- Layer section
This section allows you to select layers in different
screens and edit them simultaneously. Multiple layer/
screen criteria can be used to perform advanced
layer selections.
4- Source section
This section allows you to assign sources to the
selected layers on Program or Preview. 12 source
keys and a page browsing mechanism allows you to
organize and access up to 120 sources. The name of
a source will be displayed on the corresponding LCD
key.
5- Control section
This section allows you to select the preset to work
with (Program or Preview), and apply basic functions
to all selected layers (like Freeze, Clear, Unify...).
6- Edit section
This section allows you to edit the selected layers in
three different ways: roughly via the joystick, finely
via the encoders or directly via the numpad. With
its 12 contextual LCD keys, the block displaying the
numpad (the
EDIT pad
) also provides access to a
variety of edit tools such as pages of shortcuts, layer
presets and macros.
7- Transition section
This section allows you to use the T-Bar for a smooth
transition effect between presets. The individual,
motorized sliders can be used to transition individual
screens, and they show the current state of the
screen.
8- Control Transition
This section allows you to take all your active screens
and control the transition time globally.
You can also enable the
CUE SEQUENCE
button to
control the cue sequence playback (play, next step,
stop ...).
1
2
3
4
8
7
5
6
Starting the Vertige™
Press
Start
Creating a User
Select the
CREATE
option.
Enter a name and
a password (optional).
Press
Create.
Configuring the Vertige™
Network
Press the
SETTINGS
button in
the upper-right corner.
Select the
Network
tab then
the
EDIT
option.
Select the Ethernet port you
want to use.
Enter the desired IP address,
subnet mask and gateway.
Press
Apply.
Logging in
Select the
LOGIN
option.
Select a user.
Press
Login.
Creating a Show
Select the
CREATE
option.
Enter a name.
Press
Create.
Note:
Creating a show
will automatically create a
default iteration.
Loading a Show
Select the
LOAD
option.
Select a show.
Press
Load.
Wizard Step 1 (Assembly)
In the
Device Type
field, select the type of
device that will be handled by this assembly.
In the
Device Extension
field, select the option
that matches your assembly configuration
(
Single
,
Linked with Slave
,
Linked with LOE
or
Synchronized
). If your device(s) have an
option (
4K
or
4K - PL
), then make sure to
select it in the
Device Option
field.
Wizard Step 2 (Devices)
Enter the IP address of the Master device. If
you have selected the
Synchronized
option,
then check the
Slave #X
boxes to enable
up to three additional devices that will be
synchronized with the Master device. Then
adjust each device IP address to match
your network configuration. Press the
Next
button to continue.
Wizard Step 4 (Screens)
Rename each screen if necessary, select the mode (Grid or
Custom Canvas) and configure the corresponding settings. Press
Create.
Note 1:
The wizard will automatically create an assembly with its devices
and streams, the screens, the sources and the front panel key bindings.
Note 2:
If your event requires creating other devices and screens, use
the wizard as many times as necessary.
Note 3:
After using the wizard, you may have to adjust some default
settings (assemblies / screens / sources / ...).
Wizard Step 3 (Scene)
Select the total number
of screens wired to your
devices.
Configuring an Assembly
Select the
ASSEMBLY
tab.
Select an assembly.
Configuring a Source
Select the
SOURCE
tab.
Select a source.
Running the Show
Select the
PRESET
tab
Enjoy!
Configuring a Screen
Select the
SCREEN
tab.
Select a screen.
Configuring the Internal Rate
Select the
PRECONFIG/RATE
option.
Choose the desired
mode (Internal, Follow or
Framelock).
Adjust the settings.
Renaming the Source
Select the
EDIT
option.
Enter a name / Press
Apply.
Note:
Use a short name with a maximum of two
words to ensure readability on LCD buttons.
Configuring the screen areas
Select the
AREA / LAYOUT
option. Configure
the format setting (timing, rotation...) as well
as the AOI and Position (Custom Canvas mode
only).
Configuring the Inputs
In the left menu, select
IN/
OUT
and then
INPUT
.
Press
All Inputs
to set up
automatically all the inputs
of the devices.
Configuring the Source key
binding
Select the
EDIT
option.
Navigate to an available key.
Press the corresponding button
on the touchscreen.
Press
Apply.
Configuring the streams mapping
Select the
MAP / QUICK
option.
Select the native stream that will get displayed on the selected native
layers when the corresponding source key is pressed in the front panel.
Configuring the Screen Mapping
Select the
AREA /
MAP
option.
Make sure each screen area is mapped
to the correct device output.
Configuring the Streams
Select the
STREAM / LIVE
option.
Make sure each "Live"
stream matches the correct
input plug.
Configuring the Soft Edge blending
(Grid mode only)
Select the
BLENDING
option.
Adjust the covering.
Adjust the black levels.
Adjust the blending curves.
Loading an Iteration
Select the
LOAD
option.
Select an iteration.
Press
Load.
5
8
9
6
7
1
2
3
4


