UG-177
Evaluation Board User Guide
Rev. 0 | Page 6 of 27
DEFAULT SWITCH AND JUMPER SETTINGS
The J8, J10, J12, and J17 jumpers must be connected and
jumper J3 should be set to the “USB/EXT” power setting. The
MP pin jumpers (J9) can be connected as desired to use MP
pushbuttons or switches. The mic bias jumpers J11 and J14 can
be inserted if microphone bias is needed on inputs 0 and 1.
Switch S7 selects whether the board is to be powered up or if
audio is to be bypassed from input to output with the board
powered down. For normal operation the switch should be slid
to the left. S1 selects whether the ADAU1772 is to be powered
from 3.3 V or 1.8 V, the default is 3.3 V. If powering the board
via USBi it is important to make sure that the switch on the
bottom of the USBi board is set to the correct voltage (1.8 V or
3.3 V). S2 controls self-boot operation, by default it should be
slid to the right to disable self-boot.
POWERING UP THE BOARD
To power up the board, connect the ribbon cable of the USBi
to J1 (CONTROL PORT) of the EVAL-ADAU1772Z.
CONNECTING THE AUDIO CABLES
Connect a stereo audio source to J22 (AIN2/3). Connect head-
phones or powered speakers to J23 (Stereo Output). The labels
for J22 and J23 are only visible on the bottom of the board.
SETTING UP COMMUNICATIONS IN SIGMASTUDIO
Start SigmaStudio by double-clicking the shortcut on the desktop.
Click
File…New Project
or press
Ctrl+N
to create a new project.
The default view of the new project is called the
Hardware
Configuration
tab.
To use the USBi in conjunction with SigmaStudio, first select it
in the
Communication Channels
subsection of the toolbox on the
left side of the
Hardware Configuration
tab, and add it to the project
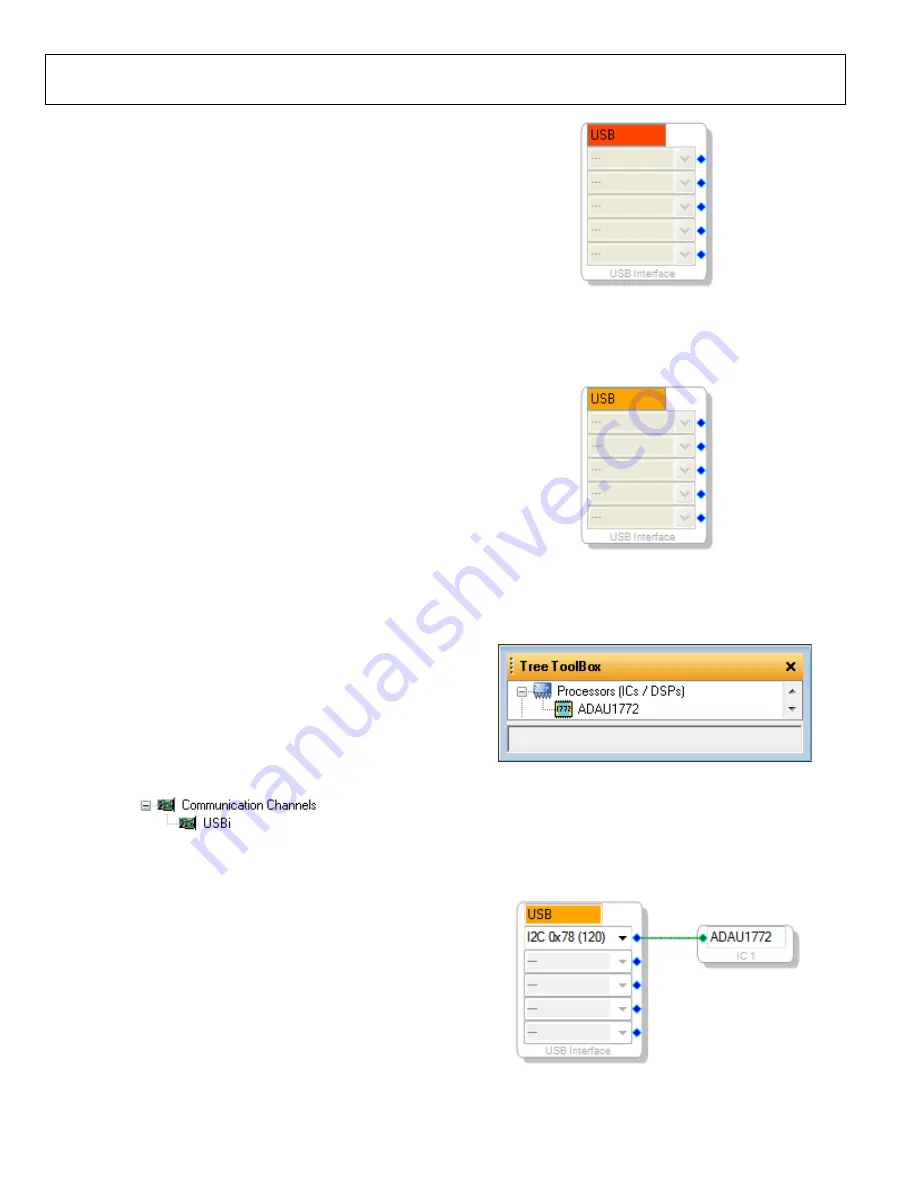
space by clicking and dragging it to the right (seeFigure 11).
08
31
4-
0
1
0
Figure 11. Adding the USBi Communication Channel
If SigmaStudio cannot detect the USBi on the USB port of the
computer, then the background of the
USB
label will be red
(seeFigure 12). This may happen when the USBi is not connected
or when the drivers are incorrectly installed.
08
31
4-
0
1
1
Figure 12. USBi Not Detected by SigmaStudio
If SigmaStudio detects the USBi on the USB port of the computer,
the background of the
USB
label changes to orange (see Figure
13).
08
31
4-
0
1
2
Figure 13. USBi Detected by SigmaStudio
To add an ADAU1772 to the project, select it from the
Processors (ICs / DSPs)
list and drag it to the project space
(see Figure 14).
Figure 14. Adding an ADAU1772
To use the USB interface to communicate with the target IC,
connect it by clicking and dragging a wire between the blue pin
of the USBi and the green pin of the IC (seeFigure 15). The
corresponding drop-down box of the USBi automatically fills
with the default mode and channel for that IC.
Figure 15. Connecting the USB Interface to an ADAU1772 IC
Содержание ADAU1772
Страница 17: ...Evaluation Board User Guide UG 177 Rev 0 Page 17 of 27 Figure 49 Evaluation Board Layout Top Assembly...
Страница 18: ...UG 177 Evaluation Board User Guide Rev 0 Page 18 of 27 Figure 50 Evaluation Board Layout Top Copper...
Страница 19: ...Evaluation Board User Guide UG 177 Rev 0 Page 19 of 27 Figure 51 Evaluation Board Layout Power Plane...
Страница 20: ...UG 177 Evaluation Board User Guide Rev 0 Page 20 of 27 Figure 52 Evaluation Board Layout Ground Plane...
Страница 21: ...Evaluation Board User Guide UG 177 Rev 0 Page 21 of 27 Figure 53 Evaluation Board Layout Bottom Copper...
Страница 22: ...UG 177 Evaluation Board User Guide Rev 0 Page 22 of 27 Figure 54 Evaluation Board Layout Bottom Assembly...
Страница 25: ...Evaluation Board User Guide UG 177 Rev 0 Page 25 of 27 NOTES...
Страница 27: ...Evaluation Board User Guide UG 177 Rev 0 Page 27 of 27...


