background image


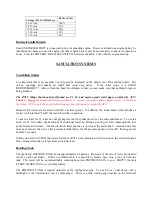
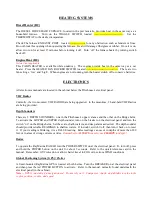
Voltage (Wet Cell Battery) 

Battery State 

12.65 volts 

100% 

12.47 volts 

75% 

 12.25 volts 

50% 

11.95 volts 

25% 

11.70 volts 

0% 


Battery Parallel Switch


Each ENGINE BATTERY is connected to its corresponding engine.  However, should one engine battery be 
insufficiently charged to start its engine, the other engine battery may be momentarily connected to provide a 
boost.  Press the BATTERY PARALLEL SWITCH located at the helm.  Turn off after engine start-up. 
 

SANITATION SYSTEMS 


VacuFlush Toilets 
                      

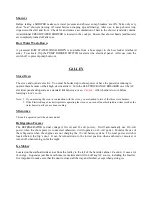
It  is  important  that  every  member  of  your  party  be  informed  on  the  proper  use  of  the  marine  toilets.    The 
valves,  openings,  and  pumps  are  small  and  could  clog  easily.    If  the  toilet  clogs,  it  is  YOUR 
RESPONSIBILITY!  Always flush the head for children so that you can make sure  that nothing foreign is 
being flushed. 
 

The  ONLY  things  that  should  get  flushed  are  #1,  #2,  and  marine-grade  toilet  paper  provided  by  AYC!


Caution – Never put household toilet paper, Kleenex, tampons, sanitary napkins, paper towels, or food into 
the toilets.  

 Use only the special dissolving marine toilet paper provided by AYC.


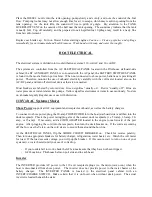
Breakers  for  toilets  are  located  on  the  DC  electrical  panel.    In  addition,  the  Guest  Head  toilet  also  has  a 
rocker switch labeled “Flush” that must be in the on position. 
 
To use the toilet for #1, after use simply depress the foot pedal down for 3 seconds and release.  To use the 
toilet  for  #2,  first  add  a slight  amount  of  additional water  by  lifting  up  with  your  foot  underneath  the foot 
pedal briefly and release.  Afterwards, flush.  Best practice is to release the pedal after 3 seconds but if this 
does not evacuate the bowl, after pressure builds (listen for the pressure pump to shut off), flush again for 
another 3 seconds.


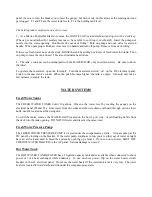
When you need to CLEAN the toilets, first shut off the water pressure switch located on the electrical panel.  
Once cleaned, turn the water pressure switch back on. 


Holding Tank 


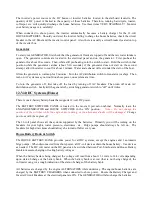
The sanitation HOLDING TANK holds approximately 48 gallons.  Be aware of the rate of waste production 
(about 1 gallon per flush).   With an overfilled tank, it is possible to break a hose, clog a vent, or burst  the 
tank.    The  result  will  be  an  indescribable  catastrophe  and  an  EXPENSIVE  FIX  to  you.    EMPTY  the  tank 
EVERY OTHER DAY to avoid this problem. 
 
The  HOLDING  TANK  is  located  outboard  of  the  starboard  engine.    You  can  do  a  visual  check  with  a 
flashlight  or  the  “watermelon”  test  by  thumping  it.    There  is  a  tank  watch  gauge  located  on  the  electrical 

Содержание AEROKNOT

Страница 1: ...he beautiful islands of the Pacific Northwest This manual will help you become familiar with this vessel If after familiarizing yourself with it you have any questions about the boat or about places to visit please do not hesitate to ask any of the AYC staff Remember AYC vessels are non smoking boats and we appreciate you taking care in having a fun safe and memorable time aboard Happy cruising ...

Страница 2: ...al 110 Volt AC Systems Shore Shore Power Inverter Generator 12 Volt DC Systems House House Battery Bank Switch Battery Parallel Switch Sanitation Systems VacuFlush Toilets Holding Tank Water Systems Fresh Water Tanks Fresh Water Pressure Pump Hot Water Tank Showers Raw Water Wash Down Galley Stove Oven Microwave Refrigerator Freezer Ice Maker ...

Страница 3: ...ics VHF Radios Depth Sounders Radar Global Positioning System GPS Plotter Entertainment Systems AM FM Radio CD Player TV DVD Anchoring Mooring Cans Anchoring Mooring Cans Barbecue Dinghy Outboard Motor Lowering Operating Lifting Towing Crabbing Fishing Other ...

Страница 4: ...u to remove the forward floor hatches to access the most forward valve cover where the filler cap is located Please use blue shop towels located in engine room on the bulkhead and the yellow funnel Check the general condition of the BELTS new 2021 are covered so look for black dust HOSES and FUEL LINES Ensure the valve on each RAW WATER THRU HULL is in the open position lever in line with valve Ob...

Страница 5: ... will register at or above 40 PSI The engine temperature should rise slowly Note If oil pressure is low shut down engine and inspect engine compartment and look for possible cause for example loss of oil Caution If an engine is overheating or there is lack of raw water expelled in the engine exhaust stop the engine immediately Recheck the raw water cooling system to ensure the raw water thru hulls...

Страница 6: ...w will need to step off from the swim step with the stern line Another crew member will need to be at the bow or mid ship to hand over the next line Confirm TRIM TABS are in the full bow up position 8 to 10 seconds to make slow speed backing and turning easier While moving slowly to the dock or mooring location center the WHEEL e g rudders straight and use the GEARSHIFTS and THROTTLES only if nece...

Страница 7: ... signifies electronics or items to use cautiously No dots on a breaker signify irregular use or use with discretion 110 Volt AC Systems Shore Shore Power supports all AC equipment and receptacles onboard as well as the battery chargers To connect to shore power plug the 30 amp POWER CORD into the boat starboard side and then into the dock receptacle Check the power rating plug size of the nearest ...

Страница 8: ...astly kill the generator by switching generator switch to off until it dies 12 Volt DC Systems House There is one 4 battery battery bank that supports 12 volt DC power The BATTERY SWITCHES PANEL is located in the most aft port salon cabinet Normally leave the ENGINE GENERATOR and HOUSE SWITCHES in the ON position Note Do not change the position of the switches while the engines are running or the ...

Страница 9: ... on the DC electrical panel In addition the Guest Head toilet also has a rocker switch labeled Flush that must be in the on position To use the toilet for 1 after use simply depress the foot pedal down for 3 seconds and release To use the toilet for 2 first add a slight amount of additional water by lifting up with your foot underneath the foot pedal briefly and release Afterwards flush Best pract...

Страница 10: ...s empty It should only take a few minutes to empty the tank WATER SYSTEMS Fresh Water Tanks The FRESH WATER TANKS hold 110 gallons Observe the water level by reading the gauges on the electrical panel T1and T2 Gray water from the sinks and showers drain overboard through various thru hulls usually located near the using unit To refill the tanks remove the WATER CAPS located on the bow s port side ...

Страница 11: ...Allow burners to cool before lowering stove s cover Note 1 If you are using the oven in conjunction with the stove you are limited to two of the three stove burners 2 If the Electric Range breaker trips while operating the stove oven turn off another high draw item such as the water heater until you are done cooking Microwave This unit is operated just like a home model Refrigerator Freezer The RE...

Страница 12: ...DEPTH SOUNDERS one in the Pilothouse s upper valance and the other on the Bridge helm To activate the LOWER and UPPER depth sounder turn on the breaker on the electrical panel and turn the switch on on the Bridge helm Set the scale shallow alarm and deep alarm as desired The depth sounder should provide reliable READINGS in shallow waters If in doubt switch it off then turn it back on to reset it ...

Страница 13: ...line before setting the anchor Colored markers are placed every 25 ft on the chain and nylon rode indicating the amount of rode If the anchorage is crowded put down at least a 3 to 1 scope 60 feet for 20 feet of water Set the anchor by reversing the engines Then let out additional scope dependent upon conditions After anchoring is complete attach bridle to anchor rode and secure to port and starbo...

Страница 14: ...pper position if not already there Do this by removing the large pin and reinserting after raising the arm It is easier to do this if you first swing the arm out over the water to give yourself more room Holding the dinghy and the line detach the STANDOFF BARS and lower the dinghy with the line into the water noting that the dinghy gets heavier as it nears the water Operating Lower the motor into ...

Страница 15: ...ot and or gear inside the boat OTHER SAFETY should be paramount in your daily cruising A MAN OVERBOARD DRILL should be discussed and perhaps even practiced with a life jacket Remember the life jackets are stowed on the Bridge in the starboard seat s compartments A few should always be out and ready Your flares and safety equipment are located in the Pilothouse cabinet under the electrical panel in...

Отзывы: