Archive Service
63
Vision
2
Instruction Manual
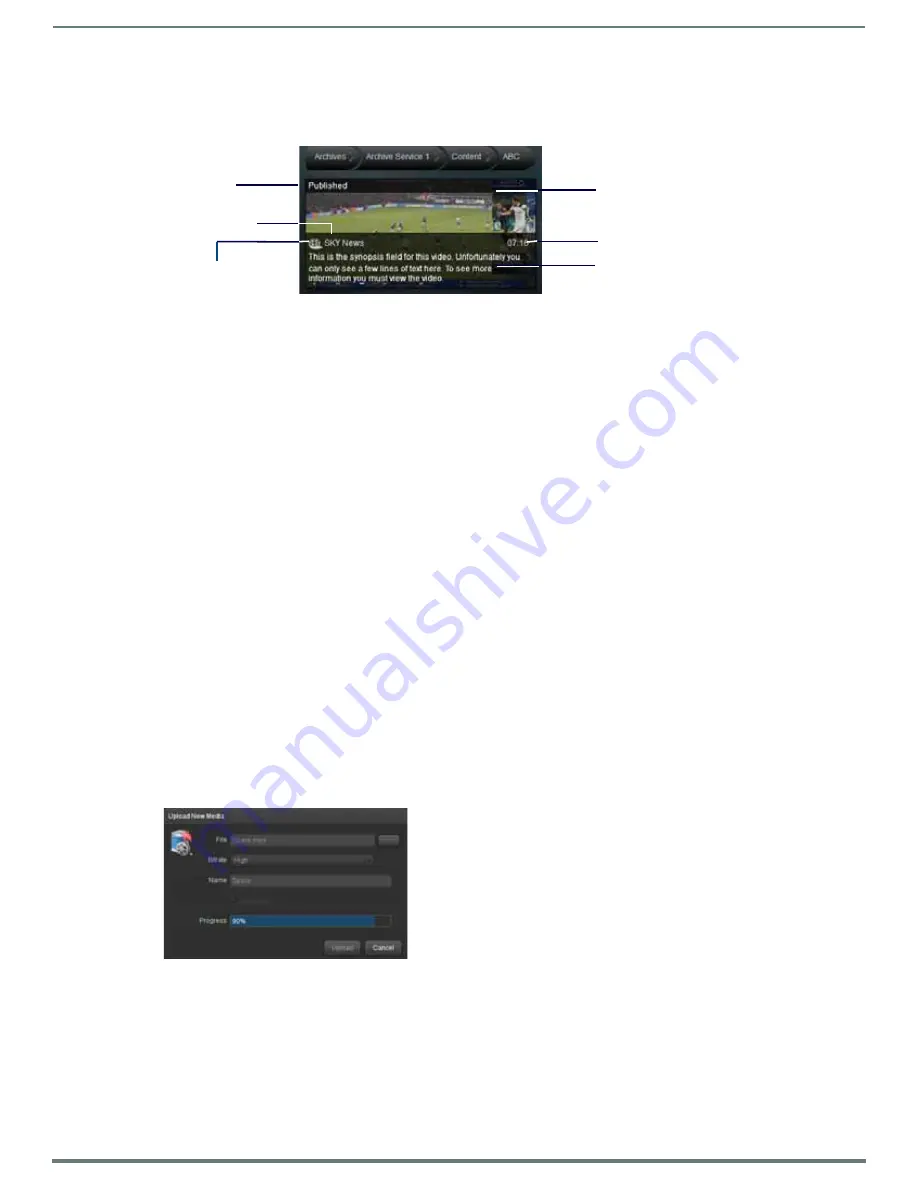
Now that you are in a folder, click on a video/audio file to select it. The selected media is shown with a light blue border. If the media
has metadata, then the information in the first metadata section is shown. Typically this is the video synopsis (FIG. 91). To select
multiple media files, use CTRL-click. To select a range of media, use the SHIFT key. The only option available on multiple media files
is delete.
The following operations are available in the options drop down menu when you select a video:
Rename Media - Rename the media file.
Create Shortcut - Create shortcut to media file, this acts like a copy of the media. Then cut and paste a shortcut to another
location.
Publish/Hide - change whether media is published/hidden. Published media is viewable by Tablet and set-top box users. If
user access control is enabled for this archive then Published media is viewable by Set-top box, tablet, or PC users with
view permission to this folder.
NOTE: If access control is enabled for a particular archive, then PC Users without Publish permission cannot see Hidden media. See
Archive Permissions on page 23 for more details.
Cut/Paste - Cut a video and then paste it to another location. Only one video at a time can be cut/pasted.
Delete - Delete selected media files to the trashcan. If in the trashcan, there is a delete option which deletes the media
permanently and frees up space on the drive.
Sort Media by Date - Sort media by the date/time they were uploaded to the system.
Sort Media by Name - Sort media by name.
Playing Video
Double click on a video to play it. Vision
2
automatically selects the best format and bitrate if there multiple formats and bitrate
versions of this file. The following operations are available in the options drop down menu while playing a video:
Edit Information - Edit Video Metadata.
Upload Additional Media - Upload an additional version of the video in a different bitrate or format. This process is similar
to uploading a new video, see the section on Uploading a Video below.
Edit Poster Frame - Edit video thumbnail.
Upload Video
To upload a video, select Upload New Media from the options menu to display the upload screen (FIG. 92). Vision
2
does not support
transcoding files. Versions of the same file must be uploaded with different formats and bitrates using the Upload Additional Media
option.
Perform these steps to upload a video:
1.
Click the Browse (...) button to select a file to upload.
2.
Select a Bitrate for the video from the drop down. The available options are high, medium, and low. This option is not available
for MP3 files as bitrate is irrelevant in this case the bandwidth demands of MP3 files are relatively low.
3.
Enter a name for the video in the name text box, by default the name is taken from the filename. Note this text box is not
available if you are uploading an additional video. Punctuation is not accepted, only numbers or letters are allowed.
FIG. 91
Video with Thu First Metadata Section (Typically Synopsis)
FIG. 92
Upload Media
Media file
Duration of Media
Media Thumbnail
can be modified using
Edit Poster Frame
Published State
First metadata section
typically synopsis
Media Name
Filmstrip indicates this
is a media file


