Installation and Setup
60
Enova Digital Media Switchers - Hardware Reference Manual
Setting an AxLink Device Address
1.
Open NetLinx Studio and select Tools>DIP Switch. The DIP Switch 2.0 applet appears.
2.
Enter the AxLink device number in the Device Number text box and note toggle positions. Close the applet.
3.
On the bottom/side of the AxLink device, set the device’s DIP switch toggles to an appropriate device number
according to AMX best practices (see established ranges above).
4.
Connect AxLink cables from the AxLink device to the AxLink port on the Enova DGX CPU.
5.
In NetLinx Studio, select the OnLine Tree tab and refresh the OnLine Tree with the Enova DGX displayed. The AxLink
device appears as a device in the OnLine Tree.
AxLink Power Measurement and Control
The AxLink port on the CPU supports a SEND_COMMAND to turn on and off +12V power output on the port.
AXPWRON LOWER
– turns on power output on port
AXPWROFF LOWER
– turns off power output on port
These messages are always sent to port 1 of the 5001 control device (D:P:S = 5001:1:0) and return status comes from the
same port.
AxLink Port Diagnostics
The fault state can be queried using the SEND_COMMAND:
GET AX FAULT
(D:P:S = 5001:1:0).
The reply to normal operating status is:
AX FAULT: NONE
The reply to a problem in operating status is:
AX FAULT: BUS
Removing the problem should restore the fault state to
NONE
without intervention.
NOTE:
Shorting the bus power does not cause a fault that
GET AX FAULT
can detect.
Using the ID Pushbutton
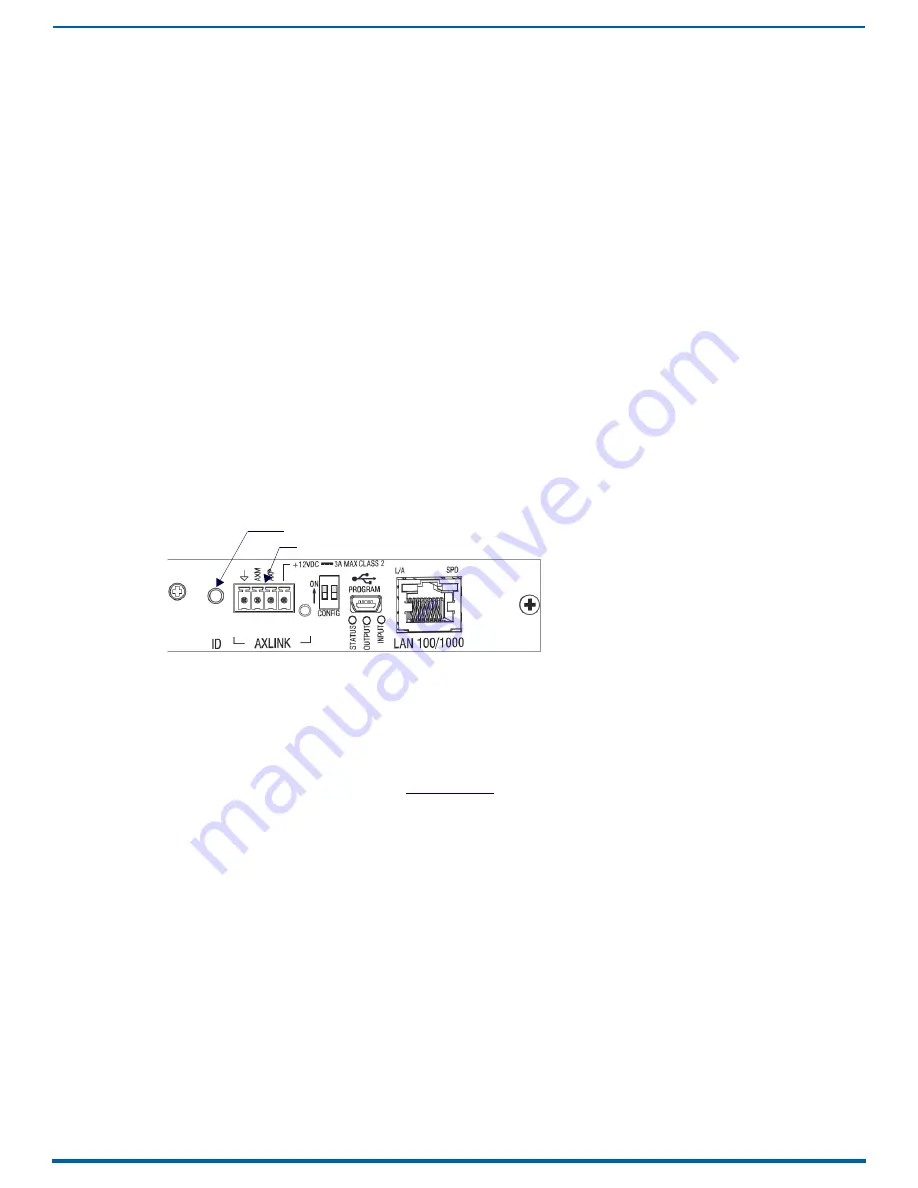
The ID Pushbutton for the integrated Master is located on the rear of the enclosure on the CPU board to the left of the
AxLink Port (FIG. 29):
The ID Pushbutton can be used to perform three types of initial configuration settings:
Toggle between DHCP (default) and static IP addressing (see below).
Reset the switcher to its factory default settings, which affects the settings but not the firmware version (page 60).
Restore the switcher to its factory firmware image, which affects both the firmware version and the settings
NOTE:
ID Pushbutton functions can also be implemented using Telnet commands (see the "WebConsole & Programming
Guide – NetLinx NX Central Controllers" at www.amx.com).
Toggling Between DHCP and Static IP Addressing
1.
Verify that the Master is not currently booting.
2.
Press and hold the ID Pushbutton for 10 seconds or longer.
3.
Release to toggle between static and dynamic IP addressing. The Master will automatically reboot to complete the
process.
NOTE:
The default static IP address is 192.168.1.2 with a 255.255.255.0 subnet mask.
Resetting the Factory Default Settings:
A reset of the Master to factory default settings includes the removal of all security settings and user files (including all
code and IRL files), resetting to DHCP, and loading an empty NetLinx program. Once reset, the Master will be effectively
in an out-of-box state.
1.
Verify that the Master is currently booting.
NOTE:
The Master is booting when the Program port Status and Input LEDs are ON (green and yellow respectively)
and the Output LED (red) is OFF.
2.
During the boot process, press and hold the ID Pushbutton for 10 seconds or longer.
CAUTION:
Do not press longer than 10 seconds. Pressing the ID Pushbutton for 20 seconds restores the factory
firmware image on the Master.
3.
Release to reset to the factory defaults.
FIG. 29
ID Pushbutton
ID Pushbutton
AxLink port


