background image

UHM210-11 User Guide

UHM210-11 User Guide

16

amscope.com

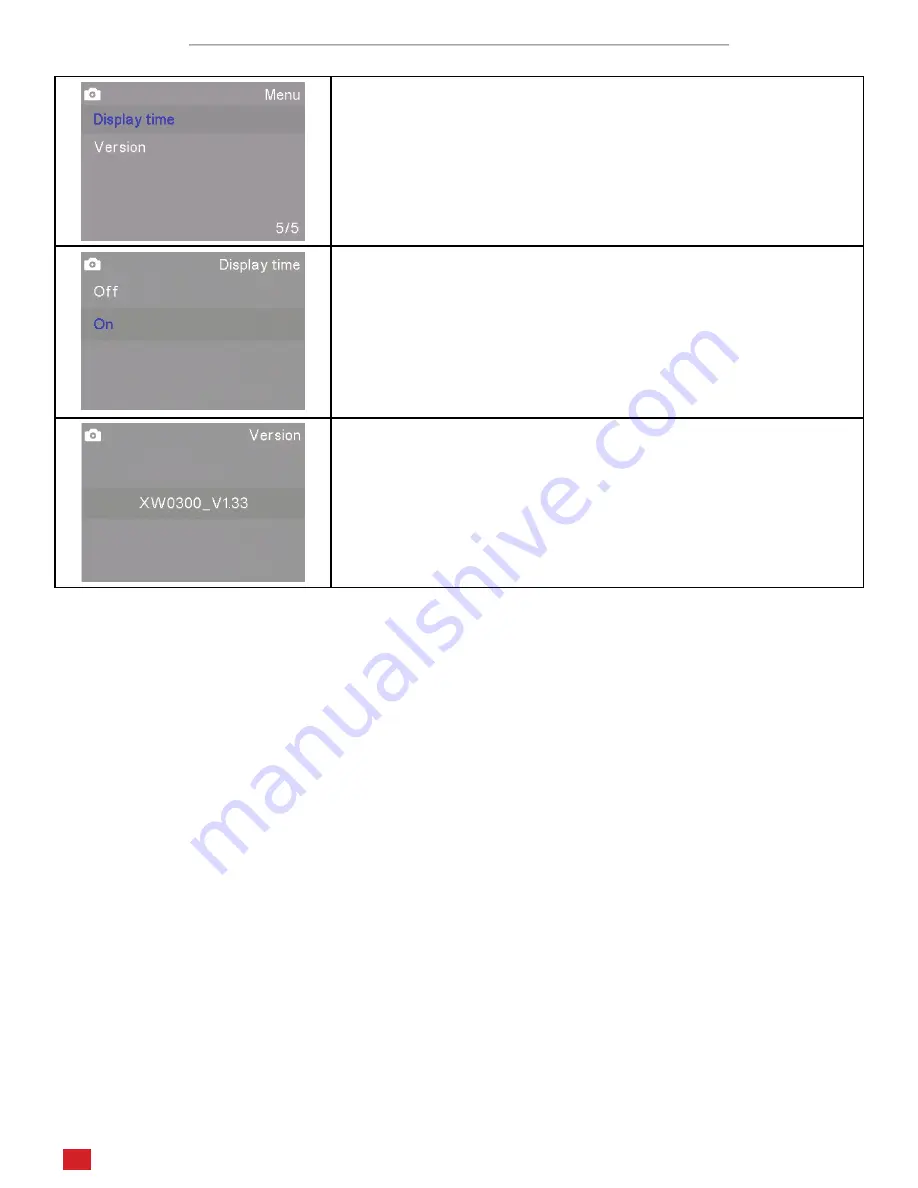
Photo and Video Settings Menus Page 5/5

The fifth page in Photo and Video modes includes Display Time and Version.

Display Time determines whether the time will be displayed on-screen. 

This can be toggled between on and off.

Version displays the current firmware version.

Содержание UHM210-11

Страница 1: ...the UHM210 11 digital microscope The information in this manual is provided to help you famil iarize yourself with the assembly and use of the products Please read thoroughly before using the products and keep this manual with the product for reference v1 0 20220725 ...

Страница 2: ...o the instrument or injury to yourself or others Only use the provided power adapter or authorized replacement Incompatible power adapters can cause damage to the instrument If you should lose the included power adapter please contact AmScope for information about a replacement Do not dismantle Dismantling can result in damage to the instrument and potential exposure to dangerous materials or elec...

Страница 3: ...ording Media 9 Imaging Modes 10 Photo and Video Modes 10 Photo and Video Settings Menus Page 1 5 11 Photo Settings Menu Page 2 5 12 Video Settings Menu Page 2 5 13 Photo and Video Settings Menus Page 3 5 14 Photo and Video Settings Menus Page 4 5 15 Photo and Video Settings Menus Page 5 5 16 Playback Mode 17 Playback Menu 18 Operating Mode PC 19 ...

Страница 4: ...UHM210 11 User Guide 4 amscope com 180mm 215mm 208mm ...

Страница 5: ...ive Sensor Area 5 57mm x 3 13mm Shutter electronic rolling shutter Sensitivity 1300mV 1 30s f 5 6 Video Resolutions 1920x1080 30fps 1280x720 60fps File Formats JPG photo MOV video Recording Media MicroSD up to 128GB I O Mini HDMI video out USB C data and power Ring Light 1 18 LED Ring Light 2 13 LED Power Requirements DC 5V 900mA over USB What s In The Box The UHM210 11 standard outfit includes On...

Страница 6: ...B Type C Power PC Connection Zoom In Up HDMI Out Zoom Out Down MicroSD Slot Mode OK Reticle Power Switch Power Indicator Light Menu Freeze Wired Control Input Cature Record Decrease Focal Length Increase Focal Length Diffuse Illumination Direct Illumination ...

Страница 7: ...rm can be adjusted around three joints to position the microscope at virtually any angle and position within the reach of the arm All joints are locked simultaneously using the locking knob Before adjusting the arm be sure to support the microscope with a hand Next loosen the locking knob until the arm joints are loose enough to easily move Position the microscope as desired then tighten the locki...

Страница 8: ...o independent ring lights Each ring light is controlled by a separate knob on the side of the microscope While the microscope is connected to a power source the ring lights will operate independent of the microscope s power switch The knob engraved with the number 1 controls the outer ring light which provides diffuse illumination which is suitable for most observation as it more even The knob eng...

Страница 9: ...icroscope s power switch to the I on position After a few seconds a live image will be displayed on the screen While in HDMI mode the microscope uses internal software to capture images and video as well as to control the imag ing device s settings Several icons may be displayed on the screen displaying such things as the imaging mode expo sure white balance and media status The icons will be hidd...

Страница 10: ...clusive to their respective modes The control panel s buttons provide the same functionality in both modes aside from the Capture button which saves still images in Photo mode and starts or stops recording in Video mode Zoom In Up Menu Freeze Capture Image Zoom Out Down OK Reticle When the menu is closed the buttons control the following functions Press the center button to capture a photo Photo m...

Страница 11: ...of the levels seen across the field of view and attempts to achieve a middle grey Single Auto mode performs the same function as Auto but only at the time it is selected rather than continuously Manual allows you to select a value from 1 to 10 to manually target the appropriate level White Balance is used to compensate for color casts caused by various light sources Auto mode attempts to compensat...

Страница 12: ... image Flip inverts the image vertically Color allows you to toggle the color mode between Normal color and Black White for a greyscale image Capture Mode determines allows you to set a delay between the time you press the capture button and the time at which the image is cap tured This is useful to avoid camera shake or when manipulation of the subject is needed which would require the use of you...

Страница 13: ...rotates the image Flip inverts the image vertically Color allows you to toggle the color mode between Normal color and Black White for a greyscale image Resolution sets the video image size and frame rate Options include 1920x1080 30fps and 1280x720 60fps Loop Recording can be used to limit the maximum recording time to either 3 5 or 10 minutes After the set amount of time has lapsed during record...

Страница 14: ...he Reticle setting sets an on screen overlay to aid in measurements segmenting and counting Reticle1 is a simple crosshair Reticle2 is a grid of squares Reticle3 is a crosshair with concentric circles Frequency sets the capture frequency This can be set to 50Hz or 60Hz and should correspond to your power system s frequency to avoid flicker Auto Power Off can be used to automatically disable the vi...

Страница 15: ...lude Japanese English Simplified Chinese and Traditional Chinese Date Time allows you to set the current date and time which can be included in timestamps Default Setting will return the system s settings to their factory de faults Format can be used to format a MicroSD card This is necessary if the card is not already formatted or is using an incompatible format When this function is used all dat...

Страница 16: ... Settings Menus Page 5 5 The fifth page in Photo and Video modes includes Display Time and Version Display Time determines whether the time will be displayed on screen This can be toggled between on and off Version displays the current firmware version ...

Страница 17: ...wing functions Press the top button to display the previous file Press the bottom button to display the next file Press the left button to open the menu When the menu is open the buttons control the following functions Press the top button to navigate up Press the bottom button to navigate down Press the left button to exit the current setting or menu Press the right button to select a menu or opt...

Страница 18: ...o confirm the deletion The Protect tool allows you to lock and unlock files to protect them from deletion You can choose to lock or unlock the currently displayed file or all files The Slide Show tool allows you to display saved images in sequence For video files the first frame will be displayed Select an interval op tion 2 seconds 5 seconds or 8 seconds then press the OK button to begin the slid...

Страница 19: ... switch to the I on position Once a PC connection is detected the microscope will enter PC mode If the microscope is connected to an HDMI display a blue screen will be displayed stating the microscope is operating in PC mode The control panel s buttons will not function When connected to a PC the microscope will function as a UVC USB Video Class camera It can be used by compatible Windows software...

Отзывы: