background image

DM745-HDM9-3MP  User Manual 


Page 9 


3.7  

Main Toolbar 

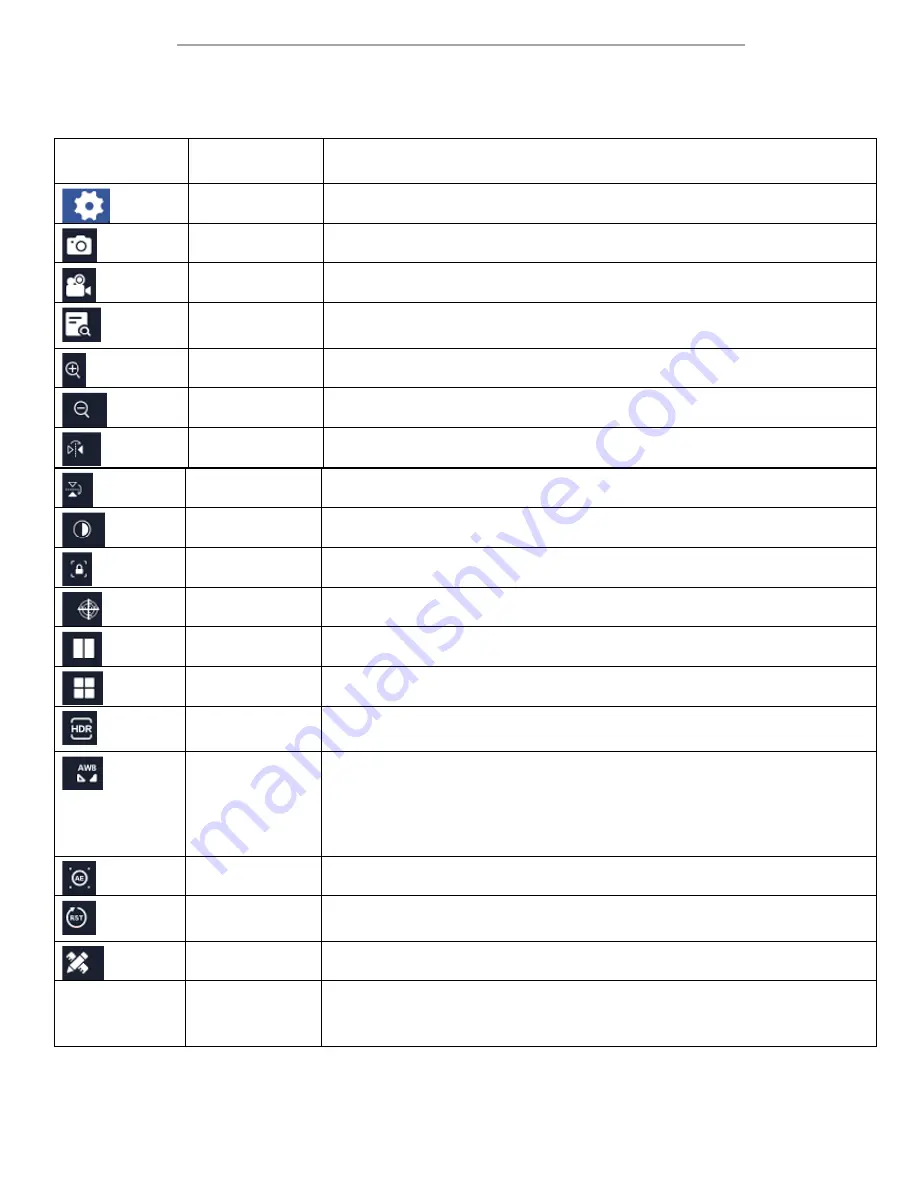
The Main Toolbar contains display setting options, simple primary functions, and shortcuts to access settings and 
measurement menus.  It also includes a display for time and date, as well as a means to set this data. 

Icon or 

Representation 

Tool or 

Shortcut Name 

Description 


Settings 

Shortcut opens the settings menu 


Snap 

Saves a still image capture of the video feed as .jpg in /sd/DCIM 


Record 

Begins recording a video from the video feed as .avi in /sd/DCIM 


Browser 

Opens the file browser in the software to display saved images or video 
located on the microSD card. 


Zoom In 

Increases the digital zoom on the display (maximum of 10X) 


Zoom Out 

Reduces the digital zoom on the display (minimum of 1X) 


Mirror 

Flip the image along the vertical display axis 


Flip 

Flip the image along the horizontal display axis 


Black & White 

Toggle between colour display and greyscale display 


Freeze Preview 

Pauses the displayed preview 


Flags 

Displays the crosshair reticle as an overlay of the preview 


Division 

Splits the display into two halves 


Quarter Screen 

Splits the display into four parts 


High Dynamic 
Range 

Toggles High Dynamic Range.  While active, image appears dimmer, but bright 
and shadowy regions appear closer to normal 


Region of 
Interest 

Activates region of interest white balancing.  Displays a rectangular overlay 
element that can be moved by clicking and dragging it to a new region.  Size 
can be adjusted by using the mouse wheel within the region of interest.  
While active, the automatic white balance will be taken from the region of 
interest rather than the whole viewing area 


Auto Exposure 

Toggles auto exposure 


Parameter 
Reset 

Resets parameters across the main toolbar, settings menu, and measurement 
menu.  Retains calibration information 


Measurement 

Displays the measurement toolbar in place of the main toolbar 


Time and Date 

Opens the dialog box for setting time and date. Hover the cursor over each 
portion of the time/date display and use the mouse wheel to set the elements 
individually. 

Содержание DM745-HDM9-3MP

Страница 1: ...DM745 HDM9 3MP Digital Microscope for Industrial Inspection with 0 7X 4 5X Zoom and 9 Screen Product Manual v0 9 20221024 ...

Страница 2: ...result in an explosion or fire Do not use in a wet environment Electrical components of the instrument can discharge when exposed to water potentially resulting in damage to the instrument or injury to yourself or others Only use with the provided power adapter or an authorized replacement Incompatible power adapters can cause damage to the instrument If you should lose the included power adapter ...

Страница 3: ...ped Pixel Size 2 0μm x 2 0μm Active Sensor Area 5 18mm x 3 07mm Shutter Electronic Rolling Shutter Monitor Specifications Display Size 9 Monitor Magnification 37 96X Displayed Magnification 8 8X 56X Native Resolution 1024 x 600 Aspect Ratio 16 9 375 Brightness 400 lumens What s In The Box The DM745 HDM9 3MP standard outfit includes One microscope with track stand and monitor One USB wireless mouse...

Страница 4: ...he power switch on the underside of the mouse and move it to the ON position Storage Devices A micro SD card is required to save photos and other files This microscope includes a 32GB micro SD card Compatible storage devices will be automatically detected when properly inserted The micro SD card is inserted into the TF Card slot on the right side of the display with the metallic pins facing the ba...

Страница 5: ... 4 5X magnification range This is the optical magnification range which is typically listed An additional 0 33X magnification stage is used to compensate for the format of the digital image sensor This document refers to this stage as integrated reduction since the purpose is to reduce the size of the image to better fit the specific image sensor While this reduc tion stage modifies the overall ma...

Страница 6: ...tion The low and high magnifications would be as follow 0 7 x 0 33 x 38 8 8 4 5 x 0 33 x 38 56 2 3 Illumination This microscope is equipped with an LED ring light and an under stage LED light array to provide illumination The ring light is fixed in place around the objective lens The under stage light array is fixed in place underneath the stage plate of the microscope and it can be useable when t...

Страница 7: ...o manage camera and display settings as well as to perform image capture and measuring functions All of these functions are accessed from the display The software has four major menus including the main toolbar the settings menu the measurement toolbar and the calibrations menu ...

Страница 8: ...displayed The line should span as many readable graduations as possible and should be parallel to the ruler s edge to improve the preci sion Move the cursor along the image of the ruler until it has spanned an adequate number of graduations then click the left mouse button again to create the second anchor point A popup window will be displayed Enter a name for the profile the length of the measur...

Страница 9: ...Freeze Preview Pauses the displayed preview Flags Displays the crosshair reticle as an overlay of the preview Division Splits the display into two halves Quarter Screen Splits the display into four parts High Dynamic Range Toggles High Dynamic Range While active image appears dimmer but bright and shadowy regions appear closer to normal Region of Interest Activates region of interest white balanci...

Страница 10: ...ng draw a line with an arbitrary angle Line spacing draw a pair of lines and the second will be parallel to the first Point line distance draw perpendicular lines Angle measure an angle Rectangle draw a rectangle Polygon draw a polygon Radian draw an arc Radius circle draw a circle using a centre point and a point on the circumference Two point circle draw a circle using the end points of the diam...

Страница 11: ...DM745 HDM9 3MP User Manual Page 11 Notes add text ...

Страница 12: ...apes and labels Clear screen removes all measurement label elements This cannot be undone Screenshot saves a snap with all overlay elements Export exports a file with all measurement element values and a screenshot of the display in a xlsx file Calibration selector select a saved measurement calibration to apply to all measurement elements Calibrate manage saved measurement calibrations including ...

Страница 13: ... adjust the exposure time of the camera White Balance enable automatic white balance or detect and lock the white balance level the one push Red manually adjust the proportional Red level of the RGB image Green manually adjust the proportional Green level of the RGB image Blue manually adjust the proportional Blue level of the RGB image Temp Color adjust the colour temperature of the image Power F...

Страница 14: ...a adjust the gamma of the image Sharpness adjust the sharpness of the image Denoise adjust the compensation for the noise in the image Overlay Reset deactivates and resets all overlay elements from this panel to default Object select the active object overlay object for editing Width set the line width for the active overlay object Color set the line colour for the active overlay object Open All a...

Страница 15: ...nce The color of an object is influenced by the color of light reflecting off of it or passing through it Different light sources produce light with different color biases Common examples are incandescent lamps which typically produce warm colors compared to fluorescent or LED lamps which produce cooler colors This sort of bias is referred to as color temperature Due to this phenomenon a white obj...

Отзывы: