

Amped Wireless
A Division of Newo Corporation
Copyright © 2015 Amped Wireless / Newo Corporation. All rights reserved.
Amped Wireless, Newo Corporation, Amped Wireless Logo are registered trademarks or trademarks of Newo Corporation.
v052615
If you continue to have issues setting up the Range Extender, give us a call — we’re here to help: 888-573-8820 or 909-217-3168
Visit our website for more support information and answers to frequently asked questions: www.ampedwireless.com/support
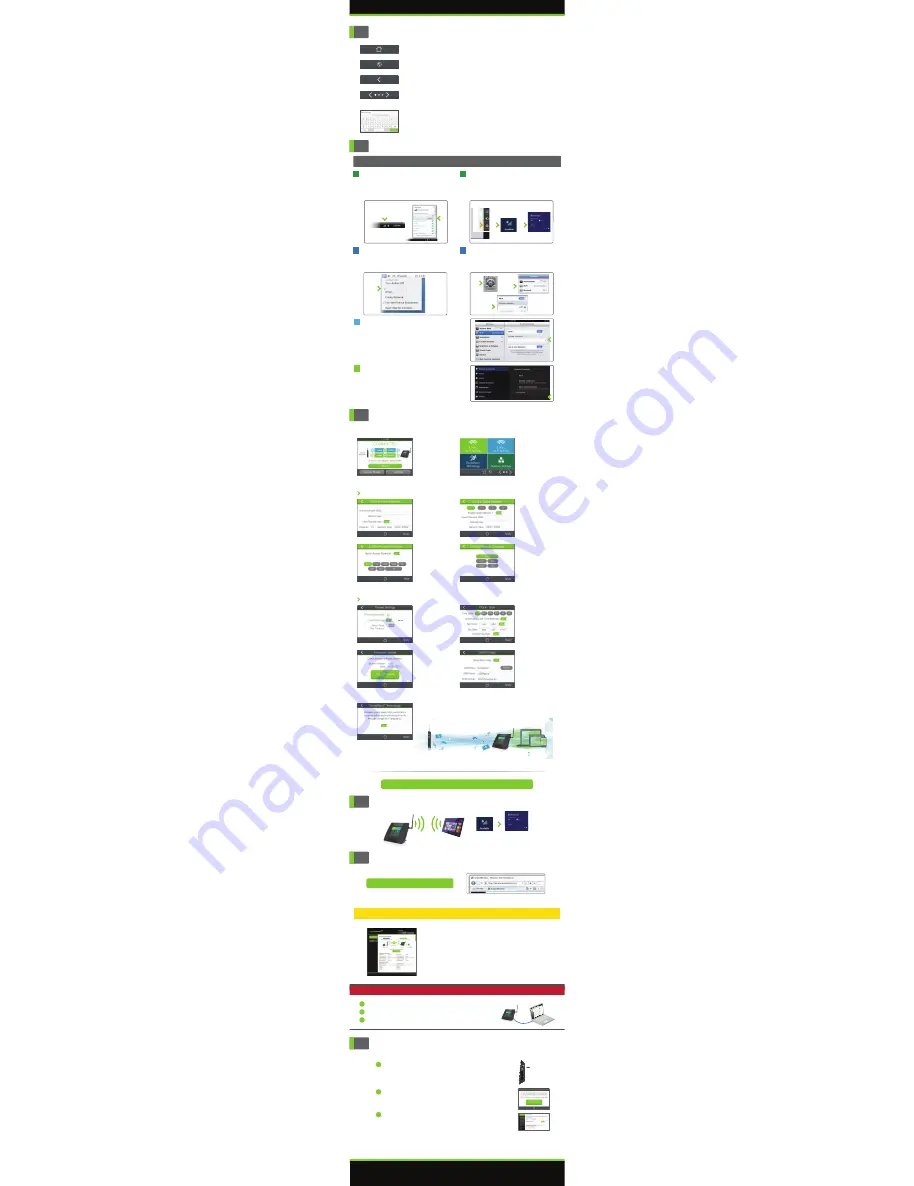
Accessing More Settings
Tap 2.4GHz or 5GHz Wi-Fi Settings to modify Wi-Fi related features:
More Settings
Wi-Fi Settings
This is the second page of the Setup Guide. Start on the opposite side first.
TAP-EX2
The Settings menu
can be accessed
from the Dashboard.
Tap
Settings
.
The
Settings
menu
gives you access to a
number of different
features. Scroll
left/right to access all
settings.
Change your Home
or Extended Network
SSID, Security Key
and other settings in
Home Network
or
Extended Network
settings.
Set up
Guest
Networks
with an ID
and Security Key
that’s different from
your primary network.
Control when your
Wi-Fi Network is on or
off with
Access
Schedule
.
Adjust the distance
(output power) of your
Wi-Fi network using
Wireless Coverage
settings.
Open your Web Browser & Access the Setup Menu
How to Reset the Range Extender to Default Settings
Recommended browsers: Google Chrome, Safari or Internet Explorer (8.0 and up). Do not use Firefox.
http://setup.ampedwireless.com
If the URL fails to open, then try: http://192.168.1.240
Enter the setup web address into your browser:
ACCESSING THE WEB MENU DOES NOT REQUIRE INTERNET ACCESS.
THE MENU IS SERVED FROM THE RANGE EXTENDER.
IF YOU HAVE PROBLEMS ACCESSING THE WEB MENU...
a) Disconnect your PC from all Wi-Fi networks.
b) Attach an Ethernet cable (not included) between the PC and the Range Extender.
c) Open your web browser and go to http://setup.ampedwireless.com again.
a
b
c
Connect your Internet Device to the Range Extender
Amped_TAPEX2
More Detailed Settings are Available on the Web Menu
Not all features listed. Access the menu for all settings.
The web menu
Dashboard
will provide you with the current status of the
Range Extender. The
More Settings
tab on the left will give you access
to more extensive settings.
Click on the Wireless icon to see available wireless
networks (For Vista, click Start > Connect To). Select
the
Amped_TAPEX2_2.4
or
Amped_TAPEX2_5.0
network and click Connect.
Click on the Wireless icon to see available wireless
networks. Select the
Amped_TAPEX2_2.4
or
Amped_TAPEX2_5.0
ne
twork.
Tap on your Settings icon, select Wi-Fi, and choose
the
Amped_TAPEX2_2.4
or
Amped_TAPEX2_5.0
network.
iPhone
Amped_TAPEX2
Windows 7 & Vista
Mac OS X
How to Connect to the Range Extender
Amped_TAPEX2
Amped_TAPEX2
Amped_TAP EX2
Swipe in from the right edge to access the charms
bar, tap on Settings, select the Wi-Fi icon, and select
the
Amped_TAPEX2_2.4
or
Amped_TAPEX2_5.0
network.
Windows 8
A. Press the
Home
button to get to the homepage.
B. Tap the
Settings
app icon.
C. Tap on
Wi-Fi
to enter the iPad’s Wi-Fi settings.
D. Toggle the Wi-Fi On/Off selector switch to
On
.
E. Under "Choose a Network...", select
Amped_TAPEX2_2.4
or
Amped_TAPEX2_5.0
iPad Tablet
Amped_TAPEX2
A. Tap the
Apps
menu on the tablet screen.
B. Locate and tap the
Settings
app icon.
C. Under "Wireless & networks," tap
Wi-Fi settings
.
D. Tap the
Wi-Fi box
to turn on Wi-Fi and scan.
E. Under "Wi-Fi networks", select:
Amped_TAPEX2_2.4
or
Amped_TAPEX2_5.0
Android Tablet
Amped_TAPEX2
Connecting to the 5GHz network requires that you have a 5GHz capable network adapter.
Navigating the Touch Menu
Tap the
Home
icon, found on the bottom of many screens,
to return to the Dashboard at any time.
Tap the
Globe
icon, found on the bottom of the Settings
screen, to change the language of the menu.
Tap the
Left Arrow
, found on the upper left corner of many
screens, to navigate back to the previous page.
Tap the
Left
or
Right Arrow
to navigate between multiple
pages for one screen. The dots in this example indicate
there are 3 pages to see.
Tap on a
Blank Field
to access a keyboard or keypad
for entering in information such as your Network ID and
Security Key.
Home Button:
Language Selection:
Back Arrow:
Navigation:
Keyboards/Keypads:
Tap Management to access a number of administrative settings:
Management Settings
Set the timeout
interval for the screen
to turn off and set a
passcode to re-
access the screen
using
Screen
Settings
.
Set the time and date
from the
Clock/Date
settings.
Check for the latest
software updates
using the
Firmware
Update
feature.
Share files locally from
any USB storage
device from the
USB
Storage Sharing
menu.
BoostBand
™
Technology
Increase the overall speed and performance of your extended network by
streamlining dual band network traffic through a single Wi-Fi frequency band
between the Router and the Range Extender.
2.4GHz Wi-Fi
5GHz Wi-Fi
Router
BOOST
BAND
™
Up to
2X Speed
*
HIGH POWER TOUCH SCREEN
AC750 WI-FI RANGE EXTENDER
TAP-EX2
There are three options to reset the Range Extender back to factory default settings:
1
2
3
Reset Button
Right Panel of the Range Extender
Hold down the Reset button for five to ten (5-10) seconds. You may need to
use a pen tip or pin to access the button. Pressing the Reset Button for less
than five (5) seconds will simply reboot the Range Extender while saving your
existing settings.
Touch Menu
Tap the Reset button through the touch menu:
Settings
>
Management
>
Reset
. Tap
Reset All Settings
.
Web Menu
Access the Reset button through the web menu on the left side:
More Settings
>
Management
>
Save/Reload Settings
. Select
Reset Settings to Default
.
All manuals and user guides at all-guides.com


