Step 1
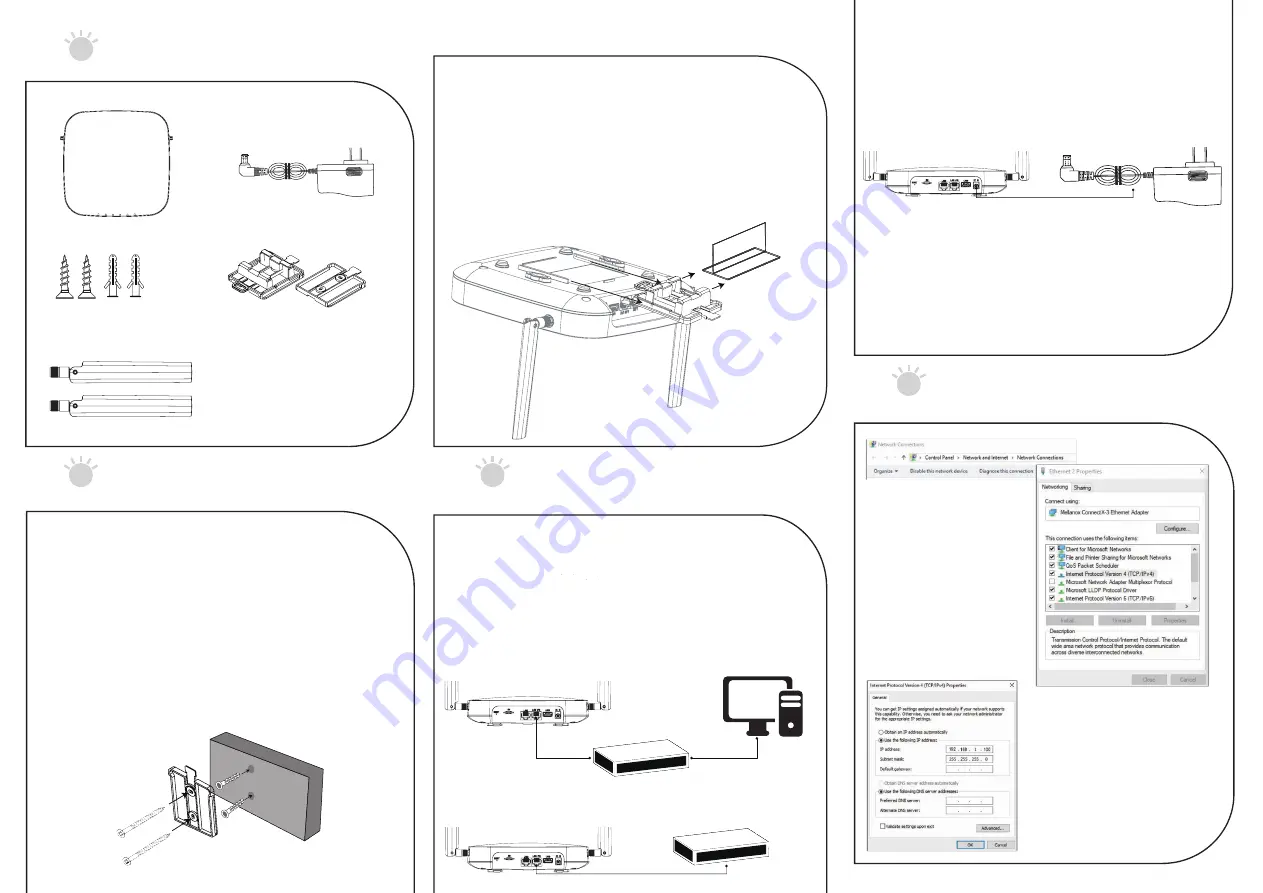
Package Content
(1) Access Point
Step 3
Connecting the Device for Configuration
Step 4
IP Address Configuration
(1)Once your computer
is on, ensure that your
TCP/IP is enabled.
Open Network
Connections and then
click Local Area
Connection. Select
Internet Protocol
Version 4 (TCP/IPv4).
(2)If your computer is already
on a network, ensure that you
have set it to a Static IP
Address on the interface.
(Example: 192.168.1.2 , the
Subnet Mask address as
255.255.255.0. and Default
Gateway is 192.168.1.254 )
(2) Power Adapter
(3) Wall Mounting screw kit
(1)Determine where the mounting plate of Access Point to
be placed and mark location on the surface for the two
mounting holes. Use the appropriate drill bit to drill two
26mm depth holes in the markings and hammer the bolts
into the openings.
(2)Screw the anchors into the holes until they are flush with
the wall.
(3)Put mounting plate on the wall to map with hole of
anchor then screw the included screws into the anchors.
(4)Place the Access Point against wall fitting throughout the
slots of the Access Point.
Step 2
Mounting Kits Installation
▉
For Ceiling mount Installation:
(1)Slide the ceiling mount base into the slot of the
Access Point.
(2)Hold the Access Point with one hand to reach the
other hand over the T-Rail sides of the bracket. Then
hook the stationary end of the ceiling mount bracket
onto the T-Rail.
▉
For Wall Mount Installation:
(4)Ceiling mounting bracket
(5)External Antenna
If you are initiating the
APL54X which is the 2x2
11ax DBDC access point with
the LTE option, the Package
Content included (Illustration)
Switch
Injector
(B) PoE Injector (Plug in from LAN1 Port)
(1)Connect one end of the Ethernet cable into the LAN1
port of the Access Point and the other end to the Ethernet
port on the computer.
(2)Plug in power source by different ways that depends on
user setup
environment
(A) PoE Switch (Plug in from LAN1 Port)
(C) DC Power Adapter (Plug in from DC Jack)
-Connect the Power Adapter to the DC-IN port of the
Access Point and plug the other end into an electrical
outlet.
Note: The Access Point supports both IEEE 802.3at
PoE (Power over Ethernet) or the included power
adapter. You may use either one as the power
source. DO NOT use both at the same time.


