44
1. Installation of the hood body
a) Trace a vertical line on the wall to indicate the center of the cooker plate,
b) Dismantle the aluminium grease filter,
c) Hold the hood body [C] to the wall with its center mark on the vertical central line, maintaining the minimum distan
-
ce of 650 mm between the bottom edge of the hood and the cooker plate (Fig. 2),
d) Indicate the spacing of mounting holes on the wall (Fig. 3),
e) Drill the holes as indicated on the wall, using drills of diameter corresponding to the attached expansion plugs,
drive the plugs in and then screw the hood body to the wall.
f) Install the aluminium grease filter.
V INSTALLATION
Connecting to the power network and operation check
After connecting the device to the power supply network (in accordance with the requirements defined above) it is
necessary to check operation of the motor and lighting of the hood.
Setting the operation mode of the kitchen extractor hood
Setting the air extractor mode of operation of the hood
In the extractor mode air is discharged to the outside by a special conduit. In that setting any carbon filters shall be
removed. The hood should be connected to the opening discharging air to the outside by means of a rigid or flexible
conduit of 120 mm diameter, which should be purchased in a shop selling installation materials.
A qualified installer should be commissioned to make the connection.
Setting the odour absorber mode of operation of the hood
In this option filtered air returns to the room through openings in the front of the hood.
In this setting it is necessary to install the carbon filter
Fan speeds
The lowest and medium speeds should be used under normal conditions and with low concentration of fumes. The
top speed should be used in case of high concentration of kitchen fumes, e.g. during frying or grilling.
EN
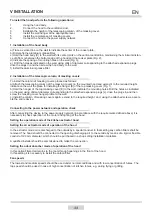
To install the hood perform the following operations:
1.
Hang the hood body,
2.
Connect the hood to the ventilation duct,
3.
Establish the height of the telescoping column of the masking cover,
4.
Install the wall hanger at the appropriate level,
5.
Install the complete set of masking covers,
6.
Connect the hood to the power supply network.
2. Installation of the telescopic column of masking covers
To install the column of masking covers proceed as follows:
a) Attach the telescoping column of the masking covers on the mounted hood and extend it to the required height,
indicate on the wall the place for installing the hanger [E] of the top masking cover (Fig. 1),
b) Hold the hanger of the top masking cover [E] to the wall, indicate the mounting holes. Drill the holes as indicated
on the wall, using drills of diameter corresponding to the attached expansion plugs [L], drive the plugs in and then
screw the masking cover hanger profile to the wall.
c) Install the column of masking covers again, extend to the required height and, using the attached screws, assem
-
ble the entire device.
Содержание OKC 5662 I
Страница 4: ...4 1 3 5 2 9 ...
Страница 5: ...5 6 7 ...


