


Installation
Sorensen SGA Series
4-2
M550129-01 Rev AF
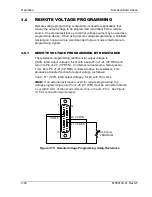
sense leads, and ensure that the digital voltmeter that measures output
voltage is connected across the sense leads.
4.2
CALIBRATION AND VERIFICATION
PROCEDURES
WARNING!
Hazardous voltages might be present on the output, even after it is disabled,
due to stored capacitive charge. Disconnect the AC mains input, and allow
5 minutes to drain the output capacitive charge to safe levels, before
connecting or removing output wiring.
All calibration potentiometers are on circuit board assemblies located at
the front of the chassis, and adjustment of the potentiometers is made
from the top of the chassis. Refer to Figure 4-1 for the physical location of
the potentiometers. Some of the models will require partial removal of the
top cover of the chassis to gain access to the potentiometers, dependent
on the type of chassis.
The 6U-chassis units and earlier 3U-chassis units have access holes in
the top cover that allow adjustment of the calibration potentiometers
without removing the top cover. However, if the Ethernet option is
installed, some of the potentiometers are covered by a ribbon-cable. To
adjust those potentiometers, the cover should be partially removed, and
slid towards the rear of the chassis just enough to expose the location of
the potentiometers, but with the cover still on top of the chassis. The
ribbon-cable should then be carefully moved sufficiently to expose the
adjustment screws of the potentiometers.
The latest 3U-chassis units do not have access holes in the top cover,
and the top cover must be partially removed to perform calibration. The
cover should be slid towards the rear of the chassis just enough to
expose the potentiometers, but with the cover still on top of the chassis. If
the Ethernet option is installed, a ribbon-cable must be moved, as
described above for the 6U-chassis.
When a unit is configured with the Remote Isolated Analog Interface
option, calibration must be first performed on that option (refer to Section
4.3), before the standard calibration and verification procedures of
Section 4.2 are performed.
Содержание Sorensen SGA Series DC
Страница 1: ...M550129 01 Rev AF www programmablepower com SGA Series DC Power Supplies Operation Manual ...
Страница 2: ......
Страница 36: ...Installation Sorensen SGA Series 2 16 M550129 01 Rev AF Figure 2 4 Installation Drawing 3U Models 10V 30V ...
Страница 37: ...Sorensen SGA Series Installation M550129 01 Rev AF 2 17 Figure 2 5 Installation Drawing 3U Models 40V 600V ...
Страница 38: ...Installation Sorensen SGA Series 2 18 M550129 01 Rev AF Figure 2 6 Installation Drawing 3U Models 800V 1000V ...
Страница 40: ...Installation Sorensen SGA Series 2 20 M550129 01 Rev AF Figure 2 8 Rear Panel Standard 3U Models 10V 30V ...
Страница 41: ...Sorensen SGA Series Installation M550129 01 Rev AF 2 21 Figure 2 9 Rear Panel GPIB Option 3U Models 10V 30V ...
Страница 43: ...Sorensen SGA Series Installation M550129 01 Rev AF 2 23 Figure 2 11 Rear Panel Standard 3U Models 40V 600V ...
Страница 44: ...Installation Sorensen SGA Series 2 24 M550129 01 Rev AF Figure 2 12 Rear Panel GPIB Option 3U Models 40V 600V ...
Страница 46: ...Installation Sorensen SGA Series 2 26 M550129 01 Rev AF Figure 2 14 Rear Panel Standard 6U Models 20kW 30kW ...
Страница 47: ...Sorensen SGA Series Installation M550129 01 Rev AF 2 27 Figure 2 15 Rear Panel GPIB Option 6U Models 20kW 30kW ...
Страница 50: ...Installation Sorensen SGA Series 2 30 M550129 01 Rev AF This page intentionally left blank ...
Страница 80: ...Operation Sorensen SGA Series 3 30 M550129 01 Rev AF Figure 3 25 Parallel Connection and Remote Sense ...
Страница 82: ...Operation Sorensen SGA Series 3 32 M550129 01 Rev AF This page intentionally left blank ...
Страница 90: ...Installation Sorensen SGA Series 4 8 M550129 01 Rev AF This page intentionally left blank ...
Страница 94: ...Maintenance Sorensen SGA Series 5 4 M550129 01 Rev AF This page intentionally left blank ...
Страница 97: ...M550129 01 Rev AF Index 3 This page intentionally left blank ...


