-
10
-
2. Installation Procedure
①
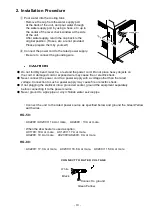
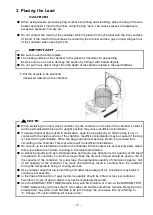
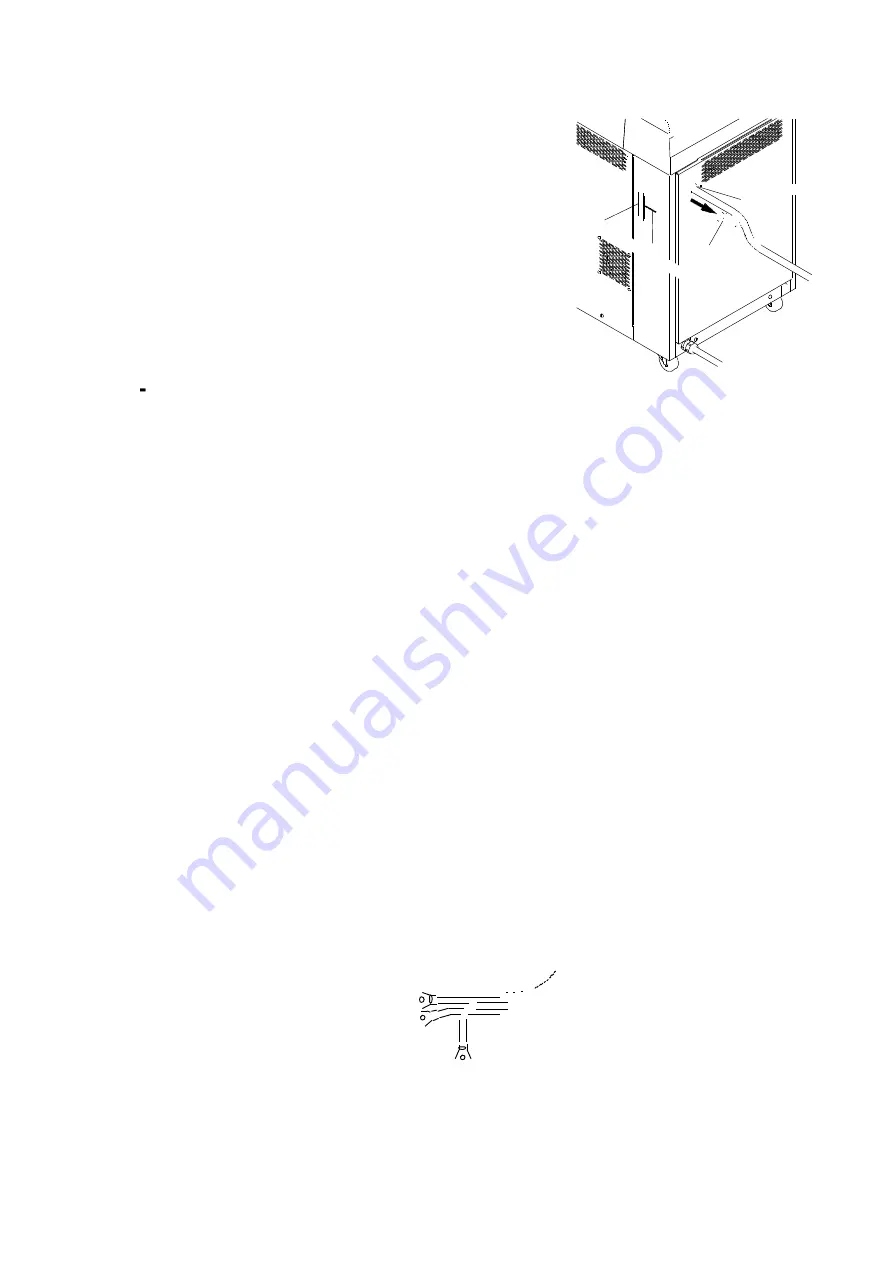
Pour water into the cooling tank.
・
Remove the cap from the water supply port
at the back of the unit, and pour water through
the water supply port by using a hose, etc. up to
the center of the level check window at the side
of the unit.
After water supply, return the cap back to the
original position. (Hoses, etc. are not provided.
Please prepare them by yourself.)
②
Connect the power cord to the rated power supply.
・
Be sure to connect the grounding wire.
●
Do not forcibly bend, twist, tie, or extend the power cord. Do not place heavy objects on
the cord. A damaged cord or exposed wire may cause fire or electric shock.
●
Never connect the power cord to a power supply with a voltage other than the rated
voltage. Connection to such a power supply may cause fire or electric shock.
●
If not plugging the sterilizer into a grounded socket, ground the equipment separately
before connecting it to the power source.
●
Never ground to a gas pipe or vinyl chloride water service pipe.
・
Connect the unit to the rated power source as specified below and ground the Green/Yellow
earth wires.
HG-50 :
・
AC220V /AC230V: 14 A or more, AC240V : 13 A or more.
・
When the 2kw heater is used as option,
AC110V: 19 A or more, AC120V: 17 A or more,
AC220V: 10 A or more, AC230V/AC240V: 9 A or more
HG-80 :
・
AC220V: 17.3 A or more, AC230V: 16.6 A or more, AC240V: 15.9 A or more
CONNECT TO RATED VOLTAGE
Black
White
Green/Yellow
Connect to ground
Water supply port
Cap
Cen
ter
Wate
r lev
el ch
eck
wind
ow
CAUTION
Содержание Hirayama HG-50
Страница 8: ... 7 HG 80 External View ...


