


42
5 Operation and Interface
This section of the manual details the camera’s interface, as well as all of the operations the camera can perform.
The main interface of the camera contains 6 major tabs on the top of the screen. By default, the interface opens on
the Live tab.
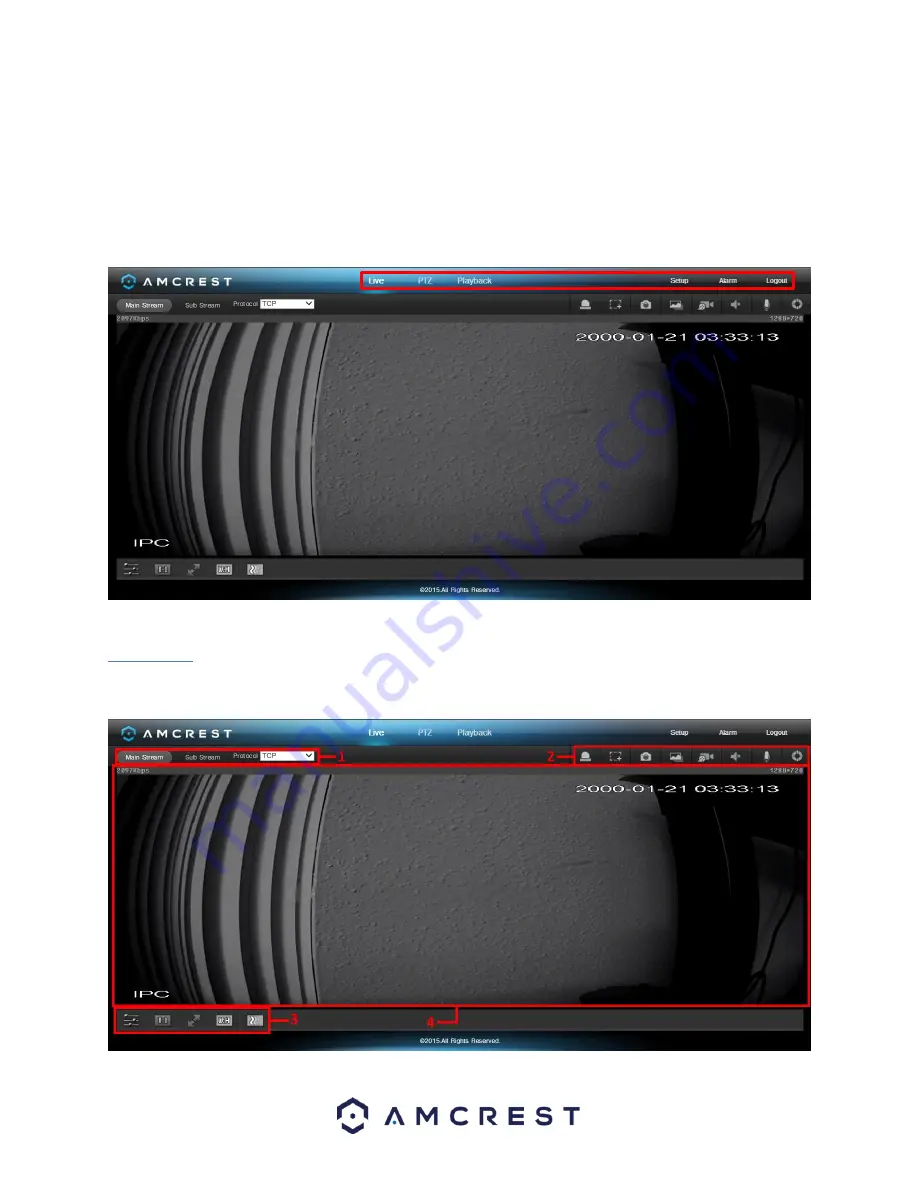
5.1 Live
The Live tab allows the user to see a live video feed from the camera. The live tab has 4 main sections:
Содержание IP2M-848E
Страница 1: ...1 Amcrest IP2M 848E 2MP 4x Zoom PoE PTZ Camera User Manual Version 2 0 0 Revised June 28nd 2016...
Страница 5: ...5 Glossary of Terms 92 FCC Statement 94 Appendix A Toxic or Hazardous Materials or Elements 95...
Страница 9: ...9 2 Device Overview The diagram below shows the camera s front profile...


