LIVE VIDEO STREAMING SETUP
Your VA-1000 comes equipped with an on board digital camera that takes both video and still photographs to your
mobile devices.
WHAT YOU WILL NEED TO GET STARTED USING YOUR CAMERA
1. One Apple or Android phone* (not included)
2. VIDEO DRONE APP installed (app store or Andriod market available)
PHONE HOLDER AND PHONE INSTALLATION
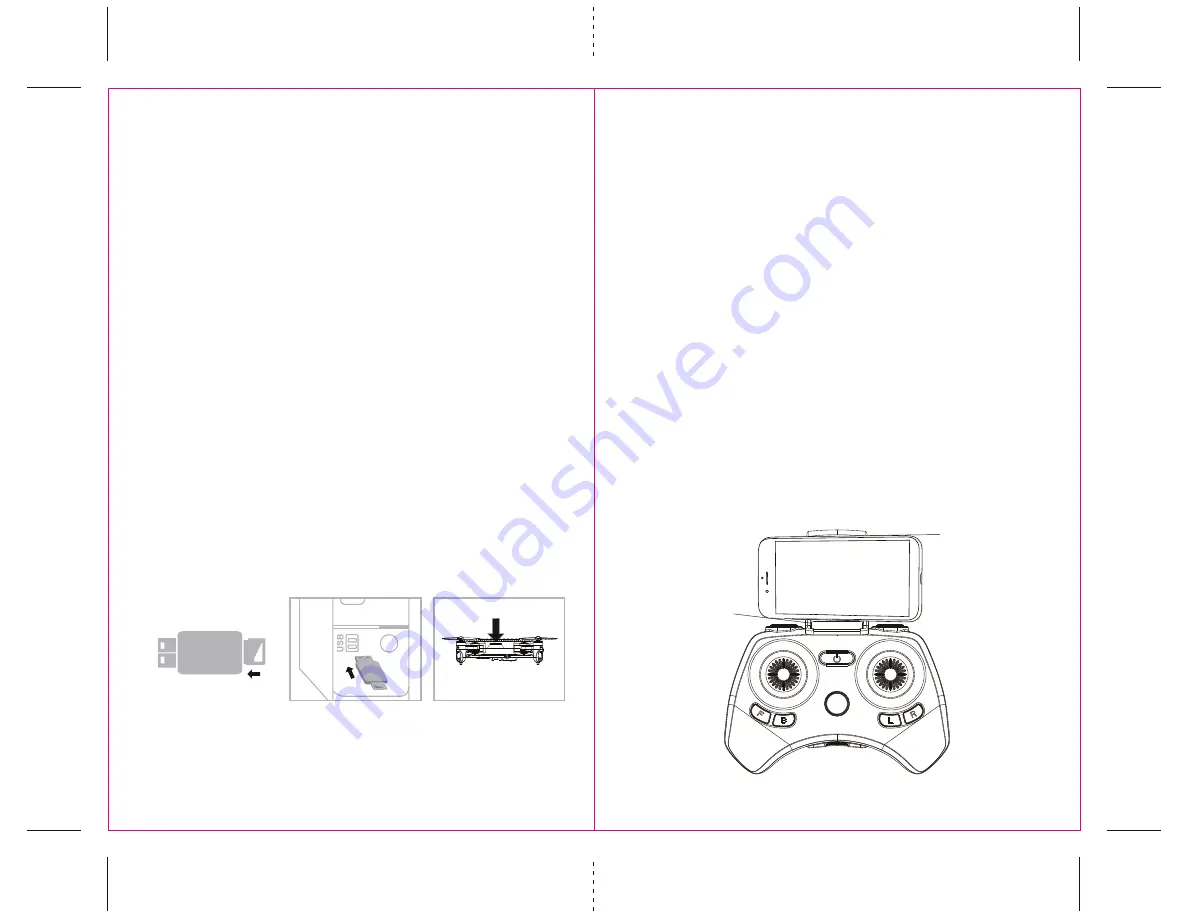
Insert the included phone holder hook (a) to the slots on the top of the controller properly, see the
illustration below, When you install the phone holder correctly you can use it to hold your phone
(see diagram U4)
U4
a
b
9
10
USING YOUR ON-BOARD CAMERA AND VIDEO RECORDER
Your VA-1000 comes equipped with an onboard digital camera(1280x720 pixel, 25 frames per second) that
takes both video and still photographs. Now you can have hours of fun creating aerial photography and
videos for family and friends.
WHAT YOU WILL NEED TO GET STARTED USING YOUR CAMERA
1. One microSD card(not included).
2. One microSD card reader(included).
3. A Computer with a USB port and Windows Media Player or other Media player that can play AVI files(not included).
FORMATTING YOUR microSD CARD
Before you can begin to take videos or digital photographs you must first format your microSD card. To format
your microSD card simply place the microSD card into the included USB SD card reader and plug it into your
computers USB port (see diagram U1 and U2 below). After a few moments an icon will appear on your
Desktop. Right click on the Icon and follow instructions to format your microSD card.
Diagram U2
microSD card
goes in back slot
Diagram U1
microSD card facing down
Diagram U3
IMPORTANT NOTICE: It’s recommend to test your camera functions before flying.
REMOVING YOUR microSD CARD
To remove your microSD Card push in gently on the back of the SD card with your thumb or forefinger until
you hear and feel a “clicking sound”. The microSD card will “pop-out” slightly and is ready for removal.
Simply grab and pull gently away from the VA-1000’s camera port to remove the card. Always store your
microSD card in a clean, safe and cool environment.
DOWNLOADING AND CLEARING SPACE ON YOUR microSD CARD
Plug your microSD card into the microSD card reader and connect to your computer. It is best to always
download all your videos and pictures on to your computer and not store this data on your microSD card.
After downloading your photos and videos , follow your computers instructions to “delete” files on your
microSD card.
INSTALLING THE microSD CARD IN YOUR VA-1000
s0LACETHEFORMATTEDMICRO3$CARDINTOTHE
VA-1000 SD card port (see diagram U3 below). Push gently until
you hear and feel the microSD card “click” into the SD card slot.
s4URNTHE6!ONANDMAKESURETHATITISBOTHFULLYCHARGEDANDPROPERLYSYNCEDTOTHECONTROLLERSEE
HOW TO SYNC YOUR QUADROCOPTER on page 4 ).
TAKING DIGITAL PHOTOS
To take photographs short press the CAMERA button of the controller (refer to CONTROLLER DIAGRAM on pg.
3), when you push the button you will hear a "beep" and the red and white led lights on the will flash one
time indicating that a picture has been taken.
RECORDING VIDEOS
To begin recording a video long press CAMERA button for 2 seconds. You will hear 2 "beeps" and the red
and white LED lights on the camera start flashing to indicate that you are in video mode and the camera is
recording. To stop the video recording, long press the CAMERA button a second time, you will hear a “beep”
indicating that the video recording has stopped and the Camera is in ready mode again.


