3
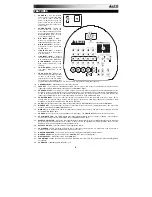
FEATURES
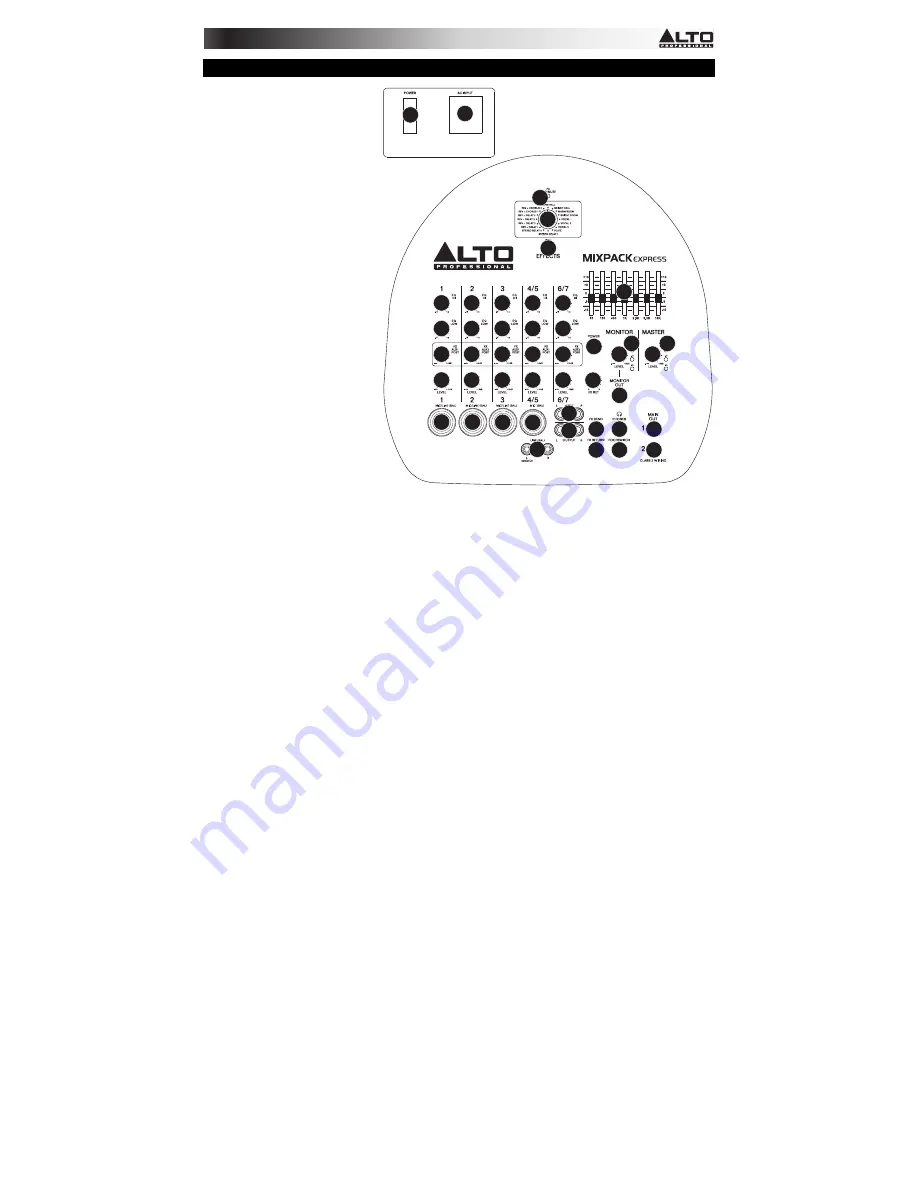
1.
POWER IN –
Use the included
power cable to connect the mixer
to a power outlet. While the
power is switched off, plug the
power cable into the mixer first,
then plug the power cable into a
power outlet.
2.
POWER SWITCH –
Turns the
mixer on and off. Turn on the
mixer after all input devices have
been connected. Make sure the
MASTER LEVEL knob is set to
"zero" before turning it on.
3.
MIC INPUT (XLR / 1/4") –
Connect a microphone to these
inputs with an XLR or 1/4" cable.
4.
MIC INPUT (XLR) –
Connect a
microphone to these inputs with
an XLR cable.
5.
LINE INPUT (1/4") –
Connect
line-level devices to these inputs
with 1/4" cables.
6.
LINE INPUT (RCA) –
Connect
line-level devices to these inputs
with a standard stereo RCA cable.
7.
HI EQ (TREBLE) –
Adjusts the
high (treble) frequencies of the
channel.
8.
LOW EQ (BASS) –
Adjusts the
low (bass) frequencies of the
channel.
9.
FX AUX1 POST –
Adjusts the
channel audio (post-EQ) level that
is sent to the mixer's internal
effects processor and FX SEND.
Turn this up for the channels that
you want internal effects applied to. You can use this to apply effects to individual channels.
10.
CHANNEL LEVEL –
Adjusts the audio level on the channel.
11.
TAPE OUT –
You can use a standard stereo RCA cable to connect this output to an external recording device. The
signal sent out these RCA outputs is the same as the MAIN OUT signal.
12.
FX SEND OUTPUT –
You can use a 1/4" TRS cable to connect this output to the input of an external amplifier or active
monitor to create a custom monitor mix for onstage musicians. You can adjust this level with the FX AUX1 POST knob.
To use an external effects rack unit, compressor, etc. with the mixer, you can use Y-cables to connect this output to the
input of your external device, then connect the outputs of the device to the FX RETURN input.
13.
FX RETURN INPUT –
You can connect the output of an external device to this input with a 1/4" mono cable. This is
usually used for outboard effects devices but can also be used like an extra input channel for synthesizers, drum
machines, etc. Adjust this input's volume with the FX RET knob.
14.
FX RET –
Adjusts the volume of the signal being sent into the FX RETURN INPUT and routed to the MAIN OUT.
15.
MONITOR OUT –
Use a standard 1/4" cable to connect this output to your monitor or amplifier system. The level of this
output is controlled by the MONITOR LEVEL knob.
16.
MAIN OUT –
Use standard 1/4" cables to connect these outputs to the speakers. The level of these outputs is controlled
by the MASTER LEVEL knob.
17.
PHONES –
Connect your 1/4" stereo headphones to this output. The MONITOR LEVEL knob controls the volume.
18.
FX CLIP/MUTE LED –
The LED will flash if the mixer's internal effects processor signal is clipping. If this happens,
decrease the setting of the FX AUX1 POST knob or CHANNEL LEVEL knob.
19.
EFFECTS SELECTOR –
Selects the effect that the mixer's internal effects processor will apply to the various channels.
Each channel can send different levels of audio to the processor by adjusting their FX AUX1 POST knobs. See the
EFFECTS section for an explanation of the available effects.
20.
EFFECTS ON / OFF –
Press this button to mute/unmute the effects.
21.
FOOTSWITCH –
When a latching-style footswitch is connected to this jack with a 1/4" TRS cable, it can be pressed to
allow all channels to bypass the mixer's internal effects processor.
22.
GRAPHIC EQUALIZER –
You can use these controls to adjust the equalization of the main mix.
23.
MONITOR LEVEL –
Adjusts the volume of the MONITOR OUT and your headphones.
24.
MASTER LEVEL –
Adjusts the volume of the MAIN OUT.
25.
LED METERS –
Shows the audio level of the main mix and monitor mix. Turn the volume down if the +10 LED lights up
excessively.
26.
POWER LED –
Illuminates when the mixer is on.
1
NEW
1
3
3
3
4
5
6
7
8
9
9
9
9
9
7
8
7
8
7
8
7
8
10
10
10
10
10
11 12
13
14
18
19
20
22
23
25
26
25
24
21
15
16
17
16
2
Содержание MIXPACK EXPRESS
Страница 1: ...QUICKSTART GUIDE ENGLISH 2 4 ...


