Various Printing Operations
24
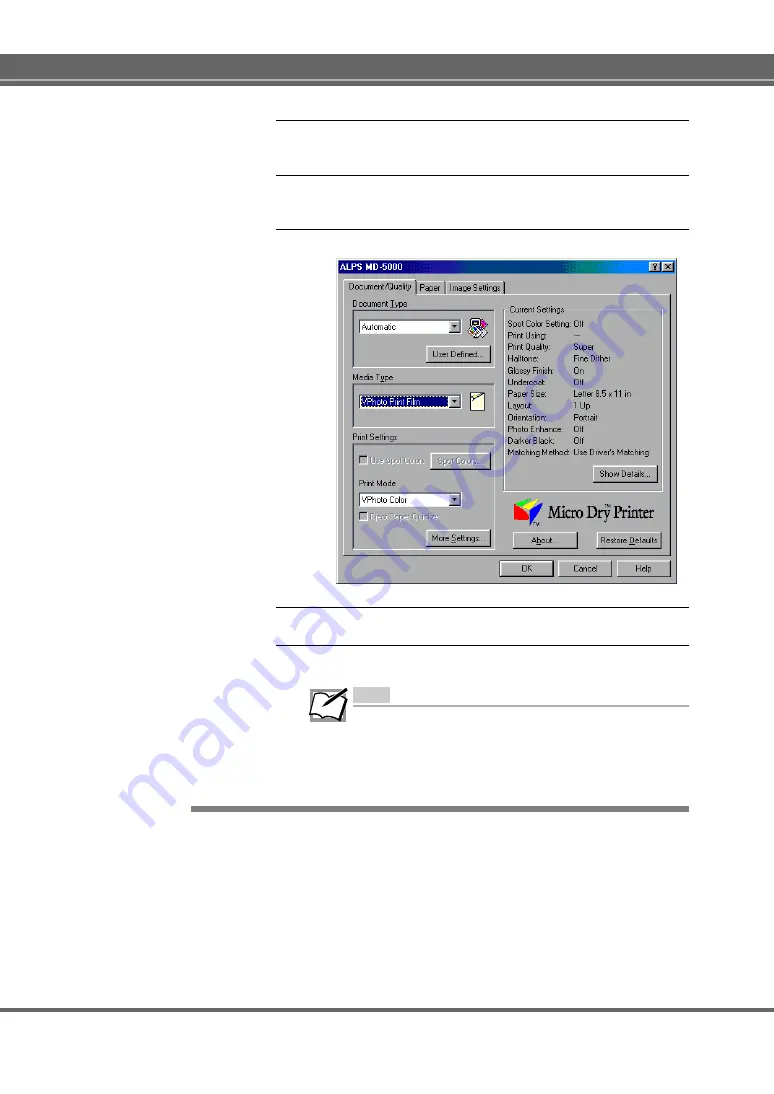
2.
Click the Document/Quality tab to bring this portion to
the front.
3.
Select Automatic, Photographs, or Graphics/Text from the
Document Type depending on the document to be printed.
4.
Select VPhoto Print Film from the Media Type setting.
5.
Change the necessary settings.
6.
When you complete the setup, click OK to close the dia-
log box.
Note
When VPhoto Print Film is selected from the Media Type, Glossy
Finish is automatically set. We recommend that glossy finish
be normally provided. If you do not want to obtain glossy finish,
click the More Settings button, then uncheck the Glossy Finish
check box in the More Settings dialog box.
Step 5
¨
¨
¨
¨
¨
Click OK in the Print dialog box to start printing.