


23
-EN
Note
• No sound is produced by the system when the Power IC is set to OFF.
Setting the Language Font
Two types of font can be selected.
Setting item:
Language Set
Setting contents:
Language 1 (Initial setting) / Language 2
Language 1 :
Normal Font
Language 2 :
European Font
Demonstration
This unit has a demonstration feature for the display.
Setting item:
Demo
Setting contents:
ON / OFF (Initial setting)
Note
• To quit Demo mode, set to Demo OFF.
Display is selected on the setup main menu in step 2.
Dimmer Control
Set the Dimmer control to Auto to decrease the illumination brightness
of the unit with the head lights of the vehicle ON. This mode is useful if
you feel the unit’s backlighting is too bright at night.
Setting item:
Dimmer
Setting contents:
Auto (Initial setting) / Manual
Dimmer Level Setting
In the Dimmer Level setting, three levels are available, the highest level
(Lev3) being the dimmest when the car headlights are on.
Setting item:
Dimmer Level
Setting contents:
Lev1 (Initial setting) / Lev2 / Lev3
Scroll Type Setting
Choose from two scrolling methods.
Select the type you prefer.
Setting item:
Scroll Type
Setting contents:
TYPE 1 / TYPE 2 (Initial setting)
TYPE 1 :
The characters scroll from right to left, one character at a time,
until the entire title has scrolled.
TYPE 2 :
Words are built up from left to right, a single character at a time.
When the display is full, it is cleared and the subsequent words are
displayed the same way until all words of the title have been
shown.
Scroll Setting (Text Scroll)
This CD player can scroll the disc and track names recorded on
CD-TEXT discs, as well as text information of MP3/WMA/AAC files,
folder names, tags, HD Radio broadcasts and SAT Radio.
Setting item:
Text Scroll
Setting contents:
Auto / Manual (Initial setting)
Text Scroll Auto:
CD text information, folder and file names, HD Radio and SAT
Radio text are scrolled continuously. In addition, all tag
information is automatically rotated in the display continuously,
without pressing the VIEW button. (except SAT Radio)
Text Scroll Manual:
The above information is scrolled only when a disc is loaded, a
channel or track is changed, etc.
Note
• In parts of the display, scrolling may not occur, or scroll content may
differ.
Switching the Character Font
Two types of font can be selected.
You can select the font type you like.
Setting item:
Font Select
Setting contents:
TYPE 1 (Initial setting) / TYPE 2
Switching the Animation Display Type (BGV
Select)
You can select your favorite animation display for background from 4
types.
Setting item:
BGV Select
Setting contents:
OFF (Initial setting) / TYPE 1 / TYPE 2 / TYPE 3 / TYPE 4
Display Setting
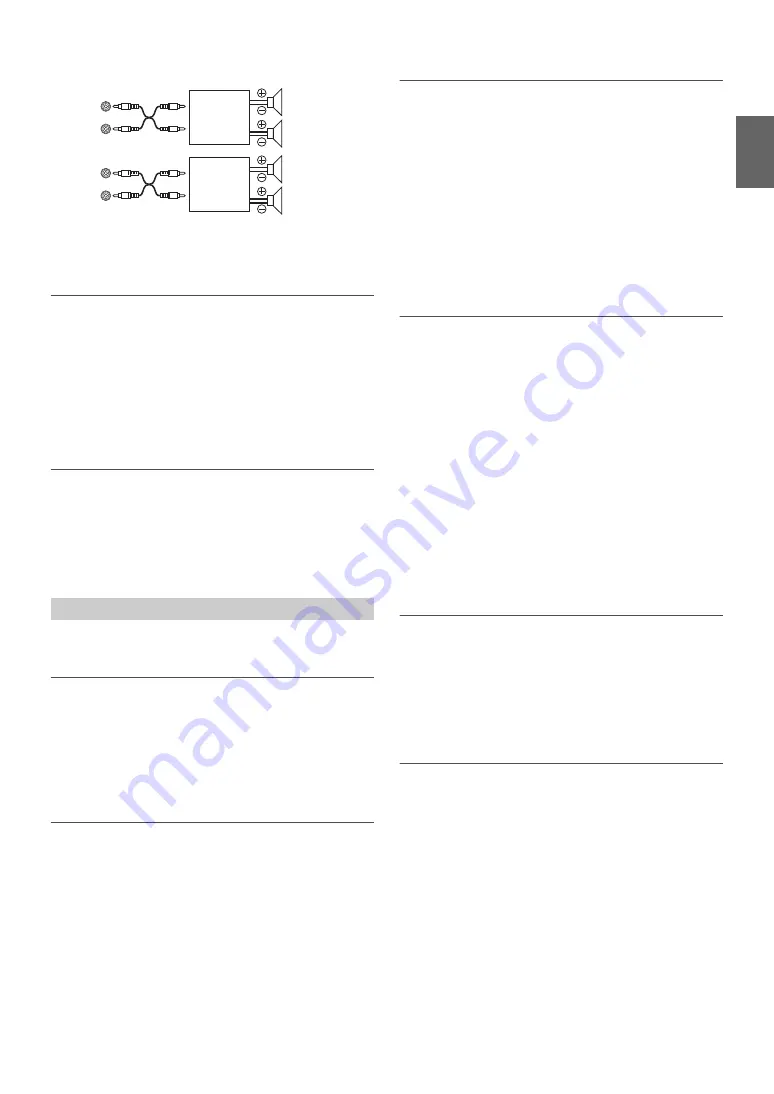
Front
left
Amplifier
Front
right
Rear
left
Amplifier
Rear
right
POWER IC OFF
:
Содержание 68-14470Z51-A
Страница 2: ......


