background image

Vista general del dispositivo

ESP

FRA

ITA

ENG

NDL

ESP

ESP

145

4  Vista general del dispositivo

Vista general del dispositivo (véase 1 página 3) 


(A) 

Marco intercambiable

(B) 

Dispositivo de control ambiental  


Display S


Calefacción por suelo

(C) Display
(D) 

Tecla del sistema  


(tecla de programación y LED)

(E) 

Rueda de selección

(F) 

Placa de montaje

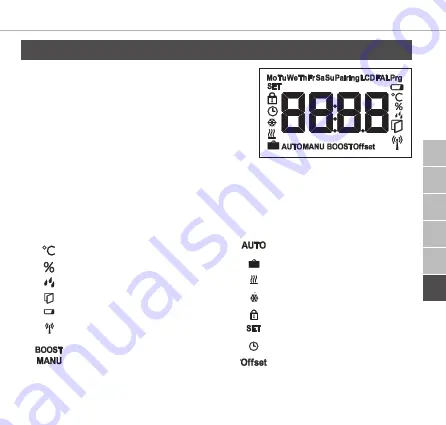
Temperatura deseada/real 
Humedad del aire
Advertencia de condensación
Símbolo de ventana abierta
Símbolo de la batería
Radiotransmisión
Modo Boost
Modo manual

Modo automático
Modo vacaciones
Calefacción
Refrigeración
Bloqueo de funcionamiento
Temperatura deseada
Fecha/hora
Offset

Vista general del display

Содержание WTHP 61001 Series

Страница 1: ...WTHP 61001 XX Alpha IP DEU FRA ITA ENG NDL ESP 133960 1740 ...

Страница 2: ...ESP NDL ENG ITA FRA DEU 2 DEU 6 3 4 ENG 33 FRA 59 NDL 84 ITA 111 ESP 139 1x 1x 1x 2x 2x 2x 2x 3 0 x 30 mm 5 mm Key SGTIN QR 1x ...

Страница 3: ...DEU FRA ITA ENG NDL ESP 3 1 A F C D E B ...

Страница 4: ...ESP NDL ENG ITA FRA DEU 4 R 3 4 5 S Q P Q P 2 ...

Страница 5: ...DEU FRA ITA ENG NDL ESP 5 6 ...

Страница 6: ...weise 9 2 3 Konformität 10 3 Funktion 10 4 Geräteübersicht 11 4 1 Technische Daten 12 5 Inbetriebnahme 13 5 1 Gerät anlernen 13 5 1 1 Anlernen ohne Alpha IP Access Point Standalone Betrieb 14 5 1 2 Anlernen an Alpha IP Access Point 15 5 2 Montage 16 5 2 1 Mit Klebestreifen montieren 16 5 2 2 Mit Schrauben montieren 17 5 2 3 Auf einer Unterputzdose montieren 18 5 2 4 In Mehrfachkombination montiere...

Страница 7: ...ung der Heizprofile 22 6 1 6 Datum und Uhrzeit einstellen 24 6 1 7 Offset Temperatur 24 6 1 8 Auswahl der Temperaturanzeige Luftfeuchtigkeit 24 6 1 9 Konfiguration der Alpha IP Basisstation 25 6 1 10 Verbindungstest 25 7 Bedienung 26 8 Anzeigen 27 8 1 Statusanzeigen 27 8 2 Fehleranzeigen 28 9 Batterien wechseln 29 10 Reinigen 30 11 Werkseinstellungen herstellen 30 12 Außerbetriebnahme 31 13 Entsor...

Страница 8: ... diese Anleitung vollständig und gründlich zu lesen Die Anleitung ist aufzubewahren und an nachfolgende Benutzer weiterzugeben Diese Anleitung sowie zusätzliche Alpha IP Systeminformationen sind stets aktuell unter www alphaip de zu finden Systeminformationen Funktionen und Bedienschritte aus der Anleitung des Alpha IP Access Point HAP 2001 sind zu berücksichtigen 1 2 Symbole Folgende Symbole werd...

Страница 9: ... der Ist Temperatur durch Ansteuerung der Alpha IP Basisstation zur Regelung von Fußbodenheizungen FAL x10x1 xxN1 verbundenen Alpha IP Heizkörperthermostaten oder Elektroheizkörpern mit Schaltsteckdose drahtlosen Kommunikation im Alpha IP Netzwerk Jegliche andere Verwendung Änderungen und Umbauten sind ausdrücklich un tersagt Eine nicht bestimmungsgemäße Verwendung führt zu Gefahren für die der He...

Страница 10: ...n Feuchtigkeit Vibrationen ständiger Sonnen oder anderer Wärmeeinstrahlung Kälte oder mechanischen Belastungen aus setzen Sicherstellen dass keine Kinder mit dem Produkt oder der Verpackung spielen Gegebenenfalls Kinder beaufsichtigen 2 3 Konformität Hiermit erklärt der Hersteller dass das Gerät der Richtlinie 2014 53 EU entspricht Der vollständige Text der EU Konformitätserklärung ist unter der f...

Страница 11: ...onenten erfolgt über das Homematic HmIP Funkprotokoll Die Funk Übertragung wird auf einem nicht exklusiven Übertragungs weg realisiert weshalb Störungen nicht ausgeschlossen werden können Störein flüsse können z B hervorgerufen werden durch Schaltvorgänge Elektromotoren oder defekte Elektrogeräte Die Reichweite in Gebäuden kann stark von der im Außenbereich Freifeld abweichen 4 Geräteübersicht Ger...

Страница 12: ...g Boost Modus Manueller Betrieb Automatikbetrieb Urlaubsmodus Heizen Kühlen Bediensperre Soll Temperatur Datum Uhrzeit Offset 4 1 Technische Daten Geräte Kurzbezeichnung WTHP 61001 xx Versorgungsspannung 2x 1 5 V LR03 Micro AAA Stromaufnahme 50 mA max Batterielebensdauer 2 Jahre typ Schutzart IP20 Verschmutzungsgrad 2 Umgebungstemperatur 0 bis 35 C ...

Страница 13: ...n 2014 53 EU Funkanlagen 5 Inbetriebnahme 5 1 Gerät anlernen Damit das Raumbediengerät Display S Fußbodenheizung in das Alpha IP System integriert werden und mit anderen Geräten kommunizieren kann muss es zunächst angelernt werden Das Anlernen des Raumbediengerät Display S Fußbodenheizung erfolgt direkt an die Alpha IP Basisstation oder im Verbund mit Heizkörperthermost aten an den Alpha IP Access...

Страница 14: ... Soll das Raumbediengerät Display S Fußbodenheizung an die Alpha IP Basisstation angelernt werden müssen die beiden zu verknüpfenden Geräte in den Anlernmo dus gebracht werden 1 An der Alpha IP Basisstation siehe Anleitung Alpha IP Basisstation den gewünsch ten Kanal auswählen 2 Für 4 Sekunden die Systemtaste der Alpha IP Basisstation drücken bis die LED der Systemtaste schnell orange blinkt 9 9 D...

Страница 15: ...1001 xx über den Access Point HAP 21001 erfolgen Gerät wie folgt anlernen Ö Ö Der Alpha IP Access Point wurde über die Alpha IP App eingerichtet siehe An leitung HAP 21001 1 Die Alpha IP App auf dem Smartphone öffnen 2 Den Menüpunkt Gerät Anlernen auswählen 3 Das Raumbediengerät Display S Fußbodenheizung aus dem Wechselrahmen he rausziehen vgl Abb 5 auf Seite 4 4 Isolierstreifen aus dem Batteriefa...

Страница 16: ...oder Aufkle ben der Montageplatte erfolgen Eine Integration in eine bestehende Schalterserie ist ebenfalls möglich 5 2 1 Mit Klebestreifen montieren Abhängig vom Untergrund kann die Montage mit den mitgelieferten doppelsei tigen Klebestreifen oder mit den mitgelieferten Schrauben erfolgen Die Monta ge ist auf unterschiedlichen Untergründen wie z B Mauerwerk Möbeln Fliesen oder Glas möglich Ö Ö Die...

Страница 17: ...ngen an der Position verlaufen 3 Die Montageplatte vom Gerät lösen 4 Die Montageplatte an die Montageposition halten Darauf achten dass der Pfeil auf der Vorderseite der Montageplatte nach oben zeigt 5 Die Montageplatte horizontal ausrichten 6 Zwei diagonal gegenüberliegende Bohrlöcher anhand der Montageplatte an zeichnen vgl P in Abb 2 7 Bei Steinwänden vorgezeichnete Löcher mit einen 5 mm Steinb...

Страница 18: ...chten 3 Die Montageplatte mittels passenden Schrauben montieren vgl Q in Abb 2 4 Den Wechselrahmen auf die Montageplatte setzen 5 Das Gerät auf die Montageplatte aufsetzen und in die Klammern einrasten 5 2 4 In Mehrfachkombination montieren Das Gerät kann mit Rahmen anderer Hersteller verwendet oder in einen Mehr fachrahmen integriert werden Bei der Montage in Mehrfachkombinationen die Montageplat...

Страница 19: ...smenü geöffnet Folgende Symbole Menüs stehen durch Drehen zur Verfügung und werden durch kurzes Drücken des Stellrads ausgewählt 6 1 Konfigurationsmenü Durch langes Drücken auf das Stellrad E wird das Konfigurationsmenü geöffnet Folgende Symbole Menüs stehen durch Drehen zur Verfügung und werden durch kurzes Drücken des Stellrads ausgewählt Kapitel Anzeige Bedeutung 6 1 1 Automatikbetrieb 6 1 2 Ma...

Страница 20: ...Automatikmodus Zur Aktivierung des Automatikbetriebs wie folgt vorgehen 1 Lange auf das Stellrad E drücken um das Konfigurationsmenü zu öffnen 2 Das Symbol auswählen und durch kurzes Drücken Auswahl bestätigen 6 1 2 Manueller Betrieb Zur Aktivierung des manuellen Betriebs wie folgt vorgehen 1 Lange auf das Stellrad E drücken um das Konfigurationsmenü zu öffnen 2 Das Symbol auswählen und durch kurz...

Страница 21: ...hl bestätigen Anzeige S zeigt die Startzeit An zeige E die Endzeit 4 Durch Drehen des Stellrads die Temperatur einstellen die während der definier ten Zeit gehalten werden soll und Auswahl durch kurzes Drücken bestätigen 6 1 4 Bediensperre Die Bedienung am Gerät kann gesperrt werden um das ungewollte Verändern von Einstellungen z B durch versehentliches Berühren zu verhindern Um die Bediensperre z...

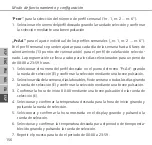
Страница 22: ...r Multi IO Box deaktiviert 1 Durch Drehen des Stellrads E HEAT für Heizen oder COOL für Kühlen aus wählen und Auswahl durch Drücken bestätigen Pr nr für das Auswählen der Wochenprofilnummer nr 1 nr 2 nr 6 1 Durch Drehen die Nummer des gewünschten Profils auswählen und durch kurzes Drücken Auswahl bestätigen Pr Ad für das individuelle Einstellen der Wochenprofile nr 1 nr 2 nr 6 Im Wochenprofil werd...

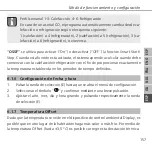
Страница 23: ...hte Temperatur für den nun eingestellten Zeitabschnitt durch Drehen Drücken auswählen und bestätigen 7 Vorgang für den gesamten Zeitraum von 00 00 bis 23 59 Uhr wiederholen Wochenprofil 1 3 Heizen 4 6 Kühlen Bei einem CO Signal wechselt das Programm von Heizen bzw Kühlen au tomatisch nach folgendem Schema 1 Heizen zu 4 Kühlen 2 Heizen zu 5 Kühlen 3 Heizen zu 6 Kühlen bzw umgekehrt OSSF für das Akt...

Страница 24: ... Temperatur bis zu 3 5 C wird die Abweichung korrigiert 1 Lange auf das Stellrad E drücken um das Konfigurationsmenü zu öffnen 2 Das Symbol auswählen und durch kurzes Drücken Auswahl bestätigen 3 Stellrad drehen und gewünschten Offset max 3 5 C durch kurzes Drücken des Stellrads bestätigen 6 1 8 Auswahl der Temperaturanzeige Luftfeuchtigkeit Je nach Wunsch werden die Ist oder die Soll Temperatur s...

Страница 25: ...nt mit dem Stellrad die gewünschte Basisstation auswählen Im Konfigurationsmenü für die Alpha IP Basisstation stehen Geräteparameter UnP1 UnP2 und Kanalparamenter ChAn zur Verfügung über die Vor und Nachlaufzeiten der Pumpe Absenktemperaturen Zeitintervalle und viele andere Parameter verändert werden Informationen zu den Konfigurationsmöglichkeiten befinden sich in der Anleitung der Alpha IP Basis...

Страница 26: ...mperatur bis zum nächs ten Schaltzeitpunkt bestehen Danach wird das eingestellte Heizprofil wieder aktiviert Im manuellen Betrieb bleibt die Temperatur bis zur nächsten manuel len Änderung erhalten Manueller und Automatikbetrieb Das Stellrad 3 Sekunden drücken um zwischen den Betriebsarten manuell und Automatik zu wechseln Im Automa tikbetrieb ist das über die Alpha IP App eingestellte Heizprofil ...

Страница 27: ...nsperre 8 Anzeigen 8 1 Statusanzeigen Anzeige Bedeutung Bedeutung blinkt Feuchtegrenze Standard 60 im Raum überschritten Raum lüften blinken Feuchteeingang an der Multi IO Box wurde aktiviert Raum lüften leuchtet Bediensperre aktiv Keine Bedienung möglich Kurzes oranges Blinken Funkübertragung Sendeversuch Datenübertragung Warten bis die Übertragung beendet ist 1x langes grünes Leuch ten Vorgang b...

Страница 28: ...er App eingeben 1x oranges und 1x grünes Leuchten nach Einlegen der Batterien Testanzeige Wenn Testanzeige erloschen fortfahren 8 2 Fehleranzeigen Anzeige Bedeutung Lösung Batteriespannung gering Batterien wechseln blinkt Verbindung zum Al pha IP Access Point fehlerhaft Die Verbindung prüfen Kurzes oranges Leuch ten nach Empfangsmel dung Batterien leer Batterien wechseln ...

Страница 29: ...inen Defekt überprüfen z B mechani sche Blockade Funkstörungen beseitigen 6x langes rotes Blinken Gerät defekt Die Anzeige in der App beachten Das Gerät durch einen Fachhändler überprüfen lassen Das Gerät austauschen 9 Batterien wechseln Das Symbol signalisiert im Display und in der Alpha IP App eine geringe Batte riespannung Die Batterien durch neue ersetzen 1 Das Gerät aus dem Rahmen und von der...

Страница 30: ... Das Display wechselt zur normalen Anzeige 9 9 Das Gerät ist betriebsbereit 10 Reinigen Das Gerät mit einem weichen sauberen trockenen und fusselfreien Tuch reinigen Für die Entfernung von stärkeren Verschmutzungen kann das Tuch leicht mit lau warmem Wasser angefeuchtet werden Für die Reinigung ein lösungsmittelfreies Reinigungsmittel verwenden 11 Werkseinstellungen herstellen Durch das Herstellen...

Страница 31: ...gedrückt halten bis die LED schnell orange blinkt Im Display wird rES angezeigt 4 Die Systemtaste loslassen 5 Die Systemtaste weitere 4 Sekunden drücken bis die LED grün aufleuchtet 6 Die Systemtaste wieder loslassen 9 9 Das Gerät führt einen Neustart durch 9 9 Die Werkseinstellungen sind wiederhergestellt 12 Außerbetriebnahme 1 Das Gerät aus dem Rahmen und von der Montageplatte abziehen vgl Abb 5...

Страница 32: ...es Einverständnis des Herstellers kopiert reprodu ziert gekürzt oder in irgendeiner Form übertragen werden weder mechanisch noch elektronisch 2017 13 Entsorgen Das Gerät nicht im Hausmüll entsorgen Elektronische Geräte sind entspre chend der Richtlinie über Elektro und Elektronik Altgeräte über die örtlichen Sammelstellen für Elektronik Altgeräte zu entsorgen ...

Страница 33: ...37 4 Device overview 38 4 1 Technical data 39 5 Commissioning 40 5 1 Teaching the device 40 5 1 1 Teach in without Alpha IP Access Point stand alone operation 40 5 1 2 Teach in to Alpha IP Access Point 41 5 2 Installation 42 5 2 1 Installation with adhesive strips 43 5 2 2 Installation with screws 43 5 2 3 Installation on flush type box 44 5 2 4 Installation in multiple combinations 45 6 Operating...

Страница 34: ...profiles 48 6 1 6 Setting date and time 50 6 1 7 Offset temperature 50 6 1 8 Selection of temperature display humidity 50 6 1 9 Configuration of Alpha IP Base station 51 6 1 10 Connection test 52 7 Operation 52 8 Displays 53 8 1 Status displays 53 8 2 Error indications 54 9 Changing the batteries 56 10 Cleaning 56 11 Resetting factory settings 56 12 Decommissioning 57 13 Disposal 58 ...

Страница 35: ...horoughly before commencing any work with the device These instructions must be kept and to be handed over to future users These instructions as well as constantly up to date additional Alpha IP system information can be found under www alphaip de System information functions and operating steps from the Alpha IP Ac cess Point HAP 2001 instructions must be followed 1 2 Symbols The following symbol...

Страница 36: ...0x1 xxN1 connected Alpha IP radiator thermostats or electric heaters with pluggable switch a wireless communication in the Alpha IP network Every other use modification and conversion is expressively forbidden Improper use leads to dangers the manufacturer cannot be held liable for and to an exclu sion of warranty and liability 2 2 Safety notes All safety notes in these instructions must be observ...

Страница 37: ...plete text of the EU Conformity Declaration is available under the fol lowing URL www alphaip de 3 Function The Alpha IP Room Control Unit Display S Floor Heating WTHP 61001 xx allows to set the room temperature in a time controlled way in order to adapt the heating phases to your individual requirements The room control unit measures the tem perature and transmits these data cyclically to the Alp...

Страница 38: ... the range in open air 4 Device overview Device overview see fig 1 page 3 A Interchangeable frame B Room control unit Display S C Display D System key teach in key and LED E Setting wheel F Mounting plate Target actual temperature humidity Condensation warning Window open symbol Battery symbol Radio transmission Boost mode Manual operation Automatic operation Holiday mode Heating Cooling Operating...

Страница 39: ...ears normally Protection type IP20 Contamination degree 2 Ambient temperature 0 to 35 C Dimensions W x H x D Without frame 55 x 55 x 23 5 mm With frame 86 x 86 x 25 mm Weight 100 g including batteries Radio frequency 868 3 MHz 869 525 MHz Receiver category SRD category 2 Typical radio range 250 m in open air Duty Cycle 1 per h 10 per h Mode of action Type 1 Guidelines 2014 53 EU Radio installation...

Страница 40: ...nfiguration is done on the device itself in case of teaching in via the Access Point it is done via the Alpha IP app 5 1 1 Teach in without Alpha IP Access Point stand alone operation For teach in keep a minimum distance of 50 cm between the devices The teach in process can be interrupted by shortly pressing the teach in key again This is confirmed by a short flash in red colour of the device LED ...

Страница 41: ...artment or insert batteries If batteries have already been inserted press the system key D for at least 4 sec onds in order to activate the teach in mode 9 9 The teach in mode is activated automatically for 3 minutes 9 9 The device LED flashes in orange The LED will light up in green after a successful teach in process If the LED lights up red repeat the process 5 1 2 Teach in to Alpha IP Access P...

Страница 42: ...ly in the Alpha IP app 6 Enter the last four ciphers of the device number SGTIN or scan the supplied QR code for confirmation The device number can be found below the QR code or in the battery compartment The LED will light up in green after a successful teach in process If the LED lights up red repeat the process 7 Follow the instructions in the app 5 2 Installation The battery operation allows a...

Страница 43: ...lation surface must be even smooth undamaged clean and free from grease and solvents 2 Remove the protective foil from one side of the adhesive strip 3 Stick the adhesive tape on the back side of the mounting plate in the recesses provided for this purpose see fig 4 page 4 4 Remove the protective foil from the other side of the adhesive strip 5 Align the device horizontally at the desired position...

Страница 44: ...nstall the mounting plate with the supplied screws see fig 3 page 4 10 Install the interchangeable frame onto the mounting plate 11 Position the device onto the mounting plate and latch it into the clips 5 2 3 Installation on flush type box The fixing holes in the mounting plate can be used for installation onto a flush type box 1 Remove the mounting plate from the room control unit Display S Floo...

Страница 45: ...ufacturers Manufacturer Frames Berker S 1 B 1 B 3 B 7 Glass ELSO Joy GIRA System 55 Standard 55 E2 E22 Event Esprit merten 1 M Atelier M M Smart M Arc M Star M Plan JUNG A 500 AS 500 A plus A creation 6 Operating modes and configuration The setting wheel E provides the operating functions of the device Depending on the configuration the settings are transmitted to the Alpha IP Base station or to t...

Страница 46: ...splay humidity 6 1 9 Configuration of the base station 6 1 10 Connection test only selectable in stand alone operation 6 1 1 Automatic mode Do the following to activate automatic operation 1 Press and hold the setting wheel E in order to open the configuration menu 2 Select the symbol and confirm the selection by shortly pressing the setting wheel 6 1 2 Manual operation Proceed as follows to activ...

Страница 47: ... 2 Select the symbol and confirm the selection by shortly pressing the setting wheel 3 Set the Start End time and date by rotating the setting wheel Confirm each selection by shortly pressing the setting wheel S shows the starting time E shows the end time 4 Set the temperature to be kept during the defined time by turning he setting wheel and confirm your selection by shortly pressing the wheel 6...

Страница 48: ...own requirements 1 Press and hold the setting wheel E in order to open the configuration menu 2 Select the symbol and confirm the selection by shortly pressing the setting wheel The following subordinate menu items are available in the menu to be accessed by turning the wheel type for switching over the base station between the modes Heating and Cool ing deactivated when multi IO box is connected ...

Страница 49: ...essing the wheel 3 Confirm the start time of 00 00 o clock by shortly pressing the setting wheel E 4 Select the desired temperature for the starting time by turning pressing and confirm 5 Select and confirm the time indicated in the display by turning pressing the set ting wheel 6 Select the desired temperature for the set period by turning pressing and confirm 7 Repeat the process for the complet...

Страница 50: ...e setting wheel E and conform each 6 1 7 Offset temperature Since the temperature is measured at the room control unit Display it may be warm er or cooler in another position on the room This deviation is corrected using the offset temperature up to 3 5 C 1 Press and hold the setting wheel E in order to open the configuration menu 2 Select the symbol and confirm the selection by shortly pressing t...

Страница 51: ...IP Base station in standalone operation 1 Press and hold the setting wheel E in order to open the configuration menu 2 Select the symbol and confirm the selection by shortly pressing the setting wheel If the room control unit is taught in to more than one base stations select the desired base station with the setting wheel The device parameters UnP1 UnP2 and the channel parameters ChAn are avail a...

Страница 52: ...gs are transmitted to connected radiator thermostats as well as to the Alpha IP app and displayed there Temperature Turn the setting wheel to the right or to the left in order to change the temperature In automatic operation the set temperature remains until the next switch over point is reached After that the set heating profile will be re activated In manual operation the temperature remains unt...

Страница 53: ... will be active for 5 minutes On connection the Alpha IP app the Alpha IP Access Point offers many configuration options as e g Adaptation of the boost duration up to 30 minutes Activation or deactivation of the operating lock 8 Displays 8 1 Status displays Display Meaning Meaning flashes Humidity limit standard 60 in the room exceeded Ventilate room flash Humidity input activated at Multi IO Box ...

Страница 54: ...ation in green Process confirmed Proceed operation Short flashing in orange once every 10 sec Teach in mode active Enter the last four ci phers of the device serial number into the app 1 illumination in orange and 1 in green after in serting batteries Test indication Proceed after the LEDs are out 8 2 Error indications Display Meaning Solution Battery voltage low Change the batteries flashes Bad c...

Страница 55: ... Transmission error trans mission limit reached duty cycle Re send the com mand in case of exceeding the duty cycle after one hour at the latest Check the device for a defect e g me chanical blocking Eliminate radio inter ference 6 x long illumination in red Device defective Observe the indica tion in the app Have the device checked by a special ised dealer Replace the device ...

Страница 56: ...nterchangeable frame onto the mounting plate 5 Position the room control unit Display S onto the mounting plate and latch it into the clips 9 9 The display changes to the normal indication 9 9 The device is now ready to operate 10 Cleaning Clean the device with a soft clean dry and lint free cloth The cloth may be mois tened with lukewarm water for the removal of heavier contamination Use a sol ve...

Страница 57: ...for 4 seconds until the LED flashes rapidly in orange The display shows rES 4 Release the System key 5 Press the System key again for 4 seconds until the LED lights up in green 6 Release the System key again 9 9 The device restarts 9 9 The factory settings are reset 12 Decommissioning 1 Pull the room control unit Display S Floor Heating from the frame and the mount ing plate see fig 5 page 4 2 Rem...

Страница 58: ... whole nor in parts in any form neither me chanically nor electronically without the previous consent of the manufacturer 2017 13 Disposal Do not dispose of the device with domestic waste Electronic devices products must be disposed of according to the Directive for Waste Electrical and Electronic Equipment at the local collection points for waste electronic equipment ...

Страница 59: ...nctionnement 64 4 Vue d ensemble de l appareil 65 4 1 Caractéristiques techniques 66 5 Mise en service 67 5 1 Programmer l appareil 67 5 1 1 Programmation sans Alpha IP Access Point mode Standalone 67 5 1 2 Programmation sur l Alpha IP Access Point 68 5 2 Montage 69 5 2 1 Monter avec des bandes adhésives 69 5 2 2 Monter avec vis 70 5 2 3 Monter sur un boitier encastré 71 5 2 4 Monter en combinaiso...

Страница 60: ...eure 76 6 1 7 Température Offset 76 6 1 8 Sélection de l affichage de la température humidité de l air 77 6 1 9 Configuration de la station de base Alpha IP 77 6 1 10 Test de connexion 78 7 Utilisation 78 8 Affichage 79 8 1 Affichage des statuts 79 8 2 Affichage des erreurs 80 9 Remplacer la batterie 81 10 Nettoyage 82 11 Rétablir les réglages de l usine 82 12 Mise hors service 83 13 Élimination 8...

Страница 61: ...uel d utilisation avant d utiliser l appareil Le manuel d utilisation doit être conservé et transmis à l utilisateur suivant Ce manuel ainsi que les informations complémentaires du système Alpha IP actuels sont toujours disponibles sur www alphaip de Les informations système les fonctions et les étapes d utilisation du ma nuel de l Alpha IP Access Point HAP 2001 doivent être respectées 1 2 Pictogr...

Страница 62: ...prise gigogne de commutation à la communication sans fil sur le réseau Alpha IP Toute autre utilisation modification ou transformation est formellement interdite Une utilisation non conforme provoque des dangers pour lesquels le fabricant dé cline toute responsabilité et qui entrainent l expiration de la garantie Toutes les consignes de sécurité de ce manuel doivent être respectées afin d éviter l...

Страница 63: ...spect des consignes de sécurité Ces situations entrainent l expiration de la garantie Nous déclinons toute responsabilité pour les dommages consécutifs Utiliser l appareil uniquement s il est en parfait état technique Respecter les puissances seuil de l appareil et de ses conditions ambiantes Exploiter l appareil uniquement dans un environnement sec à l abri de la poussière Ne pas exposer l appare...

Страница 64: ...adiateur Alpha IP raccordé Les valeurs communiquées permettent de réguler la température am biante avec précision Le réglage manuel de la température de consigne s effectue avec la molette La communication avec d autres composants est réalisée par le biais du protocole radio Homematic HmIP La radio transmission est réalisée sur une voie non exclu sive Par conséquent il est impossible d exclure les...

Страница 65: ...ge au sol C Écran D Touche système touche de programmation et LED E Molette F Plaque de montage Température de consigne réelle Humidité de l air Avertissement risque de condensation Symbole fenêtre ouverte Symbole batterie Radio transmission Mode Boost Mode manuel Mode automatique Mode vacances Chauffage Refroidissement Verrouillage Température de consigne Date heure Offset Vue d ensemble de l écr...

Страница 66: ...atterie 2 ans type Type de protection IP20 Niveau d encrassement 2 température ambiante de 0 à 35 C Dimensions l x H x P Sans cadre 55 x 55 x 23 5 mm Avec cadre 86 x 86 x 25 mm Poids 100 g avec les piles Fréquence radio 868 3 MHz 869 525 MHz Catégorie de récepteur SRD category 2 Type Portée radio 250 m en champ libre Duty Cycle 1 par h 10 par h Mode de fonctionnement Type 1 Directives 2014 53 EU I...

Страница 67: ... guration s effectue sur l appareil et sur l application Alpha IP en cas de program mation sur l Access Point 5 1 1 Programmation sans Alpha IP Access Point mode Standalone Respecter une distance minimum de 50 cm entre les appareils lors de la programmation Le processus de programmation peut être interrompu en enfonçant briè vement une seconde fois la touche de programmation La LED rouge de l appa...

Страница 68: ...ouche système D pendant au moins 4 s pour activer le mode programmation 9 9 Le mode programmation s active automatiquement pendant 3 minutes 9 9 La LED de l appareil clignote en orange La LED s allume en vert une fois la programmation réussie Répéter l opé ration si la LED est rouge 5 1 2 Programmation sur l Alpha IP Access Point Pour la commande via l application Alpha IP la programmation du WTHP...

Страница 69: ...réussie Répéter l opé ration si la LED est rouge 7 Suivre les instructions de l application 5 2 Montage Parce que l appareil fonctionne avec des piles le lieu de montage peut être choisi librement Le montage peut être réalisé dans le cadre interchangeable fourni par vissage ou par collage de la plaque de montage Une intégration dans une série de commutateurs est également possible 5 2 1 Monter ave...

Страница 70: ...appuyer 5 2 2 Monter avec vis 1 Sélectionner une position de montage adaptée 2 S assurer qu aucun câble ne passe sur cette position 3 Retirer la plaque de montage de l appareil 4 Maintenir la plaque de montage en position de montage Veiller à ce que la flèche sur la face avant de la plaque de montage indique le haut 5 Disposer la plaque de montage à l horizontale 6 Marquer deux trous de perçage en...

Страница 71: ...Disposer la plaque de montage à l horizontale sur le boitier encastré 3 Monter la plaque de montage à l aide des vis fournies cf Q sur la fig 2 4 Poser le cadre interchangeable sur la plaque de montage 5 Poser l appareil sur la plaque de montage et l enclencher dans les clips 5 2 4 Monter en combinaison multiple L appareil peut être utilisé avec un cadre d autres fabricants ou être intégré dans un...

Страница 72: ... menus suivants apparaissent en tournant la molette et il suffit d appuyer sur la molette pour sélectionner 6 1 Menu de configuration Appuyer longuement sur la molette E pour ouvrir le menu de configuration Les symboles menus suivants apparaissent en tournant la molette et il suffit d appuyer sur la molette pour sélectionner Chapitre Affichage Signification 6 1 1 Mode automatique 6 1 2 Mode manuel...

Страница 73: ...valider en appuyant brièvement 6 1 2 Mode manuel Procéder comme suit pour l activation du mode manuel 1 Appuyer longuement sur la molette E pour ouvrir le menu de configuration 2 Sélectionner le symbole et valider en appuyant brièvement 3 Tourner la molette pour régler la température souhaitée 6 1 3 Mode vacances Le mode vacances peut être utilisé lorsqu une température précise doit être main tenu...

Страница 74: ...ctiver le verrouillage d utilisation 1 Appuyer longuement sur la molette E pour ouvrir le menu de configuration 2 Sélectionner le symbole et valider en appuyant brièvement 3 Sélectionner On en tournant pour activer le verrouillage ou OFF pour le désactiver Valider la sélection en appuyant brièvement 6 1 5 Programmation des profilés de chauffage Sous ce point de menu on peut effectuer des réglages ...

Страница 75: ... chauffage sé lectionné La programmation s effectue pour une période de 00 00 à 23 59 pour le jour sélectionné 1 Sans l option de menu Pr Ad tourner la molette E pour sélectionner le nu méro du profil souhaité et valider en appuyant brièvement 2 Sélectionner le jour de la semaine jour ouvré tous les jours en tournant la molette E et valider en appuyant brièvement 3 Valider l heure de démarrage 00 ...

Страница 76: ...rée pour des durées de chauffage définies 6 1 6 Régler la date et l heure 1 Appuyer longuement sur la molette E pour ouvrir le menu de configuration 2 Sélectionner le symbole et valider en appuyant brièvement 3 Régler et valider l année le mois le jour en tournant appuyant sur la molette E 6 1 7 Température Offset Dans la mesure où la température est mesurée sur le thermostat d ambiance à écran la...

Страница 77: ...l humidité actuelle de l air 6 1 9 Configuration de la station de base Alpha IP Ce menu permet de configurer la station de base Alpha IP en mode Standalone 1 Appuyer longuement sur la molette E pour ouvrir le menu de configuration 2 Sélectionner le symbole et valider en appuyant brièvement Si le thermostat d ambiance est programmé sur plus d une station de base sélectionner la station souhaitée av...

Страница 78: ...tion Alpha IP Température Tourner la molette vers la droite ou la gauche pour modifier la température En mode automatique la température réglée reste la même jusqu au prochain point de commutation Ensuite le profil de chauffage se réactive En mode manuel la température reste la même jusqu à la prochaine modification manuelle Mode manuel et mode automatique Enfoncer la molette pendant 3 se condes p...

Страница 79: ...age 8 1 Affichage des statuts Affichage Signification Signification clignote Seuil d humidité standard 60 dans la pièce dé passé Aérer la pièce clignotent L entrée humidité sur la Multi IO Box a été activée Aérer la pièce allumée Verrouillage actif Aucune utilisation possible Clignotement orange bref Radio transmission tentative d émission transfert de données Attendre la fin de la trans mission 1...

Страница 80: ...pareil sur l application Voyant 1 x orange et 1 x vert après l insertion des piles Affichage test Continuer lorsque les affi chages test s éteignent 8 2 Affichage des erreurs Affichage Signification Solution Tension piles faible Remplacer les piles clignote Connexion à l Alpha IP Access Point dé faillante Contrôler la connexion Voyant bref orange après le signal de réception Piles vides Remplacer ...

Страница 81: ...x Respecter l affichage de l appli cation Faire contrôler l appareil par un commerçant spécialisé Remplacer l appareil 9 Remplacer la batterie Le symbole indique une batterie faible sur l écran et l application Alpha IP Rem placer les piles par des nouvelles 1 Retirer l appareil du cadre et de la plaque de montage cf fig 5 page 4 2 Retirer les piles au dos 3 Insérer deux nouvelles piles de type LR...

Страница 82: ... en cas de rétablissement des réglages de l usine Alpha IP Access Point application 1 Veiller à ce que l appareil soit activé 2 Supprimer l appareil de l application Mode Standalone 1 Retirer l appareil du cadre et de la plaque de montage cf fig 5 page 4 2 Retirer les piles 3 Remettre les piles dans le compartiment dans le respect du marquage En même temps laisser la touche système enfoncée pendan...

Страница 83: ...s jeter l appareil dans les ordures ménagères Les appareils électro niques doivent être éliminés conformément à la directive relative aux appa reils électriques et électroniques usagés dans les centres de collecte locaux pour appareils électroniques Ce manuel d utilisation est protégé par la loi sur les droits d auteur Tous droits réservés Il ne doit pas être copié reproduit abrégé ou transféré so...

Страница 84: ...Veiligheidsinstructies 87 2 3 Conformiteit 88 3 Functie 88 4 Toesteloverzicht 89 4 1 Technische gegevens 90 5 Inbedrijfname 91 5 1 Toestel eigen maken 91 5 1 1 Eigen maken zonder Alpha IP Access Point Standalone bedrijf 92 5 1 2 Eigen maken aan Alpha IP Access Point 93 5 2 Montage 94 5 2 1 Met kleefbanden monteren 94 5 2 2 Met schroeven monteren 95 5 2 3 Op een inbouwstopcontact monteren 96 ...

Страница 85: ...grammering van de verwarmingsprofielen 100 6 1 6 Datum en uur instellen 102 6 1 7 Offset temperatuur 102 6 1 8 Selectie van de temperatuuraanduiding luchtvochtigheid 102 6 1 9 Configuratie van het Alpha IP Basisstation 103 6 1 10 Verbindingstest 104 7 Bediening 104 8 Aanduidingen 105 8 1 Statusaanduidingn 105 8 2 Foutaanduidingn 106 9 Accu s vervangen 108 10 Reinigen 108 11 Fabrieksinstellingen op...

Страница 86: ...grondig gelezen te worden De handlei ding dient bewaard en aan de volgende gebruiker verder gegeven te worden Deze handleiding alsook bijkomende Alpha IP systeeminformatie zijn steeds actueel onder www alphaip de te vinden Met systeeminformatie functies en bedieningsstappen uit de handleiding van het Alpha IP Access Point HAP 2001 dient rekening gehouden te worden 1 2 Symbol en Volgende symbolen w...

Страница 87: ...rverwarmingen FAL x10x1 xxN1 aangesloten Alpha IP verwarmingslichaamsthermostaten of elektrische verwarmingslicha men met schakelstopcontacten draadloze communicatie in het Alpha IP netwerk Elk ander gebruik wijzigingen en ombouwen zijn uitdrukkelijk verboden Een niet doelgericht gebruik leidt tot gevaren waarvoor de fabrikant geen aansprakelijkheid aanvaardt en tot uitsluiting van garantie en aan...

Страница 88: ...warmte instraling koude of mechanische belastingen Zich ervan verzekeren dat kinderen niet met het product of de verpakking spe len Eventueel toezicht houden op kinderen 2 3 Conformiteit Hiermee verklaart de fabrikant dat het toestel overeenstemt met de richtlijn 2014 53 EU De volledige tekst van de EU conformiteitsverklaring is beschikbaar onder het volgende Internetadres www alphaip de 3 Functie...

Страница 89: ... het Homematic HmIP zendprotocol De zendoverdracht wordt op een niet exclusieve overdrachtweg gerealiseerd waardoor storingen niet kunnen uitgesloten worden Storingsinvloe den kunnen bv uitgelokt worden door schakelingen elektromotoren of defecte elektrische toestellen De reikwijdte in gebouwen kan sterk afwijken van deze buiten openlucht 4 Toesteloverzicht Toesteloverzicht zie afb 1 pagina 3 A Wi...

Страница 90: ...odus Automatische bedrijfsmodus Vakantiemodus Verwarmen Koelen Bedieningsblokkering Streeftemperatuur Datum Uur Offset 4 1 Technische gegevens Korte benaming toestel WTHP 61001 xx Voedingsspanning 2x 1 5 V LR03 Micro AAA Stroomopname 50 mA max Levensduur accu 2 jaar typ Beschermingsklasse IP20 Vervuilingsgraad 2 Omgevingstemperatuur 0 tot 35 C Afmetingen B x H x D Zonder frames 55 x 55 x 23 5 mm ...

Страница 91: ... Opdat het kamerbedieningstoestel Display S vloerverwarming in het Alpha IP systeem geïntegreerd zou kunnen worden en met andere toestellen zou kunnen communiceren dient het eerst eigen gemaakt te worden Het eigen maken van het kamerbedieningstoestel Display S vloerverwarming gebeurt direct aan het Alpha IP Basisstation of in de verbinding met verwarmingslichaamsthermostaten aan het Alpha IP Acces...

Страница 92: ...odus auto matisch na 30 seconden beëindigd Zou het kamerbedieningstoestel Display S vloerverwarming aan het Alpha IP Basis station eigen gemaakt worden dienen de beide te koppelen toestellen in de eigen maken modus gebracht worden 1 Aan het Alpha IP Basisstation zie handleiding Alpha IP Basisstation het gewens te kanaal selecteren 2 Gedurende 4 seconden de systeemtoets van het Alpha IP Basisstatio...

Страница 93: ...pha IP App dient het eigen maken van de WTHP 61001 xx via het Access Point HAP 21001 te gebeuren Toestel als volgt eigen maken Ö Ö Het Alpha IP Access Point werd via de Alpha IP App afgesteld zie handleiding HAP 21001 1 De Alpha IP App op de smartphone openen 2 Het menupunt Toestel eigen maken selecteren 3 Het kamerbedieningstoestel Display S vloerverwarming uit het wisselframe trek ken zie afb 5 ...

Страница 94: ...oeven of opkleven van de mon tageplaat gebeuren Een integratie in een bestaande schakelaarserie is eveneens mogelijk 5 2 1 Met kleefbanden monteren Afhankelijk van de ondergrond kan de montage met de meegeleverde dubbelzijdige kleefbanden of met de meegeleverde schroeven gebeuren De montage is op ver schillende ondergronden zoals bv metselwerk meubelen tegels of glas mogelijk Ö Ö De inbedrijfname ...

Страница 95: ... deze positie geplaatst zijn 3 De montageplaat van het toestel losmaken 4 De montageplaat aan de montagepositie vasthouden Erop letten dat de pijl op de voorzijde van de montageplaat naar boven wijst 5 De montageplaat horizontaal uitrichten 6 Twee diagonaal tegenover elkaar liggende boorgaten aan de hand van de mon tageplaat markeren zie P in afb 2 7 Bij stenen wanden voorgemarkeerde gaten met een...

Страница 96: ...aat door middel van passende schroeven monteren zie Q in afb 2 4 Het wisselframe op de montageplaat plaatsen 5 Het toestel op de montageplaat plaatsen en in de haken klikken 5 2 4 In meervakscombinatie monteren Het toestel kan frames van andere fabrikanten gebruiken of in een meervaksframe geïntegreerd worden Bij de montage in meervakscombinaties de montageplaat van het toestel dicht naast de reed...

Страница 97: ...or draaien ter beschikking en worden door kortstondig drukken op het instelwiel geselecteerd 6 1 Configuratiemenu Door langdurig drukken op het instelwiel E wordt het configuratiemenu geopend Volgende symbolen menu s staan door draaien ter beschikking en worden door kortstondig drukken op het instelwiel geselecteerd Hoofdstuk Aanduiding Betekenis 6 1 1 Automatische bedrijfsmodus 6 1 2 Manuele bedr...

Страница 98: ...oor het activeren van de automatische bedrijfsmodus als volgt te werk gaan 1 Langdurig op het instelwiel E drukken om het configuratiemenu te openen 2 Het symbool selecteren en door kortstondig indrukken selectie beves tigen 6 1 2 Manuele bedrijfsmodus Voor het activeren van de manuele bedrijfsmodus als volgt te werk gaan 1 Langdurig op het instelwiel E drukken om het configuratiemenu te openen 2 ...

Страница 99: ...igen Aanduiding S toond de starttijd aanduiding E de eindtijd 4 Door draaien van het instelwiel de temperatuur instellen die gedurende de ge definieerde tijd aangehouden dient te worden en door kort drukken bevestigen 6 1 4 Bedieningsblokkering De bediening aan het toestel kan geblokkeerd worden om het ongewild veranderen van instellingen bv door toevallig aanraken te verhinderen Om de bedienings ...

Страница 100: ...i IO Box gedesactiveerd 1 Door draaien van het instelwiel E HEAT voor Verwarmen of COOL voor Koe len selecteren en selectie door drukken bevestigen Pr nr voor het selecteren van het weekprofielnummer nr 1 nr 2 nr 6 1 Door draaien het nummer van het gewenste profiel selecteren en door kort druk ken selectie bevestigen Pr Ad voor het individueel instellen van de weekprofielen nr 1 nr 2 nr 6 In weekp...

Страница 101: ... de nu ingestelde tijdsperiode door draaien drukken selecteren en bevestigen 7 Handeling voor de volledige tijdsperiode van 00 00 tot 23 59 uur herhalen Weekprofiel 1 3 Verwarmen 4 6 Koelen Bij een CO signaal wisselt het programma van verwarmen resp koelen au tomatisch naar het vogende schema 1 verwarmen naar 4 koelen 2 verwarmen naar 5 koelen 3 verwar men naar 6 koelen resp omgekeerd OSSF voor he...

Страница 102: ... kouder of warmer zijn Via de offset tem peratuur tot 3 5 C wordt de afwijking gecorrigeerd 1 Langdurig op het instelwiel E drukken om het configuratiemenu te openen 2 Het symbool selecteren en door kortstondig indrukken selectie beves tigen 3 Instelwiel draaien en gewenste offset max 3 5 C door kort drukken van het instelwiel bevestigen 6 1 8 Selectie van de temperatuuraanduiding luchtvochtigheid...

Страница 103: ...telwiel E drukken om het configuratiemenu te openen 2 Het symbool selecteren en door kortstondig indrukken selectie bevestigen Is het kamerbedieningstoestel aan meer dan één Basisstation eigen ge maakt met het instelwiel het gewenste Basisstation selecteren In het configuratiemenu voor het Alpha IP Basisstation staan toestelparameters UnP1 UnP2 en kanaalparamenters ChAn ter beschikking via dewelke...

Страница 104: ... de aangesloten radia torthermostaten alsook naar het Alpha IP App overgedragen en daar aangeduid Temperatuur Het instelwiel naar rechts of naar links draaien om de tempera tuur te wijzigen In de automatische bedrijfsmodus blijft de ingestelde tempera tuur tot het volgende schakeltijdstip ongewijzigd Daarna wordt het ingestelde verwarmingsprofiel opnieuw geactiveerd In de manuele bedrijfsmodus bli...

Страница 105: ... 5 minuten actief Het Alpha IP Access Point in verbinding met het Alpha IP App biedt bijko mende configuratiemogelijkheden zoals bijvoorbeeld Aanpassen van de Boost duur tot 30 min Activeren resp desactiveren van de bedieningsblokkering 8 Aanduidingen 8 1 Statusaanduidingn Aanduiding Betekenis Betekenis knippert Vochtigheidsgrens standaard 60 in de kamer over schreden Kamer verluchten knipperen Vo...

Страница 106: ... Proces bevestigd Met de bediening verder gaan Kortstondig oranje knip peren elke 10 s Eigen maken modus actief De laatste vier cijfers van het serienummer van het toestel in het App invoeren 1x oranje en 1x groen oplichten na het plaat sen van de accu s Testaanduiding Wanneer testaanduidingen verdwijnen verder gaan 8 2 Foutaanduidingn Aanduiding Betekenis Oplossing Accuspanning laag Accu s vervan...

Страница 107: ...g rood op lichten Overdrachtfout zendlimiet bereikt Duty Cycle Het commando opnieuw zenden bij Duty Cy cle overschrijding na uiter lijk één uur Toestel testen op een defect bv mechanische blokkade Zendstoringen verhelpen 6x langdurig rood knip peren Toestel defect Letten op de aanduidingen in het App Het toestel door een vak man laten testen Het toestel vervangen ...

Страница 108: ...3 Micro AAA overeenkomstig de marke ring plaatsen 4 Het wisselframe op de montageplaat plaatsen 5 Het kamerbedieningstoestel Display S vloerverwarming op de montageplaat plaatsen en in de haken inklikken 9 9 Het display wisselt naar normale aanduiding 9 9 Het toestel is werkensklaar 10 Reinigen Het toestel met een zacht zuiver droog en pluisvrij doek reinigen Voor de ver wijdering van sterkere ver...

Страница 109: ... de markering opnieuw in het accuvak plaatsen Ge lijktijdig de systeemtoets gedurende 4 seconden ingedrukt houden tot de LED snel oranje knippert In het display wordt rES aangegeven 4 De systeemtoets loslaten 5 De systeemtoets nogmaals gedurende 4 seconden indrukken tot de LED groen oplicht 6 De systeemtoets opnieuw loslaten 9 9 Het toestel voert een herstart uit 9 9 De werkinstellingen zijn opnie...

Страница 110: ...ktronische oude toestellen via de plaatselijke inzamelplaatsen voor elektronische oude toe stellen als afval verwerkt te worden Dit handboek is auteursrechterlijk beschermd Alle rechten voorbehouden Het mag noch volledig noch gedeeltelijk gekopieerd gereproduceerd ingekort of onder eender welke andere vorm doorgegeven worden zowel mechanisch als elektronisch zonder vooraf gaand akkoord van de fabr...

Страница 111: ...116 4 Panoramica dell apparecchio 117 4 1 Caratteristiche tecniche 118 5 Messa in servizio 119 5 1 Apprendimento dell apparecchio 119 5 1 1 Apprendimento senza Alpha IP Access Point funzionamento standalone 119 5 1 2 Apprendimento sull Alpha IP Access Point 120 5 2 Montaggio 121 5 2 1 Montaggio con nastro adesivo 122 5 2 2 Montaggio con viti 122 5 2 3 Montaggio su una presa a incasso 123 5 2 4 Mon...

Страница 112: ...la data e l ora 130 6 1 7 Temperatura di offset 130 6 1 8 Selezione della visualizzazione della temperatura umidità dell a ria 130 6 1 9 Configurazione della stazione di base Alpha IP 131 6 1 10 Prova di collegamento 132 7 Uso 132 8 Visualizzazioni 134 8 1 Indicazioni di stato 134 8 2 Indicazioni di errore 135 9 Sostituire le batterie 136 10 Pulizia 137 11 Ripristino delle impostazioni di fabbrica...

Страница 113: ...ssario aver letto in maniera accurata e com pleta le presenti istruzioni Le istruzioni devono essere conservate e consegnate all utilizzatore successivo Le presenti istruzioni nonché ulteriori informazioni di sistema relative all ap parecchio Alpha IP sono sempre disponibili nella versione di volta in volta aggiornata sul sito www alphaip de Devono essere osservati le informazioni di sistema le fu...

Страница 114: ...ella temperatura desiderata temperatura comfort individuale regolazione della temperatura effettiva attraverso il comando della stazione di base Alpha IP per la regolazione dei riscaldamenti a pavimento FAL x10x1 xxN1 dei termostati per corpi caloriferi Alpha IP o caloriferi elettrici con presa di corrente a interruttore collegati la comunicazione senza fili all interno della rete Alpha IP Qualsia...

Страница 115: ...nseguenti L apparecchio deve essere utilizzato solo se in condizioni tecnicamente perfette Rispettare i limiti di potenza e le condizioni ambientali dell apparecchio Utilizzare l apparecchio solo se asciutto e privo di polvere Non esporre l apparecchio a umidità vibrazioni alla costante irradiazione sola re o ad altre fonti di calore al freddo o a sollecitazioni meccaniche Assicurarsi che nessun b...

Страница 116: ...ostati per corpi caloriferi Alpha collegati Sulla base dei valori rilevati è possibile regolare in maniera esatta la temperatura ambientale L impostazione manuale della temperatura teorica avviene tramite la rotella di regolazione La comunicazione con altri componenti avviene tramite il protocollo radio Homema tic HmIP La trasmissione via radio viene effettuata tramite una via di trasmissione non ...

Страница 117: ...y D Tasti di sistema tasto di apprendimento e LED E Rotella di regolazione F Piastra di montaggio Temperatura desiderata ef fettiva Umidità dell aria Avviso di formazione di ru giada Simbolo finestra aperta Simbolo della batteria Trasmissione radio Modo boost Funzionamento manuale Funzionamento automatico Modo vacanza Riscaldamento Raffreddamento Blocco del funzionamento Temperatura desiderata Dat...

Страница 118: ...a in servizio delle batterie 2 anni di norma Tipo di protezione IP20 Grado di impurità 2 Temperatura ambientale Da 0 a 35 C Dimensioni W x H x D Senza telaio 55 x 55 x 23 5 mm Con telaio 86 x 86 x 25 mm Peso 100 g incl batterie Frequenza radio 868 3 MHz 869 525 MHz Categoria ricevitore SRD category 2 Portata normale 250 m all aperto Duty Cycle 1 per h 10 per h Modo di funzionamento Tipo 1 Direttiv...

Страница 119: ...ermostati per corpi caloriferi collega ti sull Alpha IP Access Point In caso di apprendimento diretto la configurazione avviene sull apparecchio mentre in caso di apprendimento dell Access Point essa avviene tramite la app Alpha IP 5 1 1 Apprendimento senza Alpha IP Access Point funzionamento standalone Durante l apprendimento mantenere una distanza minima di 50 cm tra gli apparecchi Il processo d...

Страница 120: ...unità di controllo ambientale Display S per riscaldamento a pavimento dal telaio rimovibile cfr fig 5 pagina 4 4 Estrarre il nastro isolante dal vano batterie o inserire le batterie Se le bat terie sono già inserite premere il tasto di sistema D per almeno 4 s per attivare il modo di apprendimento 9 9 Il modo di apprendimento viene automaticamente attivato per 3 minuti 9 9 Il LED dell apparecchio ...

Страница 121: ...tivare la mo dalità di apprendimento 5 L apparecchio appare automaticamente nell app Alpha IP 6 Per la conferma inserire le ultime quattro cifre del numero dell apparecchio SGTIN o scansionare il vicino QR fornito Il numero dell apparecchio si trova sotto il co dice QR ovvero nel vano batterie Una volta eseguita con successo la procedura di apprendimento il LED si accende in verde Se il LED si acc...

Страница 122: ...so di montaggio con nastro adesivo il substrato del luogo di montag gio deve essere liscio in piano integro pulito e privo di grassi e solventi 2 Rimuovere la pellicola di protezione da un lato del nastro adesivo 3 Fissare il nastro adesivo sul tergo della piastra di montaggio nelle apposite ca vità cfr fig 4 pagina 4 4 Rimuovere la pellicola di protezione dall altro lato del nastro adesivo 5 Orie...

Страница 123: ...in legno le viti possono essere inserite direttamente Fora re con una punta per legno da 1 5 mm potrà facilitare l avvitamento 8 Inserire i tasselli nei fori 9 Montare la piastra di montaggio utilizzando le viti fornite cfr fig 3 pagina 4 10 Applicare il telaio rimovibile sulla piastra di montaggio 11 Applicare l apparecchio sulla piastra di montaggio e innestare nei morsetti 5 2 3 Montaggio su un...

Страница 124: ...accanto alle piastre di montaggio anelli portanti già fissate i e orientarla in tale posizione L apparecchio può essere utilizzato in combinazione con i telai dei seguenti produttori Produttore Telaio Berker S 1 B 1 B 3 B 7 Glas ELSO Joy GIRA System 55 Standard 55 E2 E22 Event Esprit merten 1 M Atelier M M Smart M Arc M Star M Plan JUNG A 500 AS 500 A plus A creation 6 Modi di funzionamento e conf...

Страница 125: ...ramite una breve pressione della rotella stessa Capitolo Simbolo visualizzato Significato 6 1 1 Funzionamento automatico 6 1 2 Funzionamento manuale 6 1 3 Modo vacanza 6 1 4 Blocco del funzionamento 6 1 5 Programmazione dei profili di riscaldamento 6 1 6 Data e ora 6 1 7 Temperatura di offset 6 1 8 Selezione della visualizzazione della temperatura umidità dell aria 6 1 9 Configurazione della stazi...

Страница 126: ... 2 Selezionare il simbolo e confermare la scelta con una breve pressione 3 Ruotare la rotella di regolazione per impostare la temperatura desiderata 6 1 3 Modo vacanza Il modo vacanza può essere utilizzato qualora si desideri mantenere una temperatura fissa per un determinato periodo di tempo p es durante una vacanza o una festa Per attivare il modo vacanza procedere come segue 1 Premere la rotell...

Страница 127: ...blocco del funzionamento procedere come segue 1 Premere la rotella di regolazione E in maniera prolungata per aprire il menu di configurazione 2 Selezionare il simbolo e confermare la scelta con una breve pressione 3 Ruotando la rotella selezionare On per attivare il blocco del funzionamento o Off per disattivarlo Confermare la selezione con una breve pressione 6 1 5 Programmazione dei profili di ...

Страница 128: ...re ruotando il numero del profilo desiderato e confermare la selezione con una breve pressione Pr Ad per la regolazione individuale dei profili settimanali n 1 n 2 n 6 Nel profilo settimanale è possibile impostare fino a 6 fasi di riscaldamento 13 orari di commutazione per il profilo di riscaldamento selezionato il tutto per ogni giorno della settimana La programmazione per i giorni selezionati av...

Страница 129: ... e confermarla con una pressione 7 Ripetere la procedura fino a coprire l intero periodo dalle ore 0 00 alle ore 23 59 Profilo settimanale 1 3 Riscaldamento 4 6 Raffreddamento con un segnale CO il programma passa da riscaldamento a raffreddamento in maniera automatica secondo il seguente schema 1 riscaldamento a 4 raffreddamento 2 riscaldamento a 5 raffredda mento 3 riscaldamento a 6 raffreddament...

Страница 130: ... punto della stanza potrà essere più freddo o più caldo La diffe renza può essere corretta per mezzo della temperatura di offset fino a 3 5 C 1 Premere la rotella di regolazione E in maniera prolungata per aprire il menu di configurazione 2 Selezionare il simbolo e confermare la scelta con una breve pressione 3 Ruotare la rotella di regolazione per selezionare la temperatura di offset desi derata ...

Страница 131: ...nto standalone 1 Premere la rotella di regolazione E in maniera prolungata per aprire il menu di configurazione 2 Selezionare il simbolo e confermare la scelta con una breve pressione Se l apprendimento dell unità di controllo ambientale è stato effettuato con più di una stazione di base selezionare con la rotella di regolazione la sta zione di base desiderata Nel menu di configurazione della staz...

Страница 132: ...azione 2 Selezionare il simbolo e confermare la scelta con una breve pressione 7 Uso Tramite la rotella di regolazione cfr lettera E nella fig 1 è possibile impostare le varie funzioni dell unità di controllo ambientale Le impostazioni vengono trasmes se ai termostati per corpi caloriferi associati e all app Alpha IP e qui visualizzate Temperatura ruotare la rotella di regolazione verso destra o v...

Страница 133: ...io oppure tramite l app e viene mantenuta fino alla successiva modifica manuale Funzione boost in caso di utilizzo con termostati per corpi caloriferi Premere brevemente la rotella di regolazione per attivare la funzione boost che consente un riscaldamento breve e rapido La funzione boost rimane attiva per 5 minuti L Alpha IP Access Point in combinazione con l app Alpha IP offre ulteriori possibil...

Страница 134: ...su perata Aerare l ambiente lampeggiano L ingresso di umidi tà sul Multi IO Box è stato attivato Aerare l ambiente si accende Blocco del funziona mento attivo Nessun utilizzo possibile Breve lampeggiamento in arancione Trasmissione radio tentativo di invio trasmissione dati Attendere fino al termine del la trasmissione 1x accensione lunga in verde Procedura confer mata Proseguire con l uso ...

Страница 135: ... lunga in arancione e 1x in verde dopo l inserimento delle batterie Indicazione di prova Una volta terminata l indica zione di prova proseguire 8 2 Indicazioni di errore Simbolo visualizzato Significato Soluzione Bassa tensione delle batterie Sostituire le batterie lampeggia Collegamento all Al pha IP Access Point non riuscito Verificare il collegamento Breve accensione in arancione dopo il mes sa...

Страница 136: ...i nell apparecchio ad es blocchi meccanici Eliminare i disturbi radio 6x lampeggiamenti lun ghi in rosso Apparecchio difet toso Attenersi a quanto indicato sull app Far controllare l apparec chio da un rivenditore spe cializzato Sostituire l apparecchio 9 Sostituire le batterie Il simbolo segnala sul display e sull app Alpha IP una tensione bassa delle bat terie Sostituire le vecchie batterie 1 Es...

Страница 137: ...o asciutto e non sfilacciato Per la rimozione di sporco ostinato è possibile bagnare leggermente il panno con acqua tiepida Per la pulizia utilizzare un detergente privo di solventi 11 Ripristino delle impostazioni di fabbrica Ripristinando le impostazioni di fabbrica tutte le regolazioni eseguite vanno perse Alpha IP Access Point App 1 Assicurarsi che l apparecchio sia attivato 2 Cancellare l app...

Страница 138: ...asto di sistema per 4 secondi fino a che il LED si ac cende in verde 6 Rilasciare nuovamente il tasto di sistema 9 9 L apparecchio si riavvia 9 9 Le impostazioni di fabbrica sono state ripristinate 12 Messa fuori servizio 1 Estrarre l apparecchio dal telaio e dalla piastra di montaggio cfr fig 5 pagina 4 2 Estrarre le batterie sul tergo 3 Smontare l apparecchio e smaltirlo secondo le disposizioni ...

Страница 139: ...Conformidad 143 3 Función 144 4 Vista general del dispositivo 145 4 1 Datos técnicos 146 5 Puesta en marcha 147 5 1 Programación del dispositivo 147 5 1 1 Programación sin Alpha IP Access Point modo independiente 147 5 1 2 Programación en Alpha IP Access Point 148 5 2 Montaje 149 5 2 1 Montaje con cinta adhesiva 150 5 2 2 Montaje con tornillos 150 5 2 3 Montaje en un cajetín empotrado 151 5 2 4 Mo...

Страница 140: ...lefacción 155 6 1 6 Configuración de fecha y hora 157 6 1 7 Temperatura Offset 157 6 1 8 Selección de la indicación de temperatura humedad del aire158 6 1 9 Configuración de la estación base Alpha IP 158 6 1 10 Prueba de conexión 159 7 Manejo 159 8 Indicaciones 161 8 1 Indicaciones de estado 161 8 2 Indicaciones de error 162 9 Cambio de baterías 163 10 Limpieza 164 11 Restablecer los ajustes de fá...

Страница 141: ...etenimiento antes de trabajar con el dispositivo Conserve el manual y en tréguelo al siguiente usuario Este manual así como la información adicional del sistema Alpha IP están siempre disponibles en su versión actualizada en www alphaip de Deben tenerse en cuenta tanto la información del sistema como las fun ciones y las indicaciones de funcionamiento del manual del Alpha IP Access Point HAP 2001 ...

Страница 142: ... la temperatura deseada temperatura de confort La regulación de la temperatura real mediante el control de la estación base Alpha IP para la regulación de calefacciones por suelo FAL x10x1 xxN1 o ter mostatos de radiador Alpha IP conectados o radiadores eléctricos con enchufe con interruptor la comunicación inalámbrica en la red de Alpha IP Cualquier otra utilización alteraciones o modificaciones ...

Страница 143: ...ositivo exclusivamente en perfecto estado técnico Respetar los límites de rendimiento del dispositivo y las condiciones ambienta les Utilizar el dispositivo únicamente en ambientes secos y libres de polvo No exponer el dispositivo a la influencia de la humedad vibraciones constante luz solar u otras fuentes de calor frío o estrés mecánico Debe asegurarse de que los niños no jueguen con el producto...

Страница 144: ...or Alpha IP conectados Mediante los valores determinados es posible controlar de forma precisa la temperatura ambiente El ajuste manual de la temperatura deseada se efectúa por medio de la rueda de selección La comunicación con otros componentes tiene lugar a través del protocolo de ra diofrecuencias Homematic HmIP La transmisión por radio se realiza por una vía de transmisión no exclusiva por lo ...

Страница 145: ...ión por suelo C Display D Tecla del sistema tecla de programación y LED E Rueda de selección F Placa de montaje Temperatura deseada real Humedad del aire Advertencia de condensación Símbolo de ventana abierta Símbolo de la batería Radiotransmisión Modo Boost Modo manual Modo automático Modo vacaciones Calefacción Refrigeración Bloqueo de funcionamiento Temperatura deseada Fecha hora Offset Vista g...

Страница 146: ...años típicamente Tipo de protección IP20 Grado de contaminación 2 Temperatura ambiente 0 hasta 35 C Dimensiones An x Al x Pr Sin marco 55 x 55 x 23 5 mm Con marco 86 x 86 x 25 mm Peso 100 g incl baterías Frecuencia de radio 868 3 MHz 869 525 MHz Categoría del receptor SRD category 2 Tipo Alcance de radio 250 m a campo abierto Duty Cycle 1 por h 10 por h Modo de operación Tipo 1 Directivas 2014 53 ...

Страница 147: ...on termostatos de radiador en el Alpha IP Access Point Para la programación directa la configuración se produce en el dispositivo la programación en el Access Point se produce a través de la aplicación Alpha IP 5 1 1 Programación sin Alpha IP Access Point modo independiente Durante la programación mantener una distancia mínima de 50 cm entre los dispositivos El proceso de programación puede cancel...

Страница 148: ...iental Display S Calefacción por suelo del marco intercambiable véase 5 página 4 4 Extraer la cinta de aislamiento del compartimento de la batería o introducir las baterías En el caso de que las baterías ya estén insertadas pulsar la tecla del sis tema D durante al menos 4 s para activar el modo de programación 9 9 El modo de programación se activa automáticamente durante 3 minutos 9 9 El LED del ...

Страница 149: ... D para activar el modo de programación 5 El dispositivo aparece automáticamente en la aplicación Alpha IP 6 Para confirmar introducir los últimos cuatro dígitos del número de serie del dis positivo SGTIN o escanear el código QR adjunto El número de serie del dispo sitivo se encuentra debajo del código QR o en el compartimento de la batería Una vez completado con éxito el proceso de programación e...

Страница 150: ... adecuada En caso de montaje con la cinta adhesiva la superficie del lugar de mon taje debe ser lisa plana estar en buen estado limpia así como libre de grasas y disolventes 2 Retirar la lámina protectora de uno de los lados de la cinta adhesiva 3 Fijar la cinta adhesiva en los huecos previstos de la parte posterior de la placa de montaje véase 4 página 4 4 Retirar la lámina protectora del otro la...

Страница 151: ... de madera los tornillos pueden atornillarse directamente Un taladro con una broca para madera de 1 5 mm puede facilitar la inserción de los tornillos 8 Insertar los tacos en los orificios 9 Fijar la placa de montaje con los tornillos suministrados véase 3 página 4 10 Colocar el marco intercambiable en la placa de montaje 11 Colocar el dispositivo en la placa de montaje y encajar en las pinzas 5 2...

Страница 152: ... combinaciones alinear y fijar la placa de montaje del dispositivo enrasado con las placas de montaje o soportes instala dos El dispositivo es apto para los marcos de los siguientes fabricantes Fabricantes Marcos Berker S 1 B 1 B 3 B 7 vidrio ELSO Joy GIRA System 55 Standard 55 E2 E22 Event Esprit merten 1 M Atelier M M Smart M Arc M Star M Plan JUNG A 500 AS 500 A plus A creation 6 Modo de funcio...

Страница 153: ...nificado 6 1 1 Modo automático 6 1 2 Modo manual 6 1 3 Modo vacaciones 6 1 4 Bloqueo de funcionamiento 6 1 5 Programación de los perfiles de calefacción 6 1 6 Fecha y hora 6 1 7 Temperatura Offset 6 1 8 Selección de la indicación de temperatura humedad del aire 6 1 9 Configuración de la estación base 6 1 10 Prueba de conexión solo puede seleccionarse en modo independiente 6 1 1 Modo automático Par...

Страница 154: ...ebe mantenerse una temperatura fija durante un periodo de tiempo determinado p ej durante las vacaciones o una fiesta Para la activación del modo vacaciones se procede de la siguiente manera 1 Pulsar la rueda de selección E hasta que se abra el menú de configuración 2 Seleccionar el símbolo y confirmar mediante una breve pulsación 3 Ajustar la hora de Inicio Fin y la fecha girando la rueda de sele...

Страница 155: ...sactivarlo Confirmar la selección mediante una breve pulsación 6 1 5 Programación de los perfiles de calefacción En esta opción del menú se efectúan los ajustes para los perfiles de calefacción o refrigeración y los perfiles semanales de acuerdo a sus necesidades 1 Pulsar la rueda de selección E hasta que se abra el menú de configuración 2 Seleccionar el símbolo y confirmar mediante una breve puls...

Страница 156: ...Seleccionar el número del perfil deseado en el punto del menú Pr Ad girando la rueda de selección E y confirmar la selección mediante una breve pulsación 2 Seleccionar día de la semana días laborables fin de semana o todos los días girando la rueda de selección E y confirmar la selección mediante una breve pulsación 3 Confirmar la hora de inicio 00 00 mediante una breve pulsación de la rueda de se...

Страница 157: ... cuándo debe comenzar con la calefacción refrigeración con el fin de proporcionar exactamente la temperatura establecida en los periodos de tiempo definidos 6 1 6 Configuración de fecha y hora 1 Pulsar la rueda de selección E hasta que se abra el menú de configuración 2 Seleccionar el símbolo y confirmar mediante una breve pulsación 3 Ajustar el año mes día y hora girando y pulsando respectivament...

Страница 158: ...r la rueda de selección E hasta que se abra el menú de configuración 2 Seleccionar el símbolo y confirmar mediante una breve pulsación ACT para mostrar la temperatura real valor por defecto o SEt para mostrar la temperatura deseada o ACtH para mostrar la temperatura real y la humedad del aire actual 6 1 9 Configuración de la estación base Alpha IP Desde este menú se configura la estación base Alph...

Страница 159: ... de conexión Durante esta prueba el dispositivo de control ambiental Display transmite una orden de conmutación a la estación base Dependiendo del estado de conmutación en el que se encuentre la zona de calentamiento asignada esta confirmará la recepción de la orden activándose o desactivándose 1 Pulsar la rueda de selección E hasta que se abra el menú de configuración 2 Seleccionar el símbolo y c...

Страница 160: ...al y automático En el modo automático está activo el perfil de calefacción establecido en la aplica ción Alpha IP En el modo manual la temperatura puede ajustarse en el dispo sitivo o a través de la aplicación y se mantiene hasta la siguiente modificación manual Función Boost para el uso con termostatos de radiador Pulsar brevemen te la rueda de selección con el fin de activar la función Boost par...

Страница 161: ...entilar habitación parpadean Se ha activado la entrada de hume dad en Multi IO Box Ventilar habitación iluminado Bloqueo de funcio namiento activado No es posible operar el dis positivo Breve parpadeo naranja Radiotransmisión intento de trans misión transmisión de datos Esperar hasta que la transmi sión se haya completado 1x iluminación verde larga Proceso confirmado Continuar con el manejo ...

Страница 162: ...en la aplica ción 1x iluminación naranja y 1x iluminación verde tras la inserción de las baterías Indicación de prueba Continuar una vez apagada la indicación de prueba 8 2 Indicaciones de error Indicación Significado Solución Batería baja Cambiar las baterías parpadea Fallo de conexión con Alpha IP Access Point Comprobar la conexión Breve iluminación na ranja tras aviso de re cepción Baterías ago...

Страница 163: ... p ej bloqueo mecánico Eliminar las interferencias de radiofrecuencia 6x parpadeo rojo largo Dispositivo defec tuoso Prestar atención a la indi cación de la aplicación Hacer revisar el dispositivo por un especialista Reemplazar el dispositivo 9 Cambio de baterías La señal en el display y en la aplicación Alpha IP indica que las baterías están bajas Reemplazar las baterías por otras nuevas 1 Extrae...

Страница 164: ...o seco y sin pelusas Para eliminar la suciedad más resistente se puede utilizar un paño ligeramente humedecido con agua tibia Utilizar un detergente libre de disolventes 11 Restablecer los ajustes de fábrica Al restablecer los ajustes de fábrica se perderán todos los ajustes efectuados Aplicación Alpha IP Access Point aplicación 1 Asegurar que el dispositivo esté activado 2 Borrar el dispositivo d...

Страница 165: ...inicia 9 9 Se han restablecido los ajustes de fábrica 12 Puesta fuera de servicio 1 Extraer el dispositivo del marco y de la placa de montaje véase 5 página 4 2 Extraer las baterías de la parte posterior 3 Desmontar el dispositivo y eliminarlo de la forma apropiada 13 Eliminación No eliminar el dispositivo con los residuos domésticos Los dispositivos elec trónicos deben eliminarse de conformidad c...

Страница 166: ... protegido por derechos de autor Todos los derechos reservados Está prohibida su copia reproducción resumen o cualquier forma de transmisión en su to talidad o en parte ya sea en forma mecánica o electrónica sin autorización previa por parte del fabricante 2017 ...

Страница 167: ......

Страница 168: ...133960 1740 ...

Отзывы: