


GS1380 Technical Manual
Page 20
Installing GigE Viewer for Testing
o
The latest Viewer software can be downloaded from
http://www.alliedvisiontec.com/us/support.html
.
o
Run the GigE Viewer Installer.exe. This will install the Prosilica GS Digital Camera drivers as
well as the AVT GigE Viewer application program.
o
Plug in the Prosilica GS camera via the Gigabit Ethernet port. Plug in the power connection.
Verify that the Status LED 2 is a solid green. Run the AVT GigE Viewer Application. It will take a
few seconds for the camera to be recognized. If the camera does not appear in the Viewer list
after approximately 10 seconds then try disconnecting and reconnecting the power. If it still
does not appear restart the viewer. If it still does not appear, see the Trouble Shooting section
of this document.
o
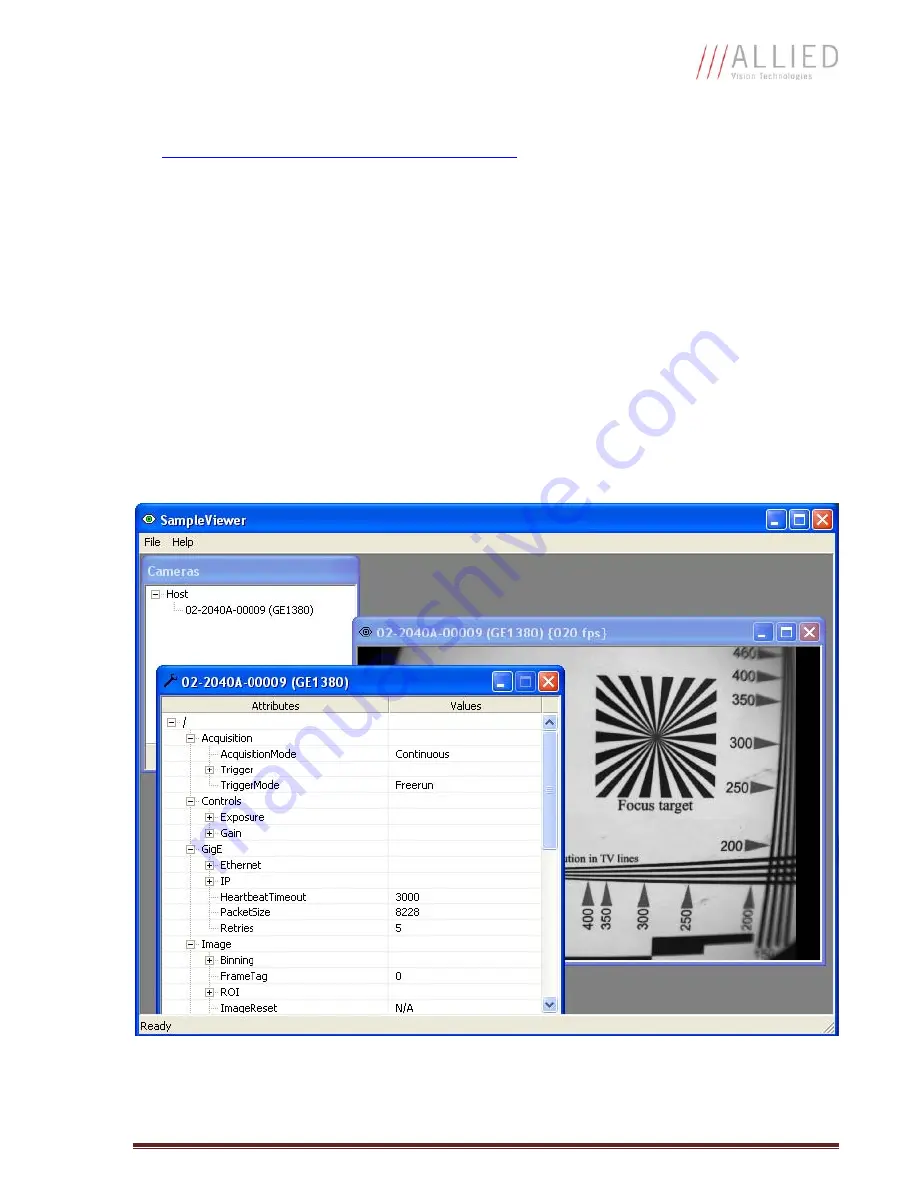
See Figure 7. Select the
wrench
icon to change camera settings. Change the PacketSize to a
value of 1500. Select the
eye
icon to image. The camera should now be imaging. If the
camera is not imaging, see the Trouble Shooting section of this document. Note that the
PacketSize can be set to 8228 if the network card has been optimized to support jumbo frames.
o
See the System Optimization Section to maximize the performance of your system.
Figure 7. GigE Viewer application window.