AT-SBx908 GEN2 Installation Guide for Virtual Chassis Stacking
133
Connecting Bare
DC Power Wires
To attach bare lead wires to the positive and negative terminals on the
power supply, perform the following procedure:
1. Prepare adequate lengths of two solid or stranded 8 AWG DC power
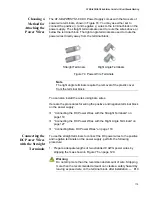
wires by stripping them as shown in Figure 89.
Figure 89. Stripping Solid or Stranded DC Power Wires
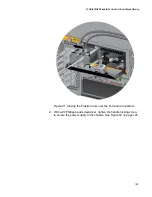
2. Use a #1 Phillips-head screwdriver to loosen the two screws on the
plastic cover over the positive and negative terminals on the power
supply and slide the cover to the right, as shown in Figure 77 on page
121. You may need to lift the locking handle slightly to access the
bottom screw.
3. Use a #3 Phillips-head screwdriver to remove the two screws from the
positive and negative terminals, as shown in Figure 78 on page 122.
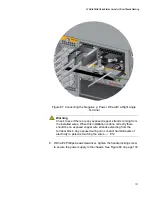
4. Wrap the positive lead wire clockwise around one of the terminal
screws and secure the screw and wire to the positive terminal
connection on the terminal block with a #3 Phillips-head screwdriver.
The positive terminal is on the left.
You may attach the wire to the terminal so that it extends either above
or below the terminal block. Figure 90 on page 134 shows the wire
above the terminal block. Allied Telesis recommends tightening the
screw to 30 to 40 inch-lbs.
Содержание AT-FAN08
Страница 10: ...Figures 10...
Страница 12: ...Tables 12...
Страница 16: ...Preface 16...
Страница 38: ...Chapter 1 Overview 38...
Страница 60: ...Chapter 2 Virtual Chassis Stacking 60...
Страница 80: ...Chapter 4 Installing the Chassis 80 Figure 32 Chassis Orientations in the Equipment Rack Continued...
Страница 82: ...Chapter 4 Installing the Chassis 82 Figure 34 Example of Adjusting the Equipment Rack Brackets...
Страница 104: ...Chapter 4 Installing the Chassis 104...
Страница 140: ...Chapter 5 Powering On the Chassis 140...
Страница 166: ...Chapter 7 Cabling the AT XEM2 Line Card Ports 166...
Страница 214: ...Appendix A Technical Specifications 214...

