F016J11384-A
12
en
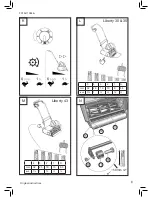
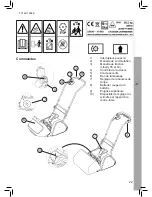
Cable clips
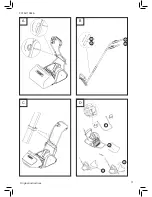
(C) Ensure that the cable clips supplied are used to fix the cables to the handle.
Grass box
(D) (Liberty 30 & 35 models) Squeeze the ends of the grass box cradle together and insert
the pins into the pivot hole on the lawnmower. With the cradle in its lowest position hook the
front of the grass box into the cradle so it fits securely.
(E) (Liberty 43) Insert the fixed pin on the grass box cradle into the pivot hole on the
lawnmower. Pull back the plunger on the grass box cradle, then release it so the pin
engages in the opposite pivot hole. With the cradle in its lowest position place the grass box
over the cradle so it fits securely.
Batteries & Charging
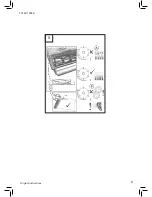
Checking battery capacity
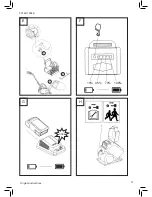
Please refer to illustration (F).
Press the battery capacity indicator button. The lights will illuminate according to the
batteries capacity level. See table below:
Charging the battery
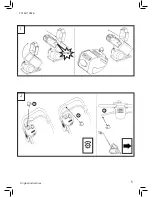
Please refer to illustration (G) and (I).
NOTE: The battery is not shipped fully charged. It is recommended to fully charge before
use to ensure that maximum run time can be achieved. This lithium-ion battery will not
develop a memory and may be charged at any time. In normal conditions a 4Ah battery can
be fully charged in 105-120 minutes. To charge a battery proceed as follows:
1.
Plug the charger into a Mains AC power outlet.
2.
Insert the battery into the charger until it CLICKS into place.
3.
When the battery is fully charged, the green LED will illuminate, unplug the charger,
press the battery release button to remove it from the charger.
The charger used is a diagnostic charger. The Charger LED Lights will illuminate in a
specific order to communicate the current battery status. They are as follows:
Lights
Capacity
4 Green Lights
The battery is at full capacity
3 Green Lights
The battery is at 70% capacity
2 Green Lights
The battery is at 45% capacity
1 Green Light
The battery is at 10% capacity
The lights go out
The battery is under capacity
and requires charging immediately
Original instructions


