©
Allen Products Company Incorporated, Signal Hill, CA 90755 USA (562) 424-1100 REV.01 04/28/09
Figure 2
Figure 3
Figure 4
Figure 5
Figure 1
Figure 6
Figure 7
Figure 8
Figure 9
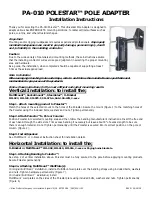
For triple MultiMount
™
installation, install MultiMount
™
wall plates on each side of the
Polestar and in the center over the banding straps using included bolts, washers and nuts. Tighten permanently (Figure
6).
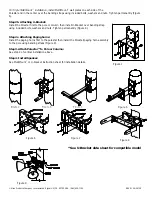
Step 2b. Attaching U-Bracket:
Install the Polestar first to the pole or column then install U-Bracket over banding strap
using included bolts, washers and nuts. Tighten permanently (Figure 8).
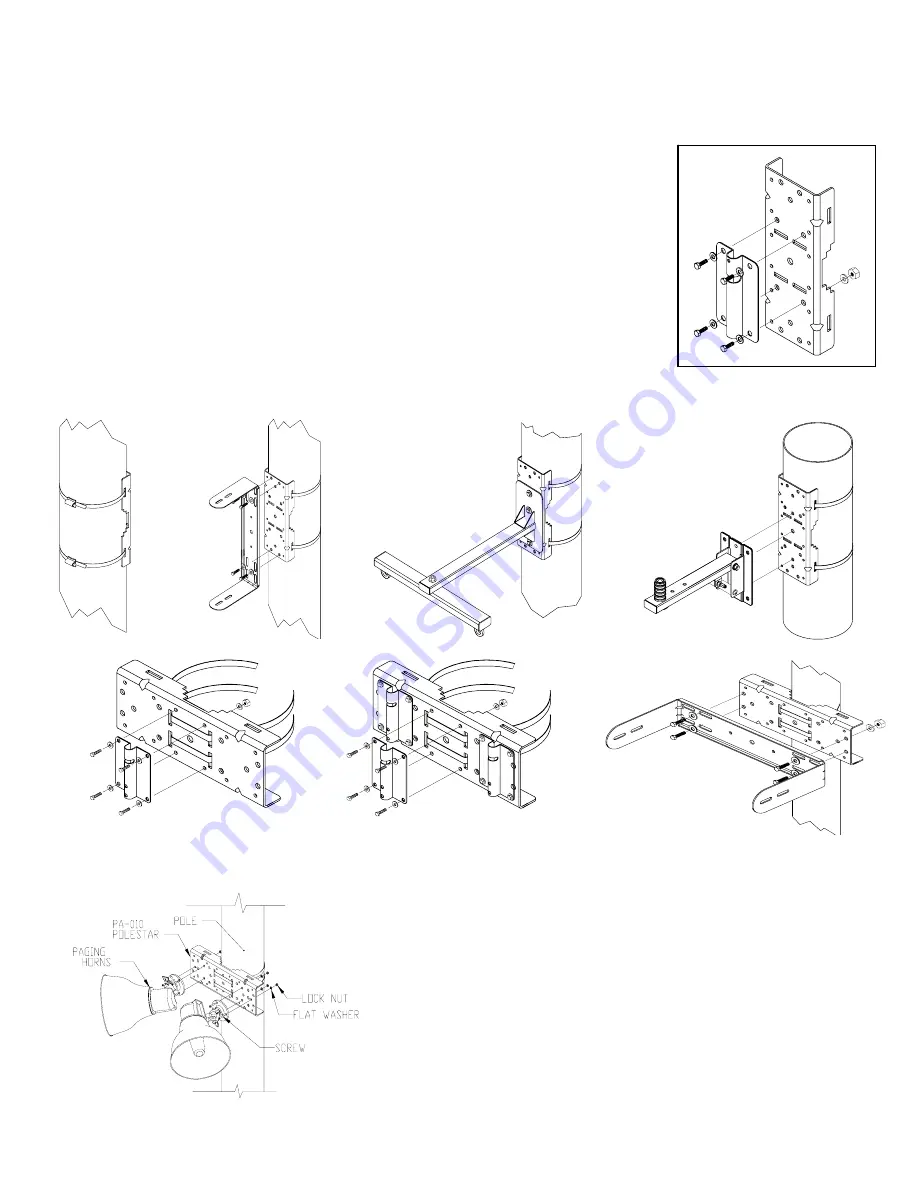
Step 2c. Attaching Paging horns:
Install the paging horns first to the polestar then install the Polestar/paging horn assembly
to the pole using banding straps (Figure 9).
Step 3. Attach Polestar™ to Pole or Column:
See step 2 of vertical installation above.
Step 4. Install Speaker:
See MultiMount
™
or U-bracket instruction sheet for installation details.
* See U-Bracket data sheet for compatible model


