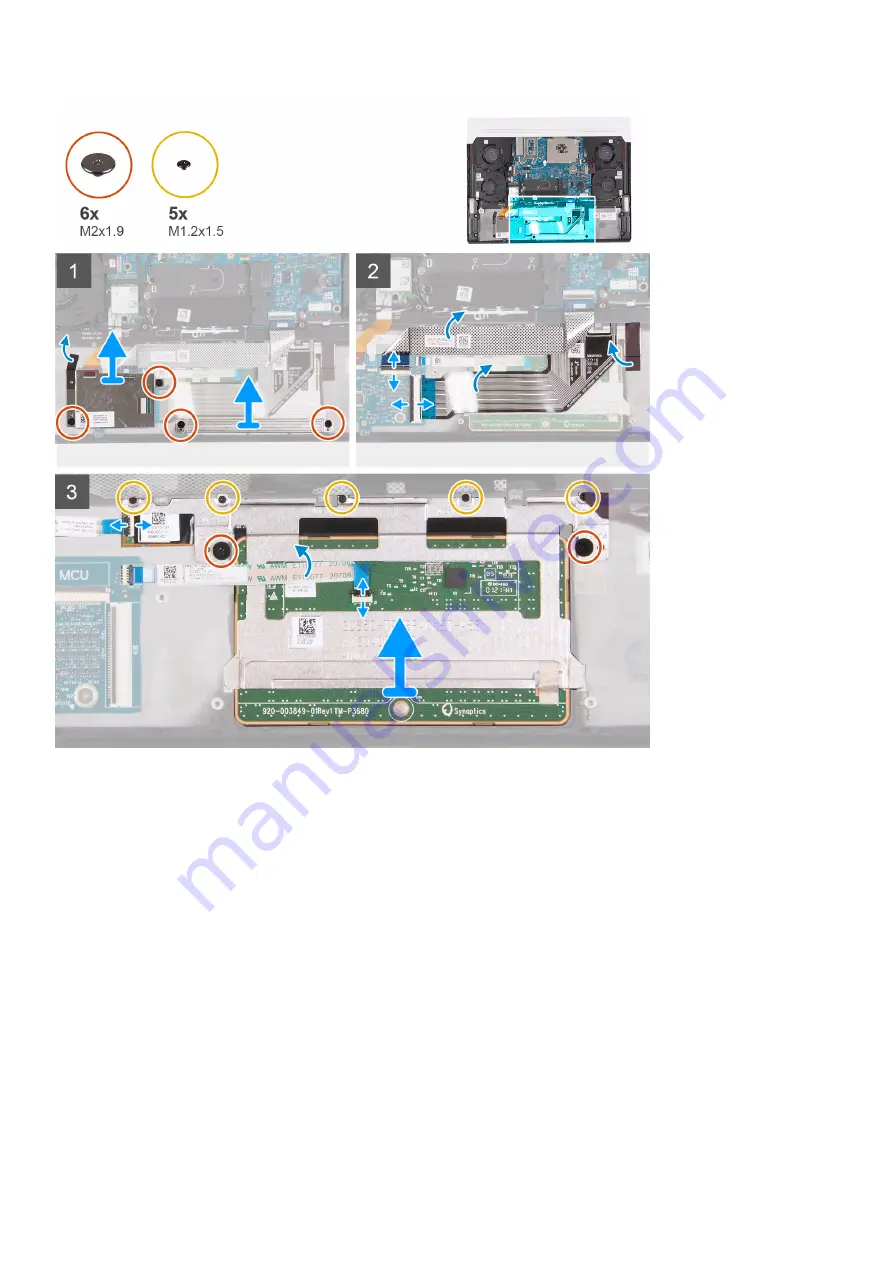
Steps
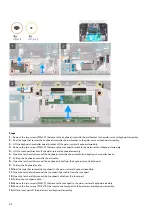
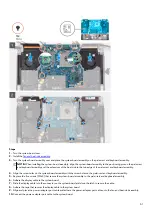
1. Remove the two screws (M2x1.9) that secure the keyboard-controller board bracket to the palm-rest and keyboard assembly.
2. Peel the tape that secures the keyboard-controller board bracket to the palm-rest and keyboard assembly.
3. Lift the keyboard-controller board bracket off the palm-rest and keyboard assembly.
4. Remove the two screws (M2x1.9) that secure the touchpad bracket to the palm-rest and keyboard assembly.
5. Lift the touchpad bracket off the palm-rest and keyboard assembly.
6. Open the latch and disconnect the keyboard-controller board cable from keyboard-controller board.
7. Fold up the keyboard-controller board cable.
8. Open the latch and disconnect the keyboard cable from the keyboard-controller board.
9. Fold up the keyboard cable.
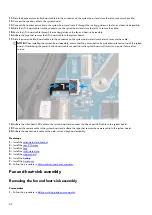
10. Peel the tape that secures the touchpad to the palm-rest and keyboard assembly.
11. Open the latch and disconnect the touchpad-light cable from the touchpad.
12. Open the latch and disconnect the touchpad cable from the touchpad.
13. Fold up the touchpad cable.
14. Remove the two screws (M2x1.9) that secure the touchpad to the palm-rest and keyboard assembly.
15. Remove the five screws (M1.2x1.5) that secure the touchpad to the palm-rest and keyboard assembly.
16. Lift the touchpad off the palm-rest and keyboard assembly.
42
Содержание P111F
Страница 1: ...Alienware x15 R1 Service Manual Regulatory Model P111F Regulatory Type P111F001 May 2021 Rev A00...
Страница 8: ...4 Connect your computer and all attached devices to their electrical outlets 5 Turn on your computer 8...
Страница 13: ...13...
Страница 15: ...15...
Страница 28: ...28...

