2
www.observint.com
2.
Route 12 Vdc power extension cables from an adequate power source to the location where the
camera will be installed.
CAUTION
Do not apply power to the camera at this time. Before applying power to the camera, ensure that
the polarity is correct. An incorrect connection may cause a malfunction and can damage the
camera.
Step 2. Install the camera
The camera can be mounted directly to a wall or ceiling. The surface should support at least four times
the weight of the camera. The video/power drop cable from the camera can be routed either through
mounting surface or through a cable channel in the mounting base.
Separate the enclosure from the mounting base
1.
Rotate the enclosure on the mounting base so that the mark on the base aligns with the notch in the
enclosure. See below.
Mark on
mounting
base
Notch in
enclosure
Enclosure
Camera
body
2.
Insert a coin or something similar in the notch, and then pry the enclosure off of the mounting base.
3.
Separate the encloser and camera body from the mounting base.
4.
Using the drill template provided, mark the location of the screws that anchor the mounting base to
the mounting surface. If mounting the camera onto a wall where moisture or other contaminants
are present, arrange the template and adjust the camera so that the cable channel is down or away
from the source of the contaminants.
5.
If you are routing the drop cable through mounting surface, mark the position of the hole for the
drop cable.
6.
Drill holes for the screws that anchor the base to the mounting surface. The mounting hardware
provided is appropriate for most surfaces. However, depending on the surface materials, more
appropriate fasteners may be required.
7.
If routing the drop cable through the mounting surface, drill a 5/8” hole in the middle of the drill
template.
8.
Attach the mounting base to the ceiling or wall.
—
If attaching the mounting base to the ceiling or wall and the drop cable will be routed through
the cable channel in the base, place the drop cable in the channel before attaching the base to
the surface.
Typical ceiling mounting
9.
Route the video, power and earth ground (optional) extension cables through the mounting surface.
Step 3. Connect the camera to the video power and ground
1.
Connect the video extension cable to the camera video BNC drop cable connector. If the camera is
in an environment where dust, moisture or other contaminants are present, seal this connection
adequately to prevent contamination.
WARNING
!
Failure of the power or video drop cable connectors due to moisture or another
contaminant is considered an installation error, which voids the warranty. If
installing this camera in a location such as an overhang, shop, garage, kitchen, etc.
where high humidity or dust is present, seal these connections adequately.
2.
Connect the 12 Vdc power extension cable to the 12 Vdc connector on the camera drop cable. Seal
the power cable connectors as needed from moisture and other contamination. The polarity of the
drop cable connector is shown below.
3.
If the camera is installed in a moist or humid environment, attach an earth ground cable to the
ground terminal on the camera body.
CAUTION
Before applying power to the camera, ensure that the polarity is correct. An incorrect connection
can damage the camera.
4.
Reattach the camera to the mounting base:
a.
Store or conceal excess extension cable appropriately
b.
Aligning the notch on the enclosure with the mark on the mounting base.
c.
Press the enclosure with the camera body onto the mounting base until it snaps into place.
5.
Apply power to the camera.
6.
Open the recorder Live View screen, and then click inside the screen where the PTZ camera video
image is displayed. See below.
Step 4. Adjust camera pan, tilt and rotation
Adjust the camera pan, tilt and rotation to point the camera at your surveillance target. When pointing the
camera, use the
Live View
display on a recorder or remote login.
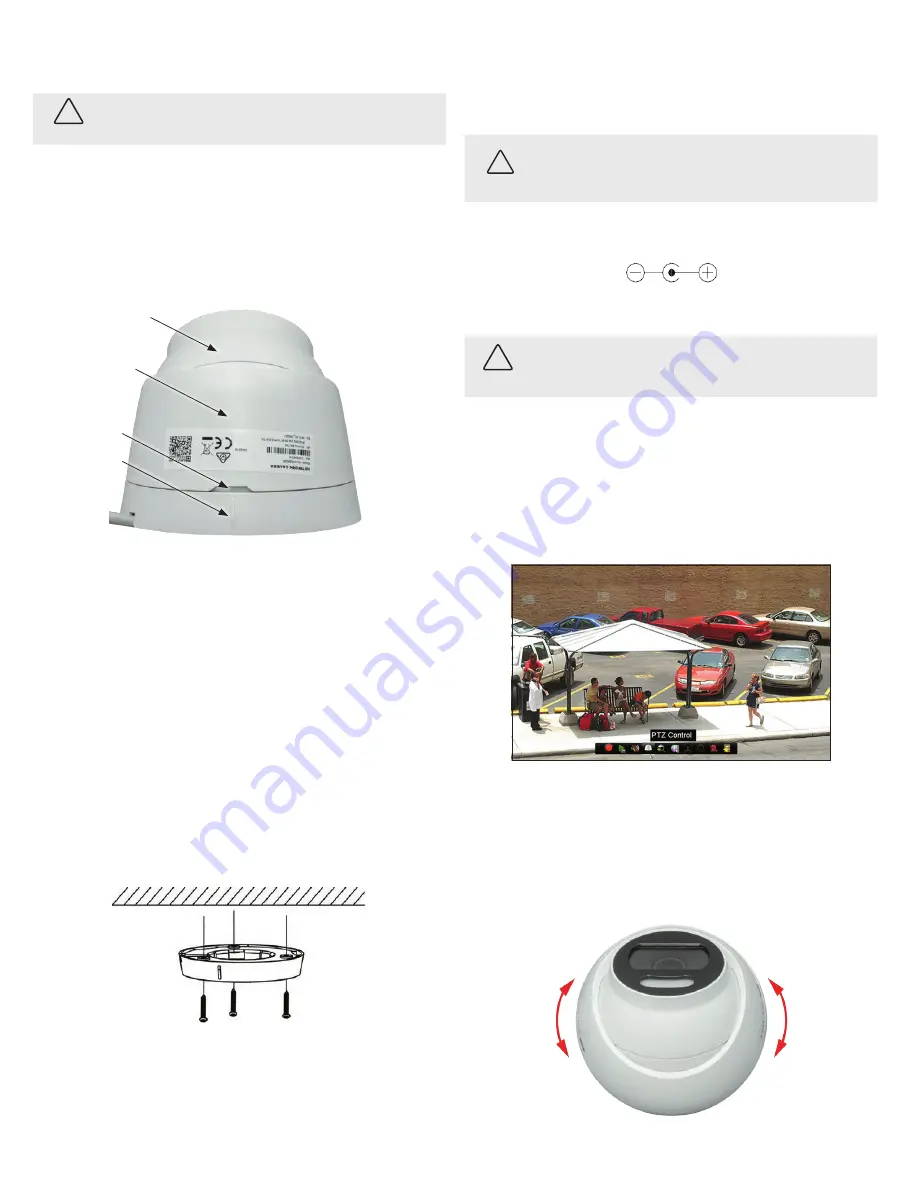
Camera adjustments
1.
Adjust the camera body so that the “
UP
” orientation mark is at the top.
2.
Pan adjustment
: While observing video from the camera, turn the enclosure and camera body
together to point the camera in the direction of your surveillance target.
Pan adjustment
0° ~ 360°
© 2019 Observint Technologies. All rights reserved.


