


40
b. Check the
Enable Schedule
box.
c. Click
Edit
, or use the graphical method to apply recording modes to hours of the day.
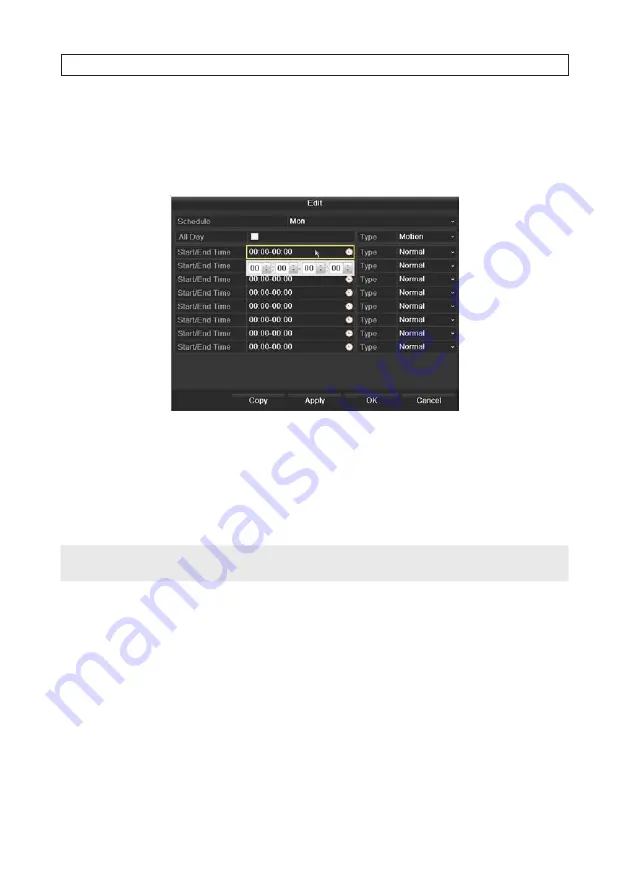
i.
If you clicked the
Edit
button, a record schedule list opens.
—
Open the
Schedule
line drop down list and select the day you want to create a record schedule for.
—
To schedule all-day recording, check the checkbox after the All Day item. To setup specific start and end times,
click the clock icon to open a time setting popup window.
—
In the
Type
column, select the type of recording trigger you want to use. “
Normal
” recording is continuous
recording. “
Motion
” recording is recording triggered by some kind of motion detected in the video image.
—
Click
Apply
to save your settings.
NOTE
You can define up to eight recording time periods for each day, each with a specified recording type. Recording time periods cannot
overlap with each other. Each recording period can use either Normal or Motion triggered recording.
—
Repeat the steps above to schedule recording for other days of the week. If the same schedule can also be
applied to other days, click
Copy
(see the window below), select the days you want to copy the schedule to,
then click
OK
.
SECTION 5: RECORD, PLAYBACK AND VIDEO BACKUP


