6
7
2.3.
Connecting the Charger
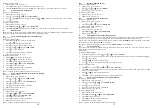
1. Plug the small end of power adapter into a power jack on base bottom.
2. Plug the large end of power adapter into a wall power outlet.
3.
GETTING TO KNOW YOUR PHONE
3.1.
Base Station Overview
1
2
3
19
15
16
17
11
13
14
18
7
6
4
5
10
12
8
9
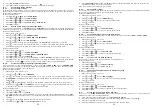
1. CALL BLOCK
•
In Idle mode: Press to go to
Call Block
menu
•
In ringing mode: Press to block incoming call number if
Block Set
is set to ON
2. CALL LIST
•
In idle mode: Press to access the Call List.
3. REDIAL LIST
•
Press these keys to confirm the options on the screen above the keys.
4. SOFT KEYS
•
Press these keys to confirm the options on the screen above the keys.
5. RETURN KEY
•
Press to go back to previous menu without making changes
6. UP & VOLUME INCREASE KEY
•
In menu mode: Press to scroll up the menu items.
•
In Phonebook list / Redial list / Call List: Press to scroll up the list.
•
While entering names or numbers: Press to move the cursor to the left.
•
During a call and message playback: Press to increase the volume.
7. DOWN & VOLUME DECREASE KEY
•
In menu mode: Press to scroll down the menu items.
•
In Phonebook list / Redial list / Call List: Press to scroll down the list.
•
While entering names or numbers: Press to move the cursor to the right.
•
During a call and message playback: Press to decrease the volume.
8. SKIP BACKWARD
•
Press to skip backward to the previous message.
9. PLAY
•
In idle mode: Press to play the message
•
During playback : Press to repeat playing the current message from the beginning
10. SKIP FORWARD
•
Press to skip the current message and play the next message.
11. TAM ON/OFF
•
Press to toggle On/ Off of the answering machine.
12. STOP
•
Press to stop the message playback.
13. DELETE
•
Press to delete current message during playback.
14. AUDIO BOOST
•
During a call: Press to audio boost on/off (inactive in speakerphone mode).
15. Phonebook
•
In idle mode: Press to access the phonebook.
16. Direct Memory Keys M1, M2, M3
•
In idle mode or in a call: Press to dial pre-recorded number stored in Direct Memory.
17. SPEAKERPHONE
•
Press to make, answer or end a call by base speakerphone.
•
Press to switch between the corded handset and the base speakerphone during a call.
18. ALPHANUMBERIC KEYPAD/ /
•
In idle / pre-dial / editing mode / during a call: Press to enter characters / numbers.
•
In pre-dial mode / during a call: Press and hold # to insert pause.
•
In intercom mode with an external call): Press and hold 0 to start conference call
•
In idle / pre-dial / editing mode / during a call: Press and hold 0 to insert a flash.
19. IN USE LED-BLUE
•
Steadily on while the handset is in use, or base is in conversation mode
•
Flashes when receiving an incoming call, or during registration.
3.2.
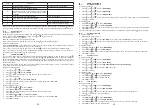
Display Icons and Symbols of Combo Base
Display icons
Description
Soft key icon for access the main menu
OK
Soft key icon for confirm selection and save input data
X
Soft key icon for:
1. Delete current shown Phonebook/ Call list/ Redial entry
2. Cancel selection and abort from current operation
1. Soft key icon for temporarily set silence for the ringer during ringing mode.
2.
Steady ON Indicates that the ringer of base is switched off.
Steady On when there are received new Voice Message Waiting (VMWI) and not yet
read.
Disappear when all the voice messages have been read.
Steady On indicates it’s a new call which has not been read in call list
Disappear after all call have been read.
Flashes when the call list is being accessed.
Flashes when redial list is being accessed.
Содержание XL785 Voice Combo
Страница 1: ...XL785 Voice Combo USER S GUIDE...

