background image

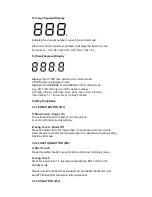
3.4.6 VOX RECOVERY TIME SELECTION MODE 

 
This allows the response characteristics of the VOX function to be precisely adjusted to 
suit individual needs.  
 
To access the VOX Recovery Time Selection menu, 
press the Function Button (#12) until Udt appears in the LCD Panel (#8) with the VOX icon 
blinking. 
 
Press the Up Button (#10) or the Down Button (#11) to select from 5, 3, 2 or 1 second 
setting. This setting determines the delay time between transmitting and receiving. 
Press the Enter Button (#13) to confirm your selection. 
Please note you may need to try different VOX time settings to determine the best value to 
suit your speaking habit. 


To turn off the VOX feature, enter the VOX selection mode and then select Off. 
 

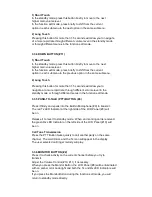
3.4.7 AUTO KEY LOCK SELECTION MODE 

 
This feature prevents accidental channel change and disturbance to the preferred settings 
of  the  Communicator.    Auto  Key  Lock  temporarily  disables  the  Up,  Down  and  Enter 
Buttons. 
 
To access the Auto Key Lock Selection menu, 
press the Function Button (#12) until the auto lock icon blinks and ALo appears in the LCD 
panel (#8). 


Press the Up Button (#10) or Down Button (#11) to select the Auto option. 
 
Press the ENTER key to confirm your selection. 
 
If you do not press any key for more than 15 seconds in the standby mode, all respective 
keys will automatically be locked. 
 
To turn the auto key lock on or off in standby mode, simply press and hold the Function 
Button (#12) for more than 1.5 seconds. 
 
To quickly activate the Auto Key Lock, hold the Function Button (#12) for more than 1.5 
seconds. 
 

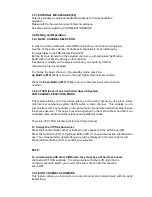
3.4.8 CALL RINGER MELODY SELECTION MODE 

 
This feature provides 7 user selectable call ringer melodies to alert you of a calling party. 
 
To select your favorite Call Ringer melody, 
press the  Function  Button  (#12) until  the call  icon  blinks and  CAL  appears  in the LCD 
panel (#8). 
 
Press the Up Button (#10) or Down Button (#11) to preview the 7 available melodies. 
 
Press the ENTER key to confirm your selection. 


Содержание Tectalk

Страница 1: ...SERVICE MANUAL 2 WAY PORTABLE HANDHELD PMR RADIO TECtalk Jan 2000 ...

Страница 2: ...Transmitter 6 CHANNEL DATA 1 GENERAL 1 1 GENERAL TECtalk is a minimum sized two way portable handheld radio The frequency range is 446 00625 446 09375MHz 8 UHF operating channels according to European PMR 446 international agreement are available 1 2 CHARACTERISTICS AND FEATURES a All active devices in this radio are semiconductors and high density IC b The radio is designed very compact and the w...

Страница 3: ...ower Max 500 mW 2 Frequency Stability 5 ppm 20 60 3 Modulation Method FM 4 Oscillation Method PLL SYNTHESIZER 5 Max Frequency Deviation 2 5 kHz with tone 6 Cooling Method air cooling Method 7 Spurious Emission 36dBm 30dBm 8 FM Hum Noise 40dB 1kHz 60 modulation w CCITT 9 Distortion 5 1kHz 60 modulation 10 Tx Audio Response 6dB OCT 3dB PRE EMPHASIS 300Hz 2 5kHz b RECEIVER 1 Receive Method Double Sup...

Страница 4: ...12 IF 1 st IF 21 7MHz 2 nd IF 450kHz 13 Local Frequency 1st Local Frequency fc 21 7MHz 2nd Local Frequency 21 25MHz 3 OPERATION 3 1 Push Buttons and Controls ...

Страница 5: ...e Control 11 Down Button Volume Control 12 Function Button 13 Power On Off Enter Button 3 2 ICONS on LCD 1 RSSI Receiving Signal Strength Indicator or TX Bar Icon Indicates the receiving signal strength and blinks during transmission 2 Monitor Indicator Appears when the monitor button is used 3 CTCSS Indicator Blinks when the correct CTCSS tone is entered 4 Auto Channel Scan Indicator ...

Страница 6: ...or Blinks in VOX selection mode or appears when VOX is activated 8 Battery Level Indicator Battery Level Meter indicates the remaining battery strength 9 Power Save Display Blinks when the power save is activated The rate at which the icon blinks varies with the power saving ratio Fast indicates a lower power saving while slow indicates a higher Power saving ratio 10 Tx Indicator Appears when a si...

Страница 7: ...nction 3 3 Key Functions 3 3 1 ENTER BUTTON 13 1 Short Touch Power On Press this button 13 briefly to turn the unit on A short confirming melody will play 2 Long Touch Power Off Press this button 13 for longer than 1 5 seconds to turn the unit off Note Press it to confirm the required option for respective functions during function edit mode 3 3 2 FUNCTION BUTTON 12 1 Short Touch Press this button...

Страница 8: ...h different volume level in the standby mode or through different menus in the function edit mode 3 3 5 PUSH TO TALK PTT BUTTON 4 Press it firmly and speak into the Built in Microphone 9 to transmit The red Tx LED Indicator at the right side of the LCD Panel 8 will be on Release it to revert to standby mode When an incoming call is received the green Rx LED Indicator on the left side of the LCD Pa...

Страница 9: ...NNEL SELECTION MODE This feature allows you to have more privacy on the main channel by using tone codes international numbering system 00 38 within a main channel This enables you to communicate with Your partners on the same main channel when all partner stations use the same subcode This helps to avoid congestion on the main channel and filters out unwanted noise static and other stations using...

Страница 10: ...l Watch Scan menu Press the Function Button 12 until the dual watch icon blinks and dW appears in the LCD Panel 8 Press the Up Button 10 or the Down Button 11 to select the desired channel number you wish to closely monitor Press the Enter Button 13 to confirm your selection To turn off the dual watch feature in the standby mode simply press the Function Button 12 once 3 4 5 VOX SELECTION MODE The...

Страница 11: ...uto Key Lock temporarily disables the Up Down and Enter Buttons To access the Auto Key Lock Selection menu press the Function Button 12 until the auto lock icon blinks and ALo appears in the LCD panel 8 Press the Up Button 10 or Down Button 11 to select the Auto option Press the ENTER key to confirm your selection If you do not press any key for more than 15 seconds in the standby mode all respect...

Страница 12: ...thin DC 1 0V in the voltage of TP 4 2 TRANSMITTER a Connect EUT measure equipment according to block diagram below b Connect DC 6 0V voltage preset to EUT c Connect power meter dummy load 50 Ohms d Adjust Tx frequency according to trimming trimmer VC2 e Connect AF oscillator to mic terminal for conform modulation degree f Adjust the frequency of AF oscillator to 1kHz and adjust AF level should be ...

Страница 13: ... of AF oscilloscope from 300Hz to 3kHz 4 At this time the point needle of modulation meter should be in the limit of 2 5 kHz d Spectrum Test 1 terminate antenna output with 50 Ohms and use a power attenuator of 20 dB to avoid harmonics generated by analyzer overload be 20dB more 2 observe the spectrum with pressing PTT key The harmonics should be less than 36 30 dBm with 20 dB external attenuator ...

Страница 14: ...with 1kHz audio and 1 5 kHz frequency deviation The 12 dB Sinad point should be reached with an RF level of 110 to 107Bm This is a good sensitivity b Audio Distortion Test 1 SSG should be adjusted like way of point a and RF level set to 47dBm 2 Adjust to 0 7Vrms at 8 Ohms load observing audio wave form 3 Read the needle of distortion meter it should be less than 5 distortion c Squelch Test After R...

Страница 15: ...ective X tal X2 No audio modulation Tx power and Tx frequency are normal ⓐ Problem of microphone or mic connector ⓑ IC U7 problem Tx is set when switch is on ⓐ Tx switch problem 2 RECEIVER Rx does not work ⓐ Speaker line open problem or connector problem ⓑ Receiver power circuit problem ⓒ Audio amplifier Base band IC U4 problem Only noise sound ⓐ U12 problem ⓑ VCO problem Rx sensitivity is weak ⓐ ...

Страница 16: ...generate 6 25kHz as reference Signal VCO frequency from prescaled input is divided signal and compared with reference signal phase in phase comparator Built in charger pump changes voltage until two signals are in phase and charged voltage supplies VCO through loop filter to produce the desired frequency Frequency data associated with channel goes to PLL IC by CPU through CLOCK DATA PLL IC enables...

Страница 17: ...als is selected and enters the X tal filter Output impedance of mixer is direct matched with input impedance of X tal filter Matching of filter satisfies pass bandwidth of filter ripple elimination within the pass band and attenuation characteristic of stop band X tal filter is composed of two pole monolithic X tal filter with 8kHz of IF bandwidth R11 is used as impedance matching with 1 st IF Amp...

Страница 18: ...s emitted at antenna through 50 Ohms matching circuit to low pass filter L7 L6 L5 C42 C43 C44 C46 C47 to eliminate harmonics 5 3 1 Audio Modulation and Audio Amplification Audio signal produced by external or internal microphone is amplified and limitted by IC U7 The output signal enters to VCO through low pass filter and U2 Max Frequency modulation deviation is adjusted by VR1 Audio modulation an...

Страница 19: ...an 2000 Albrecht Electronic GmbH Dovenkamp 11 22952 Lütjensee All service documents can be downloaded for service purpose from http www albrecht online de Service Hotline 49 4154 849 180 Service Fax 49 4154 849 288 E mail service albrecht online de ...

Отзывы: