


Mainboard PX915P-2V
6
Hardware Installation
This section will assist you in quickly installing your system hardware. Wear a wrist ground
strap before handling components. Electrostatic discharge may damage the system’s
components.
CPU Processor Installation
This mainboard supports Intel
®
Pentium
®
4 Prescott Processors using a Socket 775. Before
building your system, we suggest you to visit the Intel website and review the processor
installation procedures.
http://www.intel.com
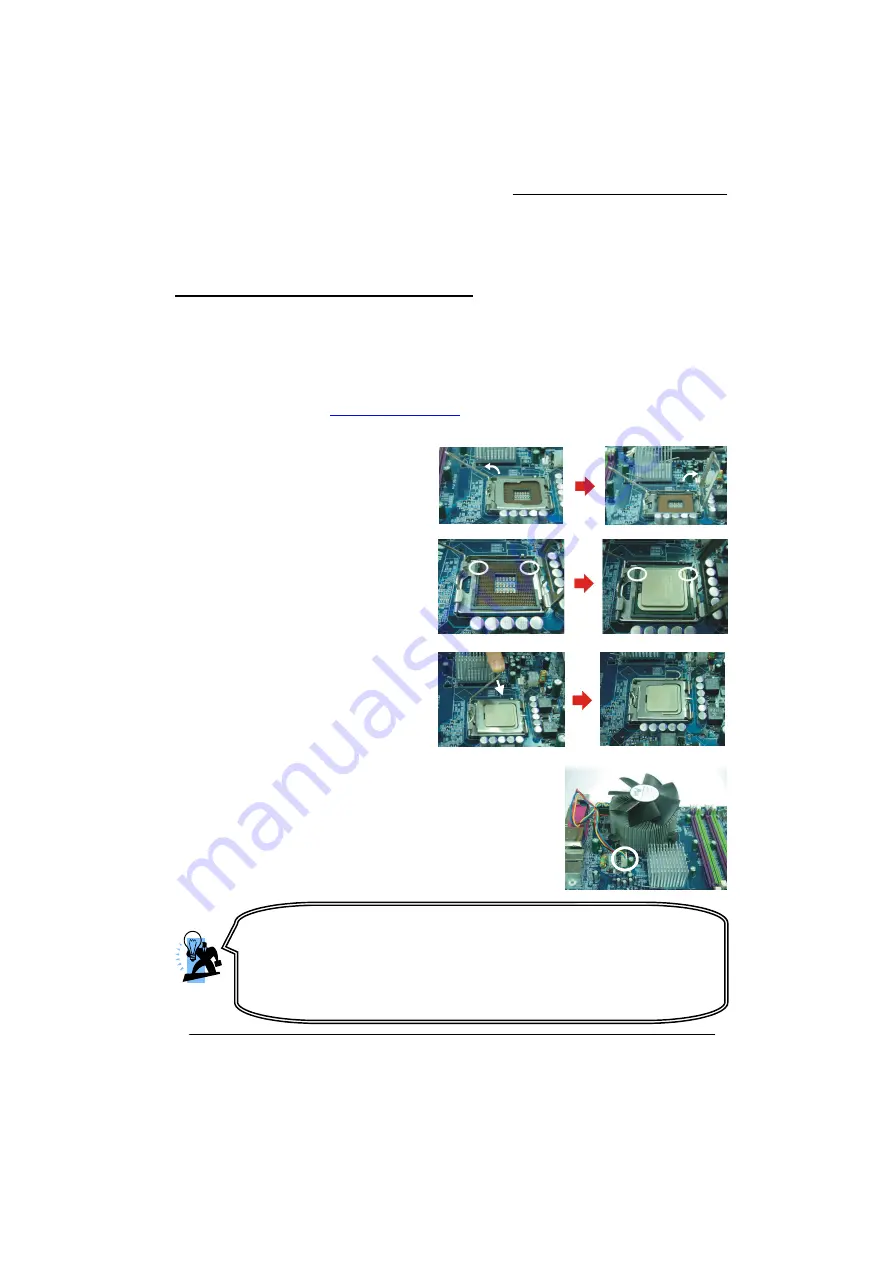
CPU Socket 775 Configuration Steps:
1. Locate the CPU socket 775 on your
mainboard and nudge the lever away
from the socket as shown. Then lift the
lever to a 140-degree angle (A). Next, lift
up the iron cover (B).
2. There are 2 distinctive marks located
near the corners of the socket on the
same side as the lever as shown (C).
Match these marks with the marks on
the CPU and carefully lower the CPU
down onto the socket (D).
3. Replace the iron cover and then
lower the lever until it snaps back into
position (E). This will lock down the CPU
(F).
4. Smear thermal grease on the top of the CPU. Lower the
CPU fan onto the CPU/CPU socket and secure it using the
attachments or screws provided on the fan. Finally, attach
the fan power cord to the
CPUFAN
header.
A
B
D
C
F
E
Attention
DO NOT touch the CPU pins in case they are damaged. Also, make sure that
you have completed all installation steps before powered on the system.
Finally, double-check that the cooling fan is properly installed and the CPU
fan power cord is securely attached, in case your CPU and other sensitive
components are damaged because of high temperatures.


