background image

Using the DVD Features

Let’s get started


Using the DVD Features

or online at 

www.argos-support.co.uk 

If you still require further assistance, call one of our experts on 

0345 604 0105.

Basic DVD Playback Functions

Playing the DVD

Depending on the disc, a menu may appear on the TV 
screen once the disc has loaded. When playing the disc, 
you may use the 

 button to toggle between Play and 

Pause mode. This product also supports Menu / Title / 
Sequential / Programme Playback.

Menu Playback (for DVD)

• 

For DVD discs, the screen will display the DVD Disc 
Menu (Root Menu).

• Press 

the  button or the OK button to start from 

the highlighted content.

• Press 

the 

DVD MENU/SUBPAGE

 button to return to 

the Root Menu when playing the disc.

• 

For some DVD discs you may need to press the 

DVD 

MENU /SUBPAGE

 button or the TITLE button to 

display the Disc Menu.

Stopping Playback

• Press 

the 

 button once to stop. Press the 

 button 

to resume from where you stopped.

• Press 

the 

 button twice to stop. Press the 

 button 

to start from the beginning.

• 

In order to protect the disc, press the button   twice 
and then press the   button to eject the disc. When 
the disc is ejected, hold the disc edge slightly and 
remove it from the disc slot.

• 

When not using the DVD function (in standby- mode 
or using others modes for a long period of time), 
please take out the disc to protect the DVD loader 
and the disc.


Previous / Next (for DVD / CD / Multimedia discs)  

• Press 

the  button to play the last Title / Chapter / 

Track.

• Press 

the  button to play the next Title /Chapter / 

Track.

If the current track is the first one, pressing
the 

 button will restart the disc from the

beginning.
If the current track is the last one, pressing
the 

 button will stop the playback.

• 

For DVD discs, the above functions may very due to 
different DVD disc’s structure.

Forward / Backward (for DVD / CD / Multimedia discs)

• 

There are 4 speeds for forward. Press the 

button 

to toggle between the different

forward options in sequence. (FORWARD x 2 / FORWARD 
x 4 / FORWARD x 8 / FORWARD x 16 / FORWARD x 32 / 
Play).

• Press 

the  button to return to normal speed 

playback.

• 

For DVD discs, when selecting backward to first title / 
chapter, the disc will start from the beginning.

There will be no sound during forward or
backward.

Pause (for DVD / CD / Multimedia discs)

• 

For CD / JPEG discs, press the 

 button to pause; 

press the 

 button again to resume playback.

• 

For DVD discs, press the 

 button to pause; press 

the 

 button again to resume playback.

Repeat (for DVD / CD / Multimedia discs)

Press the 

REPEAT

 button once to display the    current 

repeat mode.

• 

For CD discs, while playing in sequence, you may 
use the repeat playback. There are 4 repeat modes, 
press the 

REPEAT

 button to toggle between the 

different repeat modes in sequence. (Repeat Off / Re 
p eat On e / All /Single ).

• 

For DVD discs, you may setup the repeat playback 
mode. There are 4 repeat modes, press the REPEAT 
button to toggle between the different repeat modes 
in sequence. (Repeat: Off / Repeat: Chap ter / Repeat: 
Title / Repeat:All).


Info (for DVD / CD / Multimedia discs)

Press the 

DISPLAY

 button to activate the on  screen 

roll-down menu for the current Title, Chapter, Time and 
other information.

For DVD discs, press the button once to display the first 
page as shown below:

• 

For DVD discs, press the DISPLAY button once to 
display the first page as shown below:

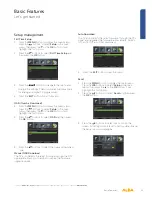
Title Elapsed

0:00:09

TT: 01/08  CH:01/01


53

Содержание LE-24GY15-T2+DVD

Страница 1: ...24 LED TV with DVD Player Instruction manual LE 24GY15 T2 DVD...

Страница 2: ...help you get the most from your TV Should you require any guidance a simple solution can often be found online at www argos support co uk If you still require further assistance call one of our exper...

Страница 3: ...xt DTV mode 32 Time Shift Function DTV mode 32 Recording DTV Programme onto a USB Storage Device 33 Timer Programming 34 Play Recorded Programme 35 Picture management 36 Sound management 36 Channel ma...

Страница 4: ......

Страница 5: ...Safety information Safety information 1...

Страница 6: ...case of storms and lightning when going on holiday or when the TV is not used for a long period of time disconnect the power cord from the mains power socket Do not place the TV furniture etc on the p...

Страница 7: ...utions may result in fire electrical shock or other hazards Handling discs To keep the disc clean only handle the disc by its edge Do not touch the surface Do not stick paper or tape on the disc If th...

Страница 8: ......

Страница 9: ...Getting Started 2...

Страница 10: ...utomatic Volume Limiting PLL Frequency Search PC input Plug Play for Windows 98 ME 2000 XP Vista DVD Features DVD CD CD R CD RW MP3 JPEG MPEG playback NTSC PAL playback according to disc content LPCM...

Страница 11: ...ain Soft and indirect lighting is recommended for comfortable viewing Allow enough space between the TV and the wall to permit ventilation Avoid excessively warm locations to prevent possible damage t...

Страница 12: ...ious viewing channel ATV DTV mode 6 P MODE Select picture mode Dynamic Standard Mild Personal 7 S MODE Select sound mode Standard Music Movie Personal 8 TV RD Select TV program or Radio program DTV mo...

Страница 13: ...TV tuner memory 19 MENU Display the OSD On Screen Display menu 20 EXIT Exit the OSD On Screen Display menu 21 Press once to stop USB DVD mode FAV Display the Favourite Channel list ATV DTV mode 22 Re...

Страница 14: ...30 INDEX To select the page number of the index from teletext ATV DTV mode AUDIO Press repeatedly to switch amony audio option if available DVD mode 31 REVEAL Reveals hidden information such as the a...

Страница 15: ...oves up a channel 7 MENU button Displays the OSD on screen display menu 8 SOURCE button Press to select among different input signal sources DTV ATV SCART AV YPbPr DVD HDMI PC USB Confirmed the select...

Страница 16: ...the remote control is not going to be used for long periods of time the batteries should be removed Otherwise the remote control may be damaged caused by battery leakage and corrosion AAA R3 X2 Batte...

Страница 17: ...xt or previous programme Getting Started Getting Started You ll be up and running in no time The remote control is designed to control all the functions of the model you selected Volume Setting Press...

Страница 18: ...se Slow motion play is not available In some cases the subtitle language will not be changed immediately to the selected one When the preferred language will not select even after pressing the button...

Страница 19: ...se X Rapid reverse TITLE SIZE Display disc menu if available Display disc menu if available X X SUBTITLE Subtitle on off Press repeatedly to switch between subtitle option Subtitle on off Press repeat...

Страница 20: ...ired language to be displayed on the menu The default on screen menu language is set as English Mode Setting Selects your desired mode setting Home Mode Viewing at home Store Mode For store demo the b...

Страница 21: ......

Страница 22: ......

Страница 23: ...23 Safety information Connections 3...

Страница 24: ...connected via the HDMI sockets or Component Socket No sound connection is needed for an HDMI to HDMI connection 2 USB Input To connect devices to the TV providing fast data exchange USB will have func...

Страница 25: ...TV via the PC cable you should also use an audio cable to connect your device to the PC AUDIO INPUT to enable audio 8 SCART socket Inputs or outputs for external devices Connect the SCART cable betwee...

Страница 26: ...nnections Most devices support SCART connection You can connect a DVD recorder VCR or decoder to the TV using the SCART socket Power off both the TV and the device before making any connections For mo...

Страница 27: ......

Страница 28: ......

Страница 29: ...Basic Features 4...

Страница 30: ...ill vary depending on the particular broadcaster This function can be used only when the EPG information is broadcast by broadcasting companies The EPG displays the programme details for the next 7 da...

Страница 31: ...sing the 0 9 buttons or press the INDEX button Mix To view a page of text while watching a TV programme press the TTX button twice The text will be superimposed over the TV programme Double height tex...

Страница 32: ...ogramme Note If the transfer rate of the USB storage device is too slow for recording or time shift function a warning statement will be shown on the screen If this happens please upgrade your USB sto...

Страница 33: ...viewing The recording from timer programme or direct recording may have a little bit of delay when it starts to record the broadcast programme Please make sure the USB device is inserted If not a war...

Страница 34: ...the frequency Off Once Daily Weekly Weekday Channel Press the OK button and then press the buttons to select the channel that you want to record Start time for Mode Once Daily Weekly Weekday Press th...

Страница 35: ...e Animals AVI MPEG4 640 x 480 4158120 bps AudioCodec SampleRate Channel MP3 44100 Hz 2 6 Press the OK button or the DISPLAY button to display the function bar Press the buttons and then press the OK b...

Страница 36: ...e connected device Medium Strong Off Weak Dynamic Contrast Adjusts the dynamic contrast Medium Strong Off Weak 4 Press the EXIT button to exit menu Sound management 1 Press the MENU button to display...

Страница 37: ...ers DAUL I II Sends the primary and secondary broadcast languages to the loudspeakers PLEASE NOTE DTS TruSurround HD must be switched off to change Sound Mode and EQ settings Adjusting any picture or...

Страница 38: ...to select the desired channel Start Press the buttons to select Start and then press the OK button to start tuning Manual Scan ATV Mode Allows you to make manual fine tuning adjustments if the channel...

Страница 39: ...splay the main menu Press the buttons to select Channel in the main menu then press the or OK button it will highlight the first option 2 Press the buttons to select Channel Edit and then press the OK...

Страница 40: ...ay damage the interface and cause a malfunction This feature is not available in all country CI Common Interface Allows the Common Access Module to be inserted and access the content that has been enc...

Страница 41: ...en you access Auto Scan Manual Scan Channel Edit First Time Setup Channel Locks Channel Locks is designed to prevent children watching unsuitable programmes When a channel is blocked a valid password...

Страница 42: ...s the buttons to select Setup in the main menu then press the or the OK button it will highlight the first option 4 Press the buttons to select Subtitle and then press the OK button to enter sub menu...

Страница 43: ...her than home mode Move t i x E T I X E n r u t e R U N E M t s u j d A Setup OSD Language Audio Languages Subtitle Teletext Blue Screen Mode Setting Time Settings PVR Settings English On Home Mode 3...

Страница 44: ...ess the OK or button to view Delete One Move Up Move Down Select Return Exit Function OK MENU EXIT Hot Key Scheduled Record File Manager Standby Delete All Zoom In Out Replay Channel Name Program Name...

Страница 45: ...up in the main menu then press the or the OK button it will highlight the first option 4 Press the buttons to select OAD and then press the OK button 3 Press the buttons to select the over air downloa...

Страница 46: ...f the programme will be affected and a warning statement will be shown on the screen If this happens please upgrade your USB storage device The TV screen will be blank temporarily as it will take time...

Страница 47: ...sic file and then press the OK button Some audio file formats will not be supported Supported File format MP3 5 Press the or OK button to start to play 6 Press the buttons and then press the OK button...

Страница 48: ...ss the buttons to select the USB mode and then press the OK button 2 Press the buttons to select Text and then press the OK button 3 Press the buttons to select your storage device and then press the...

Страница 49: ......

Страница 50: ......

Страница 51: ...Using the DVD Features 5...

Страница 52: ...button to confirm Press the button on the unit or the button on the remote control to start playing 4 Press the button if you want to remove the disc Using the Bulit in DVD Player Disc Types Disc Logo...

Страница 53: ...sing the button will restart the disc from the beginning If the current track is the last one pressing the button will stop the playback For DVD discs the above functions may very due to different DVD...

Страница 54: ...m Press the Aspect button to select the size you want Goto for DVD CD Multimedia discs This function allows you to play your favourite Title Chapter Time Press the GOTO button to activate the on scree...

Страница 55: ...to flip rotate the picture Using the DVD Language Setup Page In the DVD mode press the SETUP button on the remote control Press the buttons to select the Language Setup menu and then press the button...

Страница 56: ...p TV System Brightness Contrast 4 3 LB 4 3 PS 16 9 OK Screen Saver Last Memory TV Display 4 3 Pan Scan Widescreen picture shown in the full screen with some part cut 4 3 Letter box Widescreen picture...

Страница 57: ...ess Contrast Using the DVD Audio Setup Page In the DVD mode press the SETUP button on the remote control Press the buttons to select the Audio Setup menu and then press the buttons to select the menu...

Страница 58: ...enter setup To change the password you need to 1 Input old password for initial use please enter factory default password 8899 2 Input a new 4 digit password and then press the OK button to If you for...

Страница 59: ......

Страница 60: ......

Страница 61: ...Other information 6...

Страница 62: ...andby Mode W 0 5W Maximum Power W 45W Standby Mode After 4 Hours Digital reception MHEG 5 ENGINE compliant with ISO IEC 13522 5 UK engine Profile 1 for UK Object carousel support compliant with ISO IE...

Страница 63: ...maged it must be replaced by a qualified electrician Connect blue lead to N Neutral Connect brown lead to L Live N L 5 Energy label This is called the product Fiche the information needs to be present...

Страница 64: ......

Страница 65: ...Product Support 7...

Страница 66: ...itable plugs used to connect the aerial 6 If you are in doubt consult your dealer No sound 1 Has the TV been set to mute To cancel mute press the button or increase the volume level 2 Sound is coming...

Страница 67: ...s have a structure consisting of two 0 6mm thin discs which are adhered to each other Since the thinner the disc the higher the density at which the information can be recorded a DVD disc has a greate...

Страница 68: ...en Information for Users on Disposal of old Equipment and Batteries European Union only These symbols indicate that equipment with these symbols should not be disposed of as general household waste If...

Страница 69: ...cient service please have the following information ready Model Ref Serial number Date of purchase You can find these on the rating plate a small information panel usually a sticker or metal plate on...

Страница 70: ...here possible during this period by the dealer from who your purchased the unit The guarantee is subject to the following provisions The guarantee does not cover accidental damage misuse cabinet parts...

Страница 71: ...Product support 71...

Страница 72: ...Contact www argos support co uk Helpline 0345 604 0105...

Отзывы: