background image

TV Aspect

There are 2 options for the television aspect
ratio.
When your television is connected to this unit
with the connecting cable has a conventional
size screen (4:3), refer to “NORMAL TV”.
If the connected TV has a wide-screen (16:9),
refer to “WIDE TV”.

NORMAL TV:

1 At the initial setting screen, select “TV

Aspect” by using 

i

 or 

k

.  Then press

ENTER.

2 Use 

i

 or 

k

 to move the cursor (the

yellow area) to “NORMAL TV 4:3”.

3 Press ENTER.

4 Use 

i

 or 

k

 to move the cursor (the

yellow area) to the suitable setting.

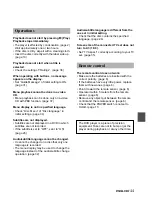
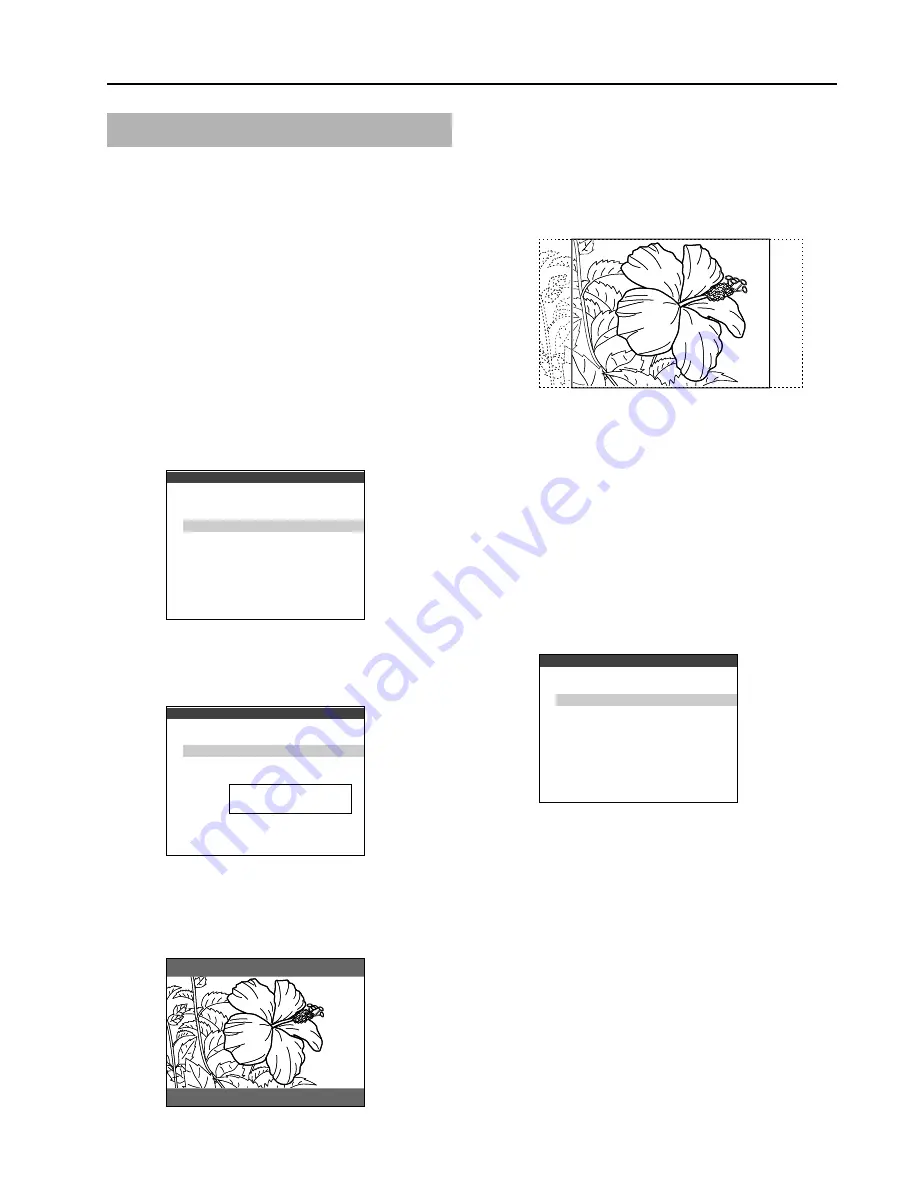
LETTER BOX

Media recorded in wide (16:9) format will be
played in “letterbox” style, with black bands
at the top and bottom of the screen.

    Choose  the  item  

ik

ENTER : Choose  item
SETUP : Complete

TV Aspect

RETURN : Previous menu

1
2

WIDE  TV
NORMAL  TV

16 : 9
  4 : 3

    Choose  the  item  

ik

ENTER : Choose  item
SETUP : Complete

TV Aspect

4 : 3

RETURN : Previous menu

1
2

LETTER  BOX
PAN & SCAN

Choose  the  TV  mode

    Choose  the  item  

ik

ENTER : Choose item
SETUP : Complete

TV Aspect

RETURN : Previous menu

1
2

WIDE  TV
NORMAL  TV

16 : 9
  4 : 3

35

ENGLISH

Changing setup values (continued)

PAN & SCAN

Media recorded in wide (16:9) format with
pan-scan encoding will be played at the full
screen height, with the left and right portions
cut off. Other media will be played in
“letterbox” style.

5 Press ENTER.

Your entry is saved.

6 Press SET UP to exit the setup menu.

WIDE TV:

1 At the initial setting screen, select “TV

Aspect” by using 

i

 or 

k

.  Then press

ENTER.

2 Use 

i

 or 

k

 to move the cursor (the

yellow area) to “WIDE TV 16:9”.

3 Press ENTER.

Your entry is saved.

4 Press SET UP to exit the setup menu.

Содержание XD-DW5

Страница 1: ...ESPAÑOL FFF FRANÇAIS ESPAÑOL ENGLISH XD DW7U XD DW5U OPERATING INSTRUCTIONS INSTRUCCIONES DE MANEJO MODE D EMPLOI PORTABLE DVD PLAYER REPRODUCTOR PORTÁTIL DE DVD LECTEUR DE DVD PORTABLE ...

Страница 2: ...s para el manual de instrucciones Página 43 No recuerda el código ajustado en Limite de Clasificacion INCORRECTO s b TITLE b RETURN b Q SURROUND CORRECTO s b TOP MENUb RETURN b Q SURROUND CORRECTION Prière de noter la correction suivante dans de mode d emploi Page 43 Vous avez oublié le numéro de code programmé sous Rat ings Limitations INCORRECT s b TITLE b RETURN b Q SURROUND CORRECT s b TOP MEN...

Страница 3: ...pment has been tested and found to comply with the limits for a Class B digital device pursuant to Part 15 of the FCC Rules These limits are designed to provide reasonable protection against harmful interference in a residential installation This equipment generates uses and can radiate radio frequency energy and if not installed and used in accordance with the instructions may cause harmful inter...

Страница 4: ... search DVD 17 Time search DVD 18 Mark function DVD Video CD with PBC off audio CD 19 Checking ON or OFF of PBC Video CD 20 Programed playback Video CD with PBC off audio CD 21 Random playback Video CD with PBC off audio CD 22 Repeat playback 23 Changing the angle DVD 25 Displaying and changing subtitles 26 Changing the audio track 27 SET UP OPERATION Changing setup values 30 CONNECTION Connecting...

Страница 5: ... 4 Remote sensor 5 Display window 6 POWER ON OFF HOLD switch 7 Power indicator 8 VOLUME control 9 PHONES jack 0 PAL NTSC switch VIDEO IN OUT jack AUDIO OPT OUT jack 3 ENGLISH 3 4 5 6 7 8 9 0 1 2 j l i k buttons s c Play buttons r a t buttons RETURN button MENU button IN OUT button MODE button TFT SW button ENTER button TOP MENU button SET UP button DISPLAY button ...

Страница 6: ...dicator 4 Angle indicator 5 Repeat playback indicators Disc repeat 1 Chapter title track repeat A B A B repeat 7 8 1 2 3 4 5 6 6 Battery indicator 7 Chapter indicator 8 Title chapter track number indication Time indication The SET UP button is used to change the display to title or chapter during DVD playback ENGLISH 4 CONTINUE ...

Страница 7: ...s 7 vRETURN button 8 a button 9 ONSCREEN DISPLAY ON OFF button 0 POWER button REPEAT button Q SURROUND button A B button ANGLE button AUDIO SELECT button SUBTITLE SELECT button SUBTITLE ON OFF button C Clear button T SEARCH button MENU button SETUP button c Play button g button f button t button s button r button Parts and controls continued ...

Страница 8: ... to prevent possible electrolyte leakage The remote control may not operate correctly when The line of sight between the remote control and the unit is exposed to intense light such as direct sunlight There is fluorescent lighting near the remote sensor Other remote controls are used nearby those of a TV set etc Using the AC adaptor Two adaptors are supplied with this unit To make this unit work u...

Страница 9: ...let AC adaptor AC D920U AC power cord 2 Battery pack Charge indicator Connecting to the cigarette lighter socket in the car Firmly connect the DC IN 9V jack of this unit and the cigarette lighter socket of your car with the car power adaptor AIWA DC 901 commercially available NOTES This unit is not usable with car power adaptors other than the AIWA DC 901 If you use another one it will cause a mal...

Страница 10: ...is lit To maintain the performance of the battery pack recharge it at least once a year even when it is not used for a long period of time Notes on recharging Use only the supplied AC adaptor to recharge the battery pack If the battery pack is too warm it may take more time to charge than usual or charging may not be done even if the charge indicator lights Cool it down and charge it again Should ...

Страница 11: ...layer is not used for an extended period of time disconnect the battery pack from the unit When it is connected a small amount of current continues to flow to the player even when the power is turned off If left connected for a long time the battery may become over discharged When disposing of the battery pack please check and follow local regulations regarding disposal and recycling for Nickel Me...

Страница 12: ...wer on again after 3 seconds If the unit is still not turned on recharge the battery pack Press OPENi to open the display panel PLAYBACK THE BASICS 1 3 Playing back OPENi 2 Power indicator Load a disc with the label side up and push down around the center of it The disc is fixed with a click 4 a disc with the label side up POWER Put your finger on the pit DISC OPENi on the left side of this unit a...

Страница 13: ...ss POWER on the remote control To avoid the accidental operation Slide the POWER switch to HOLD After playing back a disc Slide the POWER switch toward OFF to turn the power off If stop mode or pause mode lasts for more than 5 minutes the unit automatically enters standby mode Auto power saving While the liquid crystal display is off the power indicator remains lit Press c Play to turn on the powe...

Страница 14: ...isc ENGLISH 12 NOTES During playback some of the basic functions may not work with some DVD discs This is not a malfunction Operate it referring to the instructions of the discs When the display panel is closed the liquid crystal display and the speakers are turned off When you do not use the liquid crystal display close the display panel to save AC power or the battery pack Make sure that the dis...

Страница 15: ... each time the button is pressed as shown below To return to normal playback Press c Play NOTE There is no audio during fast forward or reverse DVD and Video CD only During audio CD play the sound is heard intermittently ENTER r t c Play a c Play a s ENTER 0 9 10 Q SURROUND g f t r Stopping playback Press s This unit remembers the point at which playback stopped Resume function When c Play is pres...

Страница 16: ...er buttons on the remote control Example To play track 10 Press 10 0 on the remote control Playback begins Switching the brightness of the liquid crystal display The liquid crystal display can be brightened or be dimmed Press TFT SW on the unit The brightness is switched as follows NOTE When using with the AC adaptor the liquid crystal display is bright when the power is turned on When using with ...

Страница 17: ...sed repeatedly during playback the information displays are shown as follows OPERATION WITH OSD 1 2 3 4 5 Cancel Normal display 1 shows the title number See page 16 2 shows the chapter number See page 17 3 shows the elapsed playing time during playback or the time to be searched See page 18 4 shows the audio information See page 27 5 shows the subtitle information See page 26 During a DVD playback...

Страница 18: ...o select the icon of Title search DVD or Track search Video CD with PBC off audio CD Title search DVD Track search Video CD with PBC off audio CD 1 2 Title search Track search 3 4 01 00 00 STEREO OFF ON OFF OFF B A 01 01 00 0 12 00 00 5 shows the PBC is on or off Video CD only See page 20 6 shows the repeat mode See page 24 7 shows the A B repeat mode See page 24 8 shows the memorized mark points ...

Страница 19: ... desired chapter number The number buttons on the remote control can also be used Example to play chapter number 17 press 1 7 or 10 7 If you enter the wrong number Press C to delete the number you entered Then enter the correct number 4 1 2 3 Press ENTER Playback begins with the specified chapter NOTE Chapter search will not work if you specify a chapter number which does not exist on the disc Cha...

Страница 20: ... the number buttons to enter the time of the desired location Example To start play at 1 hour 17 minutes 30 seconds 1 17 30 Press 1 hour 1 7 minutes then 3 0 seconds To start play at 8 minutes 7 seconds 0 08 07 Press 8 minutes then 0 7 seconds If you enter the wrong number Press C to delete the number you entered Then enter the correct number Press ENTER Playback begins from the specified time 1 2...

Страница 21: ...he Mark function icon Markfunction DVD VideoCDwithPBCoff audioCD jlikENTER MARK C OFF OFF B A 1 5 c Play ONSCREEN DISPLAY ON OFF 19 ENGLISH 1 2 3 c Play ENTER jlik DISPLAY Press ENTER at the desired point A point is memorized To memorize other points Press j or l to move the cursor the yellow colored area Then press ENTER NOTE The mark function may not work with some discs Playback can restart fro...

Страница 22: ... opened all the memorized points are also cleared With DVDs the memorized point is canceled by pressing s twice during playback Checking ON or OFF of PBC video CD When using menu playback with a video CD the player returns to the menu display when the selected scene finishes PBC ON You can also set the player to play the entire CD without returning to the menu screen just like with normal audio CD...

Страница 23: ...n specify up to 30 tracks You can also repeat programed selections Either when playing or while the resume function is active press DISPLAY on the main unit or ONSCREEN DISPLAY ON OFF on the remote control repeatedly The menu icons are displayed To program with the PROGRAM button Press PROGRAM on the remote control either when playing or while the resume function is active Within 10 seconds press ...

Страница 24: ...ack VideoCDwithPBCoff audioCD You can playback tracks in random order Random playback Either when playing or while the resume function is active press DISPLAY on the main unit or ONSCREEN DISPLAY ON OFF on the remote control repeatedly The menu icons are displayed Press j or l to select the Playback mode icon Press i or k to select RND Press ENTER Random playback begins To operate with the PROGRAM...

Страница 25: ...de will change each time you press the button Repeating a DVD C Chapter Repeat of the chapter being played T Title Repeat of the title being played D Disc Repeat the whole disc being played OFF Cancel repeat mode Normal playback 1 2 3 OFF OFF B A C OFF B A T OFF B A D OFF B A OFF OFF B A jlikENTER REPEAT A B ONSCREEN DISPLAY ON OFF When using the REPEAT button Press REPEAT on the remote control re...

Страница 26: ... the main unit or ONSCREEN DISPLAY ON OFF on the remote control repeatedly The menu icons are displayed Press j or l to select the A B repeat icon Press ENTER at the starting point of the section you want to repeat The Repeat indicator is displayed in the display window Press ENTER again at the ending point of the section you want to repeat The player returns to point A and plays the section betwe...

Страница 27: ... the number buttons to select the angle When using the ANGLE button Press ANGLE on the remote control to change viewing angle when the indicator is shown on the display window The angle will change each time you press i or k NOTES The symbol will be displayed if you select the Angle while viewing a disc which does not have multiple viewing angles or if viewing a part of the disc which does not all...

Страница 28: ...tles 1 2 3 Changing the subtitles While playing press DISPLAY on the main unit or ONSCREEN DISPLAY ON OFF on the remote control repeatedly The menu icons are displayed Press j or l to select the Subtitle icon Press i or k to select the desired subtitles NOTES The first subtitles displayed will be in the subtitle language selected with the subtitle setting See page 33 If there are no subtitles in t...

Страница 29: ...utton Selecting audio tracks DVD NOTES When playing a DVD with soundtracks in multiple languages the audio will automatically be played in the language which was selected when the DVD player was set up If there is not a soundtrack in that language on the disc the disc will determine which audio track is played The audio track may only be changed for discs which contain multiple audio tracks The nu...

Страница 30: ...EN DISPLAY ON OFF on the remote control repeatedly The menu icons are displayed Press j or l to select the Audio track icon Press i or k to select the audio track Then press ENTER The audio track will change each time you press i or k Example A disc has 2 audio tracks track 1 and track 2 and track 1 has 2 vocal channels Selecting karaoke audio video CD DVD The method of recording the vocal audio m...

Страница 31: ...Y ON OFF on the remote control repeatedly The menu icons are displayed Press j or l to select the Q surround icon Press i or k to select ON or OFF When using the Q SURROUND button When pressing Q SURROUND on the remote control during playback the Q surround mode can be selected directly To cancel Q SURROUND press Q SURROUND again NOTE When s is pressed twice or the disc cover is opened Q SURROUND ...

Страница 32: ... Previous menu 1 2 3 4 5 6 On screen Menu Disc Languages Digital output TV Aspect Ratings P B C O N English Bit Stream 4 3 Level 8 O N SETUP MENU CONTINUE RETURN Disc Languages Page 32 Sets the audio soundtrack language subtitle language and the language used in the menu screen If the language selected by these settings does not exist on the disc the disc s default language is used Digital output ...

Страница 33: ...r k to move the cursor the yellow area to the desired setting 5 Press ENTER Your entry is saved 6 Press RETURN to return to the previous screen or press SET UP to exit the setup menu On screen Menu Language Sets the on screen menu language to English or Spanish 1 At the initial setting screen select On screen Menu by using i or k Then press ENTER 2 Use i or k to move the cursor the yellow area to ...

Страница 34: ...y using i k and number buttons Please refer to the list of language codes on page 45 To correct the input number press j or l to move the cursor to the number to be corrected and then input new number 6 Press ENTER Your entry is saved 7 Press RETURN to return to the previous screen or press SET UP to exit the setup menu If the language selected by these settings does not exist on the disc then the...

Страница 35: ...ears The procedure for setting the language code is the same as for Audio Language setting Refer to the steps 5 and 6 of Audio Language setting Changing setup values continued 5 Press RETURN to return to the previous screen or press SET UP to exit the setup menu If the language selected by these settings does not exist on the disc then the disc s default language will be used Choose the item ik EN...

Страница 36: ... 40 Digital output is applied only for DVDs with 48 kHz 16 bit linear PCM audio and is impossible for DVDs with 48 kHz 20 bit 24 bit 96 kHz linear PCM audio during playback When they are played back signals are converted into 48 kHz 16 bit with digital output Due to secured copyrights DVDs with PCM audio are played back at 48 kHz 16 bit or below DVDs recorded in Dolby Digital AC 3 format will be p...

Страница 37: ...tem SETUP Complete TV Aspect RETURN Previous menu 1 2 WIDE TV NORMAL TV 16 9 4 3 Choose the item ik ENTER Choose item SETUP Complete TV Aspect 4 3 RETURN Previous menu 1 2 LETTER BOX PAN SCAN Choose the TV mode Choose the item ik ENTER Choose item SETUP Complete TV Aspect RETURN Previous menu 1 2 WIDE TV NORMAL TV 16 9 4 3 35 ENGLISH Changing setup values continued PAN SCAN Media recorded in wide ...

Страница 38: ...vel Level Level 8 7 6 5 4 3 2 1 No Limit for Adult Max Limit for Family Rating Enter the Password ENTER Choose item SETUP Complete RETURN Previous menu PASSWORD ik Number UP DOWN jl Move The digit cursor 0 9 Code input PASSWORD The Player is locked Remember the Password PASSWORD Press ENTER Button 2 5 8 7 Confirmation the Password ENGLISH 36 CONTINUE If you forget the password Reset the unit to de...

Страница 39: ...reen select PBC by using i or k Then press ENTER 2 Use i or k to move the cursor the yellow area to ON or OFF 3 Press ENTER Your entry is saved 4 Press SET UP to exit the setup menu Choose the item ik ENTER Choose item SETUP Complete RETURN Previous menu 1 2 P B C P B C O N O F F PBC 37 ENGLISH Changing setup values continued ...

Страница 40: ...connect the VIDEO IN OUT jack of this unit and the S VIDEO input jack of the TV set To set to the color system of the connected TV Slide the PAL NTSC switch on the right side according to the TV during stop or power off Audio connecting cable supplied CONTINUE ENGLISH 38 White Red Yellow Video connecting cable supplied Yellow Black NOTE Connect the video out of this unit to the TV set directly If ...

Страница 41: ...udio equipment with digital audio input terminals To AUDIO OPT OUT jack To audio input jacks Audio connecting cable supplied To AUDIO OPT OUT jack To optical audio input jacks Optical connecting cable not supplied Connecting the external equipment continued 39 ENGLISH Black White Red ...

Страница 42: ...ptical output terminals of this unit ENGLISH 40 To AUDIO OPT OUT jack Black White Red Playing disc DVD Video CD Audio CD Audio recording system Dolby digital AC 3 Linear PCM 48 kHz 96 kHz 16 20 24 bit DTS MPEG 1 Linear PCM Output audio signals Bit stream of Dolby digital AC 3 2ch 5 1ch PCM 48 kHz 16 bit 2ch 1 Select it in the initial setting Digital output Linear PCM 48 kHz 16 bit 2ch 2 Bit stream...

Страница 43: ...put from the optical audio output terminals of this unit By connecting to a dolby digital decoder you can enjoy theater quality realistic audio sound right in your own home Set the Digital output to Bit Stream To AUDIO OPT OUT jack To optical audio input jack Optical connecting cable not supplied Connecting the external equipment continued 41 ENGLISH ...

Страница 44: ...ding to the color system of connected equipment NOTES When you switch the PAL NTSC switch turn off the power first During playback do not connect equipment which outputs sound signals such as a game ENGLISH 42 Press IN OUT so that LInE In appears on the display window White Red Yellow Video connecting cable supplied Yellow Black To AUDIO OPT OUT jack To VIDEO IN OUT jack To video output jack To au...

Страница 45: ...below on the remote control in the following order s b TITLE b RETURN b Q SURROUND Sound and picture No sound comes out from the connected speakers Check if the connection is correct page 40 Check that LInE In is not displayed in the display window No picture appears on the TV screen Check if the connection is correct page 38 Set the input switch on the TV set to video Check that LInE In is not di...

Страница 46: ... it to ON page 26 Audio subtitle language cannot be changed It cannot be changed on a disc that only one language is recorded The menu display may be used to change the language instead of the audio subtitle change operation page 32 Audio subtitle language is different from the one set in initial setting Check that the disc contains the specified language page 26 Screen size of the connected TV se...

Страница 47: ...e 6783 Czech 7585 Kurdish 8386 Swedish 6789 Welsh 7589 Kirghiz 8387 Swahili 6865 Danish 7665 Latin 8465 Tamil 6869 German 7678 Lingala 8469 Telugu 6890 Bhutani 7679 Laothian 8471 Tagik 6976 Greek 7684 Lithuanian 8472 Thai 6978 English 7686 Latvian Lettish 8473 Tigrinya 6979 Esperanto 7771 Malagasy 8475 Turkmen 6983 Spanish 7773 Maori 8476 Tagalog 6984 Estonian 7775 Macedonian 8479 Tonga 6985 Basqu...

Страница 48: ...els is worse and surround signal is played back only within 7 kHz Pan scan screen This signifies that the screen recorded in wide screen format is displayed with left and right portions cut off Playback control video CD Version 2 0 A video CD with the playback control function can be played back by following the menu display interactively Letter box screen This signifies that the screen recorded i...

Страница 49: ...Video output Video composite output 1 Vp p 75 ohms sync negative RCA jacks Audio output DOWN MIXING AUDIO OUT connector 1 5 Vrms 1 kHz 2 RCA jacks L R Fiber optical connector IEC 958 47 ENGLISH Audio output characteristics Frequency range CD VCD 20 Hz to 20 kHz DVD 4 Hz to 22 kHz 48 kHz sampling Wow and flutter unmeasurable Operating conditions 5 C to 35 C 41 F to 95 F Accessories Remote control 1...

Страница 50: ...cannot play that disc The region number of this DVD player is 1 Note on Unauthorized Discs You may not be able to play back some DVD video discs on this player if they were purchased from outside your geographic area or made for business purposes Note on Copyright It is forbidden by law to copy broadcast show broadcast on cable play in public and rent copyrighted material without permission DVD vi...

Страница 51: ...ctancia es más baja que la de un CD Por otra parte la reproducción puede fallar debido al estado del disco manchas rayaduras condensación en las lentes del captador etc Lectured unCD R CD R W Il se peut qu un CD R CD RW ne puisse pas être lu car son pouvoir réflecteur est inférieur à celui d un CD En outre la lecture peut s avérer impossible si le disque est en mauvais état s il est tâché ou rayé ...

Страница 52: ...ar directa cerca de fuentes de calor o en el interior de un automóvil en el verano La superficie del producto se calienta cuando se utiliza durante mucho tiempo No es un fallo de funcionamiento Con el fin de evitar irritaciones leves por calor no lo deje sobre su cuerpo durante mucho tiempo ATTENTION Remarque pour la lecture du CD R RW Cet appareil ne peut lire aucun CD R RW Certains disques CD R ...

Страница 53: ...uando escuche el sonido con auriculares no suministrados Para conectar los auriculares 1 Conecte los auriculares no suministrados al cable de extensión suministrado 2 Inserte el enchufe del cable de extensión suministrado en la toma PHONES de esta unidad Ecoute avec un casque Important Pour être en conformité avec la Partie 15 des règles FCC vous devez utiliser le prolongateur fourni pour l écoute...

Страница 54: ...8A HU1 901 01 000613ATN Y0 Printed in Japan ...

Отзывы: