12
DIRECTIONS FOR USE
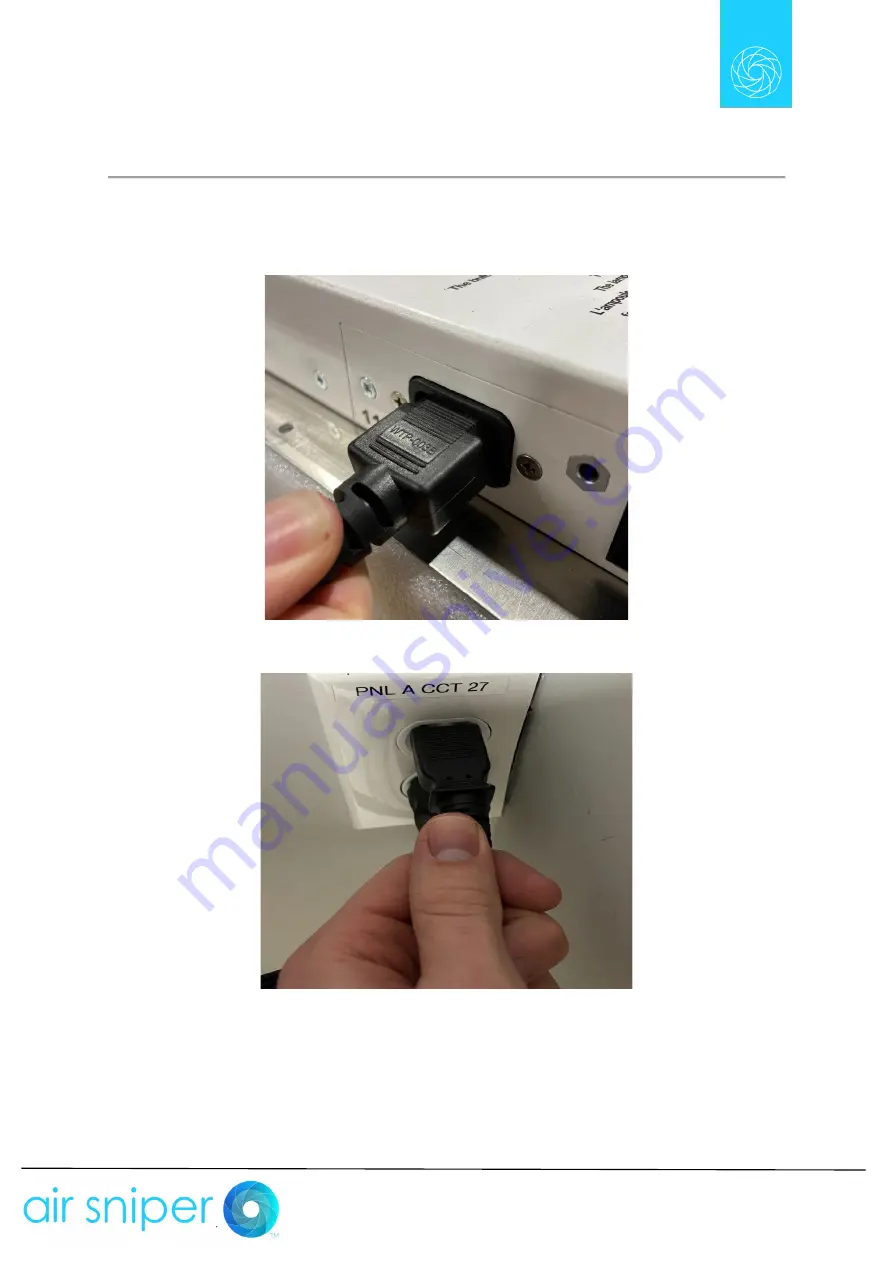
To Operate your Induct 300 unit,
1. Connect the Power Cable to the unit
Страница 1: ...Air Sniper Induct 300W Standard Instruction Manual...
Страница 2: ...al and follow installation recommendations An authorized Air Sniper dealer will know the system best and if service or maintenance is needed the Air Sniper team is here to help Our team is dedicated t...
Страница 3: ...n and use Damaged units can result in harmful UV C leaks 6 UV C Lamps contain small amounts of Mercury If the lamp is broken or damaged clean and dispose of it properly as per local safety regulations...
Страница 4: ...TRUCTIONS 3 TABLE OF CONTENTS 4 ABOUT YOUR UNIT 5 DESIGN 5 FEATURES 6 INCLUDED PARTS 7 INSTALLING YOUR UNIT 8 REQUIRED TOOLS 8 INSTALLATION 8 DIRECTIONS FOR USE 12 BULB STATUS 14 TROUBLESHOOTING 14 RE...
Страница 5: ...rth America For more information on the Induct 300W unit and all other Air Sniper products and services call 1 888 338 9549 to speak to one of our representatives DESIGN The Induct 300W is made up of...
Страница 6: ...110 V 50 60 Hz Energy Consumption 3 2 A 110 V Operating Temperature Range 25 C 100 C Power control Systems On Off Switch Airflow Differential Pressure Switch Sensor Bulb Life 43 800 Bulb life hours of...
Страница 7: ...7 INCLUDED PARTS Included in the package you will find 1 Air Sniper 300W Unit 2 Power Cable 3 4 x Magnetic lined Reflective Panels 22 x 8 each 2 1 3...
Страница 8: ...ace is available for unboxing installation and operation prior to attempting to handle your unit Ensure that the intended placement of your unit allows access to the necessary power requirements and d...
Страница 9: ...ined take note of the direction of airflow within the duct for installation be sure to mount the unit accordingly airflow direction is marked at the bottom right of the unit c Ensure that all exterior...
Страница 10: ...opening in the duct for the unit to be installed Ensure that the drill hole is made within the perimeter traced in step 2d as to not leave a gap once the unit is installed b Using the sheet metal snip...
Страница 11: ...e the unit through the cut out of the duct work b Using your drill and the 12 8 Tek screws and the pre drilled mounting holes around the unit secure the unit into the duct work where you cut into NOTE...
Страница 12: ...12 DIRECTIONS FOR USE To Operate your Induct 300 unit 1 Connect the Power Cable to the unit...
Страница 13: ...13 3 Turn the unit on using the On Off switch located on the right side of the white front panel 6 Once an airflow is detected the UV Lamp will illuminate and the Lamp Operating LED will turn on...
Страница 14: ...If your particular application handles greater airflow contact Air Sniper for options that may be better suited to higher airflow environments TROUBLESHOOTING If your unit is not operating as expecte...
Страница 15: ...r cable can also be disconnected from the unit The Power On LED will not be illuminated as the unit has been unplugged WARNING UV C Bulbs will heat during operation allow 20 30 minutes after unpluggin...
Страница 16: ...after contacting AIR for a Return Authorization Number 1 Return the defective Air Sniper unit to the dealer distributor from whom it was purchased together with a copy of the bill of sale or dated pro...
Страница 17: ...IR will provide a full refund for the purchase price of the equipment The unit must be returned to AIR in the original packaging and display no visible wear or damage The unit will be inspected upon r...