Air Master TIGER 11/250 Скачать руководство пользователя страница 16

16

PARTS LIST

No Description

Part No

1

Blot M8x103

HTTIG1125001

2

Cylinder Cover

HTTIG1125002

3

Cylinder Cover Gasket

HTTIG1125003

4

Valve Plate 

HTTIG1125004

5

Valve Clack

HTTIG1125005

6

Valve Plate Gasket

HTTIG1125006

7

Cylinder

HTTIG1125007

8

Cylinder Gasket

HTTIG1125008

9

Piston  Ring

HTTIG1125009

10

Piston  

HTTIG1125010

11

Circlip

HTTIG1125011

12

Conncting Rod

HTTIG1125012

13

Crank Case 

HTTIG1125013

14

Crank 

HTTIG1125014

15

Hex Bolt M8x22(Left)

HTTIG1125015

16

Rubber Gasket

HTTIG1125016

17

Breath Pipe 

HTTIG1125017

18

Sealed Ring?13x2.5

HTTIG1125018

19

Crank Case Cover

HTTIG1125019

20

Bolt M6x10

HTTIG1125020

21

Oil Leveler Gasket

HTTIG1125021

22

Oil Leveler 

HTTIG1125022

23

Only-way Valve

HTTIG1125023

24

Pressure Switch 

HTTIG1125024

25

Pressure Gauge

HTTIG1125025

26

Quick Couplers

HTTIG1125026

27

Regulator Valve

HTTIG1125027

28

Distributor

HTTIG1125028

29

Release Pipe

HTTIG1125029

30

Safety Valve 

HTTIG1125030

31

Nut Rp1/2

HTTIG1125031

32

Washer Foot 

HTTIG1125032

33

Drain Valve

HTTIG1125033

34

Lock Nut M10

HTTIG1125034

35

Washer 10 

HTTIG1125035

36

Spring Washer 10

HTTIG1125036

37

Wheel

HTTIG1125037

38

Wheel Bolt M10

HTTIG1125038

39

Tank 

HTTIG1125039

40

Lock Nut M8

HTTIG1125040

41

Lock Bolt M8x30

HTTIG1125041

42

Sealed Ring ?18x2.4

HTTIG1125042

43

Stem Rp1/2

HTTIG1125043

44

Discharge Pipe

HTTIG1125044

45

Stator

HTTIG1125045

46

Brearing 6203

HTTIG1125046

47

Conugated Washer

HTTIG1125047

48

Motor Cover

HTTIG1125048

49

Bolt M5x105

HTTIG1125049

50

Fan  

HTTIG1125050

51

Circlip

HTTIG1125051

52

Bolt St3.9x19

HTTIG1125052

53

Bolt M5x8

HTTIG1125053

54

Rotor

HTTIG1125054

55

Brearing 6204

HTTIG1125055

56

Sealing Ring

HTTIG1125056

57

Capacitance

HTTIG1125057

58

Washer 8

HTTIG1125058

59

Nut M8

HTTIG1125059

60

Piston Pin

HTTIG1125060

61

Fan Cover

HTTIG1125061

62

Column ?3

HTTIG1125062

63

Air Filter

HTTIG1125063

64

Curved Head

HTTIG1125064

65

Plastic Handle

HTTIG1125065

66

Bolt M5x12

HTTIG1125066

67

Power Cord 

HTTIG1125067

68

Thermal Protector 

HTTIG1125068

No Description

Part No

Содержание TIGER 11/250

Страница 1: ...OPERATION MAINTENANCE INSTRUCTIONS 01 13 24L AIR COMPRESSOR MODEL NO TIGER 11 250 PART NO 2244010 ...

Страница 2: ... of purchase Please keep your receipt which will be required as proof of purchase This guarantee is invalid if the product is found to have been abused or tampered with in any way or not used for the purpose for which it was intended Faulty goods should be returned to their place of purchase no product can be returned to us without prior permission This guarantee does not effect your statutory rig...

Страница 3: ... spraying flammable materials e g cellulose paint ensure that there is sufficient airflow and keep clear of any source of ignition 11 Before spraying any material always consult paint manufacturers instructions for safety and usage 12 Protect yourself Goggles will protect your eyes from flying particles Face masks will protect you against paint spray and fumes 13 Do not apply strain to electrical ...

Страница 4: ...loured black The BROWN wire must be connected to the terminal which is marked L or coloured red The YELLOW AND GREEN wire must be connected to the terminal which is marked E or or coloured green We strongly recommend that this machine is connected to the mains supply through a Residual Current Device RCD If you are not sure consult a qualified electrician DO NOT try to do any repairs WARNING Read ...

Страница 5: ...e To prevent damage do not lift by or put strain on valves or hoses ATTACH THE WHEELS Use a spanner to attach the wheels to the compressor Use the washers and spring washer in the positions shown ATTACH THE SUPPORT FOOT Insert the support foot into the position shown CAUTION TO PREVENT INJURY GET ASSISTANCE WHEN LIFTING THIS COMPRESSOR ...

Страница 6: ...IT THE AIR FILTER 1 If fitted remove the travel plug 2 Screw the air filter into position The air filter must be hand tight only FIT THE OIL FILLER CAP 1 Remove the travel plug 2 Insert the oil filler cap ...

Страница 7: ...e sure that the compressor is on level ground Make sure that the supply voltage matches the voltage shown on the data label CHECK THE OIL LEVEL 1 Make sure that the oil level is half way up the oil sight glass 2 If not remove the oil cap and add oil to the reservoir Only use SAE30 compressor oil available from your Clarke Dealer Part No 3050801 ...

Страница 8: ...rn the outlet valve handle to the on position TURNING THE COMPRESSOR ON 1 Plug the compressor into the power supply 2 Lift the On Off button The compressor will operate until the reservoir is fully pressurised It will then shut down The compressor will start up again when the pressure in the reservoir decreases WARNING BEFORE CONNECTING AIR TOOLS MAKE SURE THAT YOU READ THE INSTRUCTIONS SUPPLIED W...

Страница 9: ... the front the left hand outlet valve is adjustable The right hand outlet valve will only supply the full reservoir pressure and is not adjustable 1 Use the pressure regulator to set the output pressure of the left hand outlet valve Clockwise to increase the pressure Counterclockwise to decrease the pressure GAUGES 1 The reservoir pressure gauge shows the current pressure in the reservoir 2 The ou...

Страница 10: ...se TURNING THE COMPRESSOR OFF 1 Follow steps 1 3 in Removing Tools From The Air Hose above 2 Disconnect the compressor from the power supply 3 Slowly open one of the outlet valve to depressurise the reservoir You will hear a hissing sound as the reservoir depressurises Do not leave the compressor unattended if the reservoir is pressurised WARNING ALWAYS SET THE PRESSURE REGULATOR TO ZERO BEFORE YO...

Страница 11: ... thermal overload device If the motor gets too hot the thermal overload device cuts the power which prevents damage to the motor If the thermal overload device operates Let the motor cool down for 5 minutes and push the reset button If you start the compressor and the overload cutout operates again stop the compressor and disconnect from the power supply and have your compressor examined by a qual...

Страница 12: ... more often in dusty conditions 1 Remove the filter cover from the filter 2 Remove the filter from the filter cover 3 Clean the filter using a soft brush If necessary the filter can be carefully cleaned in warm soapy water Rinse and let the filter dry completely before refitting 4 Make sure that the filter and filter cover are replaced into position If the filter is damaged you must replace it ...

Страница 13: ...urn valve and replace the gasket and valve if necessary SPECIFICATIONS MODEL TIGER 11 250 Max Pressure 8 Bar Voltage 230 VAC 50 60Hz Air Displacement 9 5 CFM Receiver Capacity 24 L Fuse Rating 13 A Dimensions L x W x H 568 x 320 x 607 mm Guaranteed Sound Power Level 97 dB A Weight 27 45 kg Please note that the details and specifications contained herein are correct at the time of going to print We...

Страница 14: ...erheats easily Compressor head gasket blown or valve broken 1 Return the machine to your nearest service agent Compressor does not start The reservoir has already fully pressurised 1 Open drain valve to expel air Compressor should start again when pressure reduces Air leaking from the non return valve when the compressor is not running Faulty non return valve 1 Drain receiver completely of air 2 R...

Страница 15: ...15 EXPLODED DIAGRAM ...

Страница 16: ... Safety Valve HTTIG1125030 31 Nut Rp1 2 HTTIG1125031 32 Washer Foot HTTIG1125032 33 Drain Valve HTTIG1125033 34 Lock Nut M10 HTTIG1125034 35 Washer 10 HTTIG1125035 36 Spring Washer 10 HTTIG1125036 37 Wheel HTTIG1125037 38 Wheel Bolt M10 HTTIG1125038 39 Tank HTTIG1125039 40 Lock Nut M8 HTTIG1125040 41 Lock Bolt M8x30 HTTIG1125041 42 Sealed Ring 18x2 4 HTTIG1125042 43 Stem Rp1 2 HTTIG1125043 44 Disc...

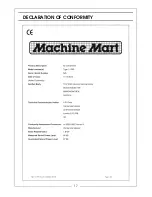
Страница 17: ...17 DECLARATION OF CONFORMITY ...

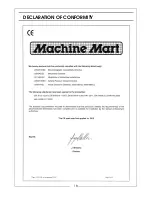
Страница 18: ...18 DECLARATION OF CONFORMITY ...

Страница 19: ...19 POPULAR ACCESSORIES ...

Страница 20: ......

Отзывы: