background image

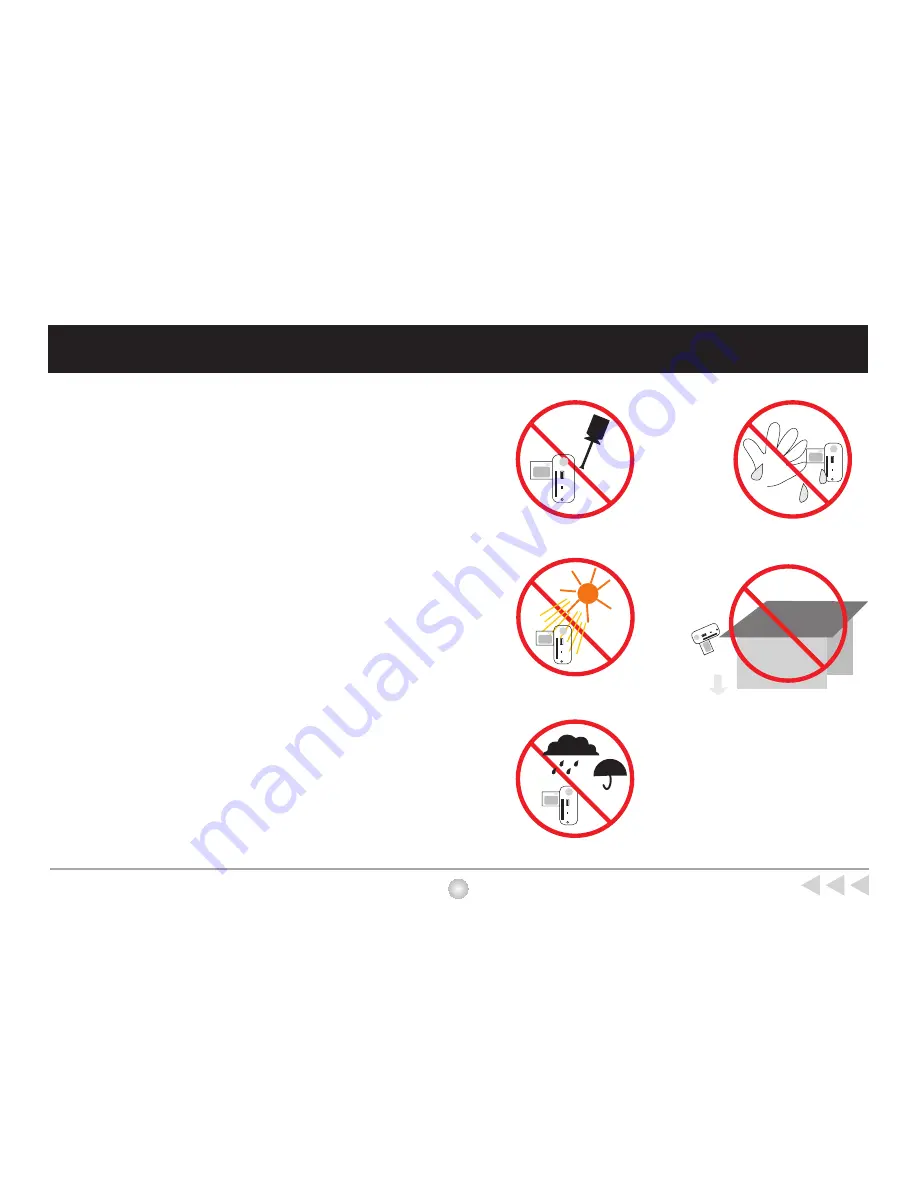
Notice

2

Notice

1. Do not drop, puncture or disassemble the

camera.

2. Remove batteries during long periods between

use.

3. Avoid all contact with water and dry hands

before using.

4. Do not expose the camera to high temperature

or leave it in direct sunlight.

5. Avoid pressing hard on the camera body.

Содержание POCKETDV II

Страница 1: ...DV Cam DV Cam Installation Guide Installation Guide...

Страница 2: ...ssemble the camera 2 Remove batteries during long periods between use 3 Avoid all contact with water and dry hands before using 4 Do not expose the camera to high temperature or leave it in direct sun...

Страница 3: ...Camera USB cable AV out cable Strap 2 x AA Alkaline batteries CD driver User guide Bundled Accessories 3 Bundled Accessories Tripod Optional...

Страница 4: ...Lens 5 Microphone LCD display 8 LED light USB port 12 CF Card slot 13 AV out port 14 Eject CF Card 15 Strap holder 16 Speaker 17 Battery cover 18 Tripod port 19 LCD Backlight control 3 Focus 4 Mirror...

Страница 5: ...battery life When not using your camera for extended periods we suggest you remove the batteries on the LCD display indicates low battery Transfer data from SDRAM to your PC immediately to avoid data...

Страница 6: ...ay to format the CF Card See P 9 for more on the Mode Selecting Do not eject CF Card while the camera is processing data EJECT CF CAR D Data will be completely lost as you format your card In addition...

Страница 7: ...l Attach the carrying strap for convenience and safety Use a tripod to minimize camera movement and ensure optimal image quality especially while shooting longer movies self portraits or video confere...

Страница 8: ...ou can t turn off your camera please make sure you exit the MENU Auto shut off your camera will automatically shut off after 60 seconds of inactivity Swing the LCD panel 90 away from the camera body B...

Страница 9: ...D display See Mode Selecting Note Still picture mode and AVI Movie function are temporarily disabled when the MENU is shown To take still pictures or AVI Movie please select to exit MENU 1 3 6 7 4 5 2...

Страница 10: ...Focus Focus Set focus before taking pictures Focus 10 16 40 40cm 100cm 40 100cm...

Страница 11: ...Pictures Recording and Taking Pictures 11 20cm 40cm Distance between the camera and your eyes How to hold your camera Subjects in the viewfinder should be clear Microphone Do not cover the lens Do not...

Страница 12: ...red as AVI files Image size is 320x240 pixels with frame rate 10 fps Maximum recording time is determined by the capacity of your CF Card and your SDRAM memory Microphone Taking AVI Movies 12 16MB 32M...

Страница 13: ...ton 4 After LED light stops image is successfully captured Three kinds of resolution and two kinds of quality are available for still image Steps 1 Rotate MENU control to highlight or 2 Press to selec...

Страница 14: ...ures About 160 pictures Quality 8MB Memory Example 1280x1024 pixels 1 3M pixels 640x480 pixels VGA High quality Normal Note This table is for your reference Actual number of pictures stored may vary u...

Страница 15: ...oice recording Microphone For more on voice playback see P 17 Voice Recording Voice recording capacity depends on CF Card storage capacity and your SDRAM Memory 15 16MB 32MB 64MB CF Card Storage Capac...

Страница 16: ...celled Erase All All files saved in CF Card will be deleted To delete files taken before a CF Card is inserted please take out the CF Card AVI JPEG or WAV 1 Rotate MENU control to highlight and press...

Страница 17: ...mbnails 4 Press to playback files Steps Playback Movies Still Pictures and Voice Record Fig 1 Fig 3 Thumbnail mode AVI WAV JPEG Fig 2 Press to playback files Playback Movies Still Pictures and Voice R...

Страница 18: ...s well lit from the front Keep the camera level and steady when releasing the shutter Make sure you have adequate light when taking still pictures or movies especially indoors For best quality video m...

Страница 19: ...System The A V out color system of camera must be selected as same as your TV Incorrect color system will cause TV display problems Each TV belongs to one color system PAL or NTSC If your TV previews...

Страница 20: ...appear while camera successfully enters A V out mode Rotate MENU control up or down to shift between modes Press to select mode TV Preview 20 For more on TV playback see P17 Screen Page 1 Screen Page...

Страница 21: ...microsoft com windows netmeeting default asp Video Mail Live Http www ulead com dmf runme htm Movie Factory Http www ulead com dmf runme htm Photo Express SE Http www ulead com Photo Explorer Http www...

Страница 22: ...ion DV Cam Manager Installation 22 DV Cam Manager features The DV Cam Manager allows you to Download pictures AVI movies and WAV to your PC View pictures and AVI movies on screen Video Conference func...

Страница 23: ...should open automatically 2 Click to start DV Cam Manager installation 3 Follow the onscreen instructions to complete installation 5 icon will appear on PC desktop after Installation Software Install...

Страница 24: ...t the smaller end of the USB cable to the USB port of your camera Plug the larger end of the USB cable to the USB port of your PC USB Hardware Installation 24 Software installation must be completed b...

Страница 25: ...all USB Mass Storage Device driver and complete removable disk installation Your PC will add a removable disk under My computer icon 2 Installing PC Camera Driver 2 1 Connect your camera and PC via US...

Страница 26: ...alling PC Camera Driver 2 1 During hardware installation please rotate MENU control to and press again to continue hardware installation 2 2 Please select Automatic search for a better driver when Fig...

Страница 27: ...menu and go up to Programs Then go to the folder named DV Cam Manager and select it Follow the following two ways to launch DV Cam Manager Launching DV Cam Manager Launching DV Cam Manager 27 OR To un...

Страница 28: ...VE mode you can use your camera for video conferencing AVI JPEG and WAV Steps 2 Press to select mode 1 Rotate MENU control to select DV Disk or LIVE mode Mode selecting in LCD display may be turned of...

Страница 29: ...r display Slide Show AVI JPEG and WAV Double click icons to display files DV Disk 1 2 3 4 5 1 2 3 4 5 Previous picture Playback Slide Show Stop Pause Next picture Slide Show DCIM LIVE Album Storage Ar...

Страница 30: ...hen the camera loses power from battery exhaustion or removal DV Disk Your camera can also serve as removable hard disk and allows you to download files from Camera to your PC Two ways to download fil...

Страница 31: ...itch to DV Disk mode preview window must be stopped Taken pictures and movies are stored in LIVE album in DV Disk mode Please switch to DV Disk mode When using PC Camera to capture image please follow...

Страница 32: ...ster speed Select one of the following functions when you have different needs Setting output size can change the size of the preview window The default size is 320x240 Choose larger pixels when you n...

Страница 33: ...nge the banding filter in Video Setting The refresh rate the number of times the screen is redrawn per second is the most likely cause of flicker Select 50Hz or 60Hz until your PC screen stops flicker...

Страница 34: ...s in DV Disk mode appear unnatural flickering noise please select Cancel Flicker in the setting dialog Setting Setting Country Country England Germany France Italy Spain Nether lands Portugal Taiwan C...

Страница 35: ...a is not turned on Press the MENU control for 3 seconds Make sure that batteries are well installed Noise appears on PC screen while camera used as a video conferencing camera Change Band Filter to 50...

Отзывы: