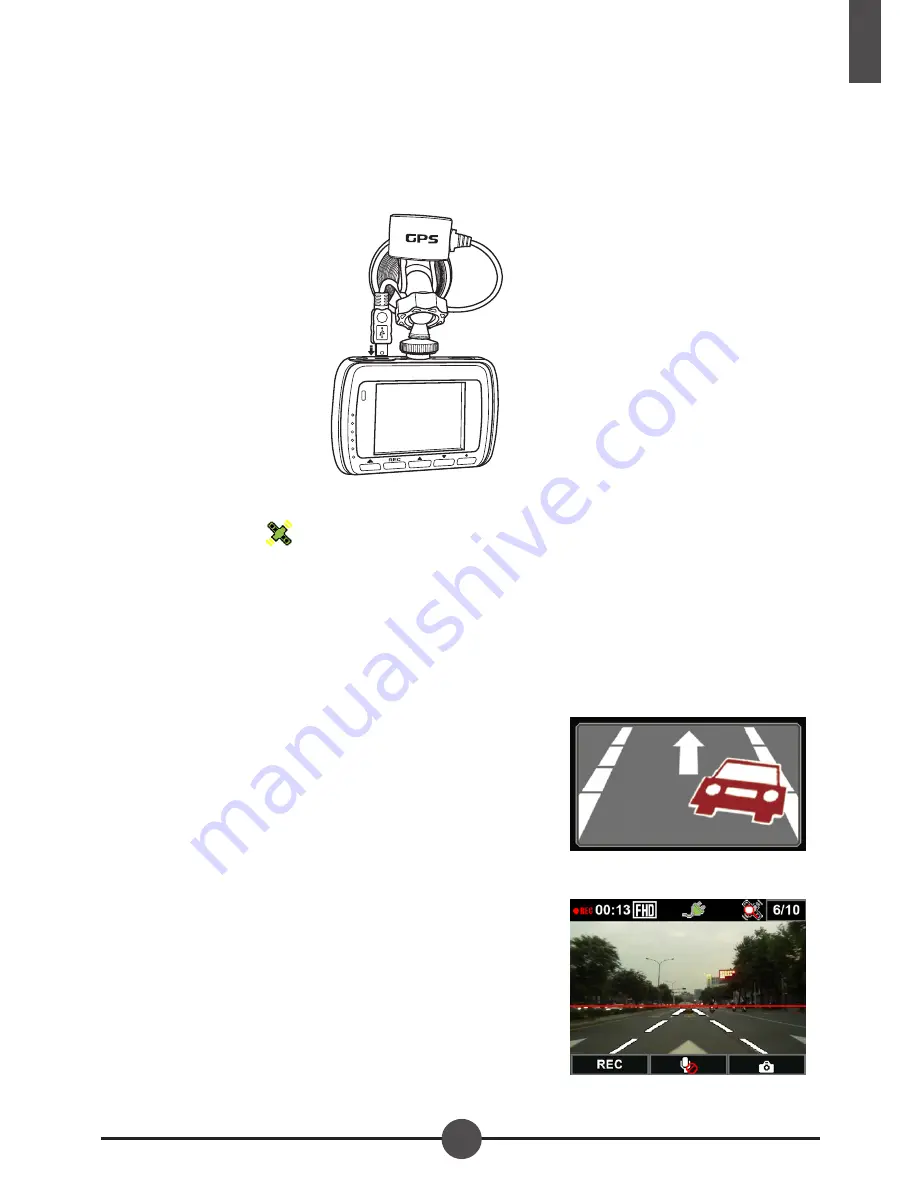
AIPTEK Car Camcorder X5 Скачать руководство пользователя страница 20

17

English

Using GPS Function

With the GPS function, this device logs the GPS position during the recording 
and the location information is stored with the recorded videos.

Connect the G-Mouse bracket (Optional) to the GPS port on the device. 

The device will automatically search for the satellite signals and the GPS signal 
indicator will turn 

 when the GPS signal is fixed.

Note:

 To acquire better accuracy of the positions, drive to a place where there 

is less cloud or a clear view of the sky.

Using the G-mouse

To start LDWS & FCWS functions, G-mouse must be connected.

■ 

Lane Departure Warning Systems (LDWS):

When the vehicle speed reaches to 60 km/hr, 


LDWS will warn the driver by Beep if the vehicle  

moves out of its roadway lane. Warning picture  

will also be displayed on the monitor as shown in  

Figure 1.

Enter Menu to set LDWS ON, return to recording 


mode. Please aim the red line to match the  

horizon line as shown in Figure 2.

Figure 1

Figure 2

Содержание Car Camcorder X5

Страница 1: ...Car Camcorder User s Manual H D G P S A V...

Страница 2: ...of infants 7 When you get off the car do not leave the device on the dashboard where it is subject to direct sunlight 8 For your own safety do not operate the controls of the product while driving Thi...

Страница 3: ...g the equipment off and on the user is encouraged to try to correct the interference by one or more of the following measures Reorient or relocate the receiving antenna Move the equipment away from th...

Страница 4: ...120 Convenient touch key operation Supports SD Card up to 32GB Supports TV playback via HDMI and AV interface Product Overview H D G P S A V G P S A V HD REC 15 2 8 9 7 1 3 4 5 6 10 11 12 13 14 1 Lens...

Страница 5: ...Be sure to format SD card using the device before the initial usage Video Storage Capacity as below Note The actual value of capacity may vary up to 30 depending on the color saturation and complexity...

Страница 6: ...base Turn and tighten the car holder and the bracket base to make sure the device is securely locked in place G P S A V HD REC G P S A V HD REC 2 With the suction cup laying flat position the suction...

Страница 7: ...S A V HD REC G P S A V HD REC 4 Adjust the device position Loose the knob to swivel the device vertically or horizontally up to 360 Then tighten the knob to make sure the device is securely locked in...

Страница 8: ...engine is started the device automatically turns on Powering the Device Automatically Once the vehicle engine is started the device automatically turns on If the Automatic Record function is enabled s...

Страница 9: ...he screen 2 Press to display menu 3 Press q to enter the OSD menu 4 Press p q to select Clock and press to enter Clock menu 5 To adjust the field item press to select the field 6 Press p q to adjust t...

Страница 10: ...f the Automatic Recording function is enabled the device automatically starts recording right after the device is turned on One video file is saved for every 5 minutes of recording The device saves th...

Страница 11: ...ly in an Emergency Record folder Emergency recording Return to normal recording 30 seconds 30 seconds Circling Recording When an emergency or accident happens press to record the event immediately An...

Страница 12: ...standby screen is displayed 2 Press p to enter Playback mode 3 Press p q to select Last Record or Emergency Record and press 4 Press p q to browse for the desired video file Last Record Emergency Reco...

Страница 13: ...he playback 3 Press p to enter the Delete screen 4 Press p to delete the selected file To delete all files do the following 1 Press to play one of the recorded videos 2 Press to pause the playback 3 P...

Страница 14: ...er the Protect screen 4 Press p to lock the file A lock icon is displayed on the screen to show that the file is protected To unlock a file do the following 1 Select the file that you want to unlock a...

Страница 15: ...lay OSD menus 1 Press any keys to display the guide icons on the screen 2 Press to display menu 3 Press q to enter the OSD menu 4 Press p q to select a menu option and press to enter the selected menu...

Страница 16: ...rding Available option Off High Sensitivity Low Sensitivity LDWS Enable Disable the LDWS Lane Departure Warning System function If this function is enabled and the system detects the vehicle begins to...

Страница 17: ...st the exposure compensation value to lighten or darken the preview screen Available option 2 1 5 1 0 5 0 0 5 1 1 5 2 Language Set the on screen display menu language Available option English Traditio...

Страница 18: ...s the files in your device 4 Copy the desired files to a folder on your computer Connecting to TV You can play files in your device on a TV using an HDMI cable or AV cable 1 Connect one end of the HDM...

Страница 19: ...Suction cup bracket For X5 Optional Adhesive bracket Optional AV cable Optional HDMI cable Optional G Mouse bracket For X5G Optional Quick Start Guide Quick Start Guide AC adapter Optional All parts...

Страница 20: ...d Note To acquire better accuracy of the positions drive to a place where there is less cloud or a clear view of the sky Using the G mouse To start LDWS FCWS functions G mouse must be connected Lane D...

Страница 21: ...LAIMER The Lane Departure Warning System LDWS and the Forward Collision Warning System FCWS are driving assistance system The functions realization of LDWS and FCWS will be subject to the actual envir...

Страница 22: ...Computer Click this icon to access the files in your memory card If the formatting is successful you will see the Media Player installation file Installation exe 4 To install the software double click...

Страница 23: ...USB 2 0 HDMI AV Output SD slot Microphone Speaker Delay Power Off Mechanism Battery or Gold Capacitor Time Stamp Keeping Time Up to 5days w G Cap Up to 20days w Battery White Balance Auto Exposure Con...

Отзывы: