Aigo DC-T35 Скачать руководство пользователя страница 35


32 


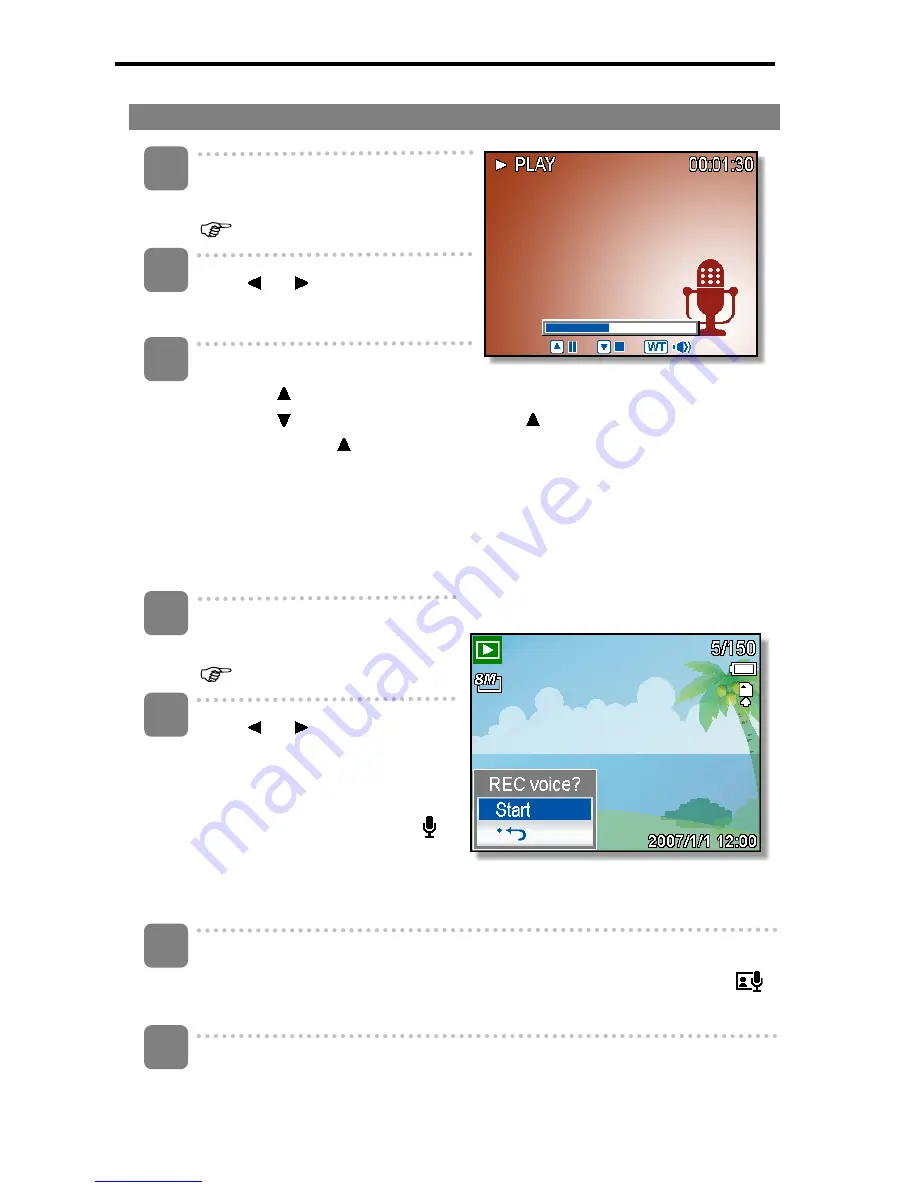
Playing Back Audio Clips 


Turn the power on, and set the 
camera to the PLAYBACK mode 
(

page 14). 


Press 

 or    to select the audio 

clip that you want to playback. 


Start playing back. 

y

 Press    to start playing the audio clip. 

y

 Press    to stop the audio clip, or press 

  to pause it. When audio clip 

paused, press 

  again to resume. 


Recording a Voice Memo 

You can add a voice memo to the still images after you record it. 


Turn the power on, and set the 
camera to the PLAYBACK mode 
(

page 14). 


Press 

 or    to select a still 

image that you want to add a 
voice memo. 

y

  If the image already has the 

voice memo recorded, the 


appears on the LCD monitor. 

The new recording will replace 

the previous one.


Open the PLAYBACK menu. 

y

 Press 

the 

MENU

 button, using four-way control to select 

Voice Memo

 (

and press the 

SET

 button. 


Press the SET button to start recording for 30 seconds. 

y

 Press 

the 

SET

 button again to end recording.


Get user manuals: 

See SafeManuals.com


Содержание DC-T35

Страница 1: ...ration is subject to the following two conditions 1 this device may not cause harmful interference and 2 this device must accept any interference received including interference that may cause unsatis...

Страница 2: ...IMAGE SIZE AND QUALITY 23 USING THE ZOOM FUNCTION 24 USING THE FLASH 25 USING THE MACRO 26 USING THE SELF TIMER BURST 27 USING THE APERTURE PRIORITY 28 USING THE SHUTTER PRIORITY 28 USING THE MANUAL...

Страница 3: ...H EFFECTS 47 CHOOSING THE IMAGE WITH PHOTO FRAME 47 COPYING THE FILES 48 SETTING THE DPOF 49 CHOOSING A STARTUP IMAGE 50 MAKING CONNECTIONS 51 CONNECTING THE CAMERA TO A TV 51 CONNECTING THE CAMERA TO...

Страница 4: ...ck This section explains playback delete and edit functions of still images movies and audio files Making Connections This section tells you how to connect this camera to a computer or TV Appendix Thi...

Страница 5: ...t Guide Battery Charger Adaptor y Actual accessories may be different y Items marked with are available as optional accessories y Note that the shape of the charger plug depends on the area where you...

Страница 6: ...utton page 24 y Thumbnail page 40 y Playback Zoom page 39 7 Playback Button page 14 8 Menu Button page 17 9 Mode Button page 14 10 ASM Button page 16 y Delete Button page 41 11 LCD Monitor page 10 12...

Страница 7: ...4 15 Shutter Button page 21 30 16 Power Button page 13 17 Strap Ring 18 USB AV Terminal page 20 52 19 Speaker 20 Tripod Socket 21 Battery Cover page 5 Get user manuals See SafeManuals com...

Страница 8: ...indicated by the arrow Insert the batteries y Install the battery with the terminal facing inside the camera Close the battery cover Low Battery Indicator A low battery indicator appears on the LCD s...

Страница 9: ...lamp becomes green y Risk of explosion if battery is replaced by an incorrect type dispose of used batteries according to the instructions y Be sure to turn off the camera power before insert or remo...

Страница 10: ...arrow Insert the card y Insert the card with the label facing up and the arrow pointing in y To remove the card gently press on the edge of the card and release it Pull the card out and close the bat...

Страница 11: ...ken by a DCF camera can be viewed on DCF compatible cameras from other manufacturers Setting the Display Language Date Time When using the camera for the first time after purchasing be sure to choose...

Страница 12: ...ue of the cursor located Press or to move the cursor between settings y Holding down or changes the values continuously y For date stamp setting page 36 Apply the setting y After adjusting the setting...

Страница 13: ...25 15 Shake warning page 21 3 Macro page 26 16 Aperture value page 21 4 Self timer Burst page 27 17 Face tracking page 37 5 Zoom indicator page 24 18 Exposure page 35 6 Shots remaining 19 Focus area...

Страница 14: ...page 32 9 Captured date time 4 File number Total 10 Voice memo control page 33 5 Battery page 5 11 DPOF page 49 6 Storage media 12 Resolution page 23 y Some information may not display correctly if y...

Страница 15: ...se images easily before shooting images PLAYBACK mode A OSD on B Full OSD D OSD off y You cannot change the LCD status in the following situation Manual exposure Recording movie clips or audio files P...

Страница 16: ...h between REC mode and PLAYBACK mode page 14 Power Saving Function For saving the battery power the LCD monitor automatically turns off 1 minute after the last control accessed factory preset setting...

Страница 17: ...he REC mode Set the camera to the REC mode page 14 Launch the mode palette y Press the MODE button o to show the scene mode palette Select a mode y Use the four way control to select a desired mode an...

Страница 18: ...for the beach or snow scenes Sports Used to take still pictures in high speed motions Party Used for the wedding or indoor parties Candlelight To capture the warmth effects of candle light Night Port...

Страница 19: ...REC mode Launch the ASM mode y Press the ASM button n to toggle switch between Aperture Priority Shutter Priority Manual Exposure mode y For detail operation page26 Exit the ASM mode y Use the ASM jog...

Страница 20: ...ange the setting y Press or o to change the setting Press the MENU n or the SET o button to save the settings and close the menu REC menu list Still Image Menu Item Available Setting Page Resolution 2...

Страница 21: ...he camera to the REC or PLAYBACK mode page 14 Press the MENU button n to open the REC or PLAYBACK menu y The menu displays depends on whether you are in the REC mode or the PLAY BACK mode Open the Set...

Страница 22: ...ting The captured image will display for 3 seconds after shooting The captured image will display for 5 seconds after shooting Power Save 1 min 3 min 5 min For power consumption the camera is turned o...

Страница 23: ...rica Japan and others Europe Oceania and others USB Computer Printer Sets the USB mode to connect the camera with a printer or computer page 52 S Image Sets a recorded image as the start up image page...

Страница 24: ...in focus then shutter speed o aperture value p and ISO value q are displayed y If the shutter speed is slow or the possibility that image may be blurred the shake warning icon may appear on the LCD m...

Страница 25: ...n Face Tracking Off On Photo Frame 10 frames can be selected Beep Off On Menu Auto Review Off 1 sec 3 sec 5 sec Rest of settings will not be controlled as below y Quality S Fine y Highlight Off y Mete...

Страница 26: ...ee page 17 Resolution Values Image Size Print Size 3264 x 2448 Printing larger than A4 size 3264 x 2176 3264 x 1840 2816 x 2112 2272 x 1704 1600 x 1200 640 x 480 Printing to postcards or attaching to...

Страница 27: ...out for a wide angle shot T zoom in for a telephoto shot y When the zoom button is pressed the zoom bar appears on the LCD monitor y When the optical zoom o factor is at maximum zooming stops temporar...

Страница 28: ...utomatically when shooting conditions require extra lighting Red eye reduction Flash strobes to let the subject s eyes adjust to the flash then fires again to take the actual image Your camera will de...

Страница 29: ...e maximum telephoto setting Turn the power on and set the camera to the REC mode page 14 Press the macro button n enters the macro mode y The macro icon o displays in the LCD monitor y To leave the ma...

Страница 30: ...hen press the SET button Off Record a single image 2 sec The shutter release will be delay for 2 seconds 10 sec The shutter release will be delay for 10 seconds Double Record two images in a shot afte...

Страница 31: ...y The larger the aperture value the smaller the lens opening allowing less light to enter the camera Using the Shutter Priority In this mode you can set a shutter speed to match the brightness Faster...

Страница 32: ...erence between the standard exposure and the selected exposure appears in red User the smile Capture Turn the power on and set the camera to the Smile Capture page 14 y In this mode face tracking will...

Страница 33: ...ize y The White Balance is set and locked to the settings of the first frame y Sound cannot be recorded while pressing the zoom button y The digital zoom cannot be used in Movie mode Finish recording...

Страница 34: ...ouTube standard resolution of 640 X 480 y Recording automatically stops when the file reaches 100 MB y If internal memory memory card is full or the file exceeds 2G in size the video recording will au...

Страница 35: ...still images after you record it Turn the power on and set the camera to the PLAYBACK mode page 14 Press or to select a still image that you want to add a voice memo y If the image already has the vo...

Страница 36: ...ted Playing Back a Voice Memo Turn the power on and set the camera to the PLAY mode page 14 Press or to select the image that has the voice memo recorded Start playing back y Press to start playing th...

Страница 37: ...tomatically corrects white balance Ideal for general photography Adjusts for bright sun conditions or natural light conditions Adjusts for cloudy days or twilight conditions Adjusts for normal indoor...

Страница 38: ...o ISO 3200 equivalent y Higher ISO speeds increase the image noise To take clean images use as low an ISO speed as possible Setting the Exposure Set the exposure value manually to compensate for unusu...

Страница 39: ...cription Off No effect is added to the image Red eye removal Playback only B W Convert image to black white Sepia Recorded image will be stored in a sepia tone Negative Opposite what they were in the...

Страница 40: ...tal influences face tracking function may be limited y The Highlight and Photo Frame cannot be used as using the Face Tracking y When capturing an image with several faces face tracking function will...

Страница 41: ...speed Playing Back Movie Clips Turn the power on and set the camera to the PLAYBACK mode page 14 Press or to select a movie clip that you want to playback Start playing back y Press to start playing...

Страница 42: ...ify the image y Press T n to magnify the image and the central portion of the image is displayed You can use the arrow button p to view different parts of the magnified image y Press the MENU button o...

Страница 43: ...er on and set the camera to the PLAYBACK mode page 14 Enter the slide show y Press the MENU button n use the four way control o to select Slide Show and press the SET button o Change the slide show se...

Страница 44: ...ess the SET button o Press or o to select the image you want to delete Press the SET button o to delete the image y Repeat step 4 5 to delete images y To quickly delete the current display image 1 Sel...

Страница 45: ...he frame of the selected image turns green Select multiple images y Use the four way control to select the image y Press the SET button toggles the on and off Repeat this step until all images that yo...

Страница 46: ...File Turn the power on and set the camera to the PLAYBACK mode page 14 Open the menu y Press the MENU button then use the four way control to select Protect and press the SET button Press or to select...

Страница 47: ...four way control to select Protect and press the SET button y You can open the menu in full screen or in thumbnail Press or to select Lock all and then press the SET button y To unlock all files sele...

Страница 48: ...e frame of the selected image turns green Select multiple images y Use the four way control to select the image y Press the SET button toggles the on and off Repeat this step until all images that you...

Страница 49: ...Press or to select OK and then press the SET button to finish rotating Changing the Image Size Turn the power on and set the camera to the PLAYBACK mode page 14 Press or to select the image you want t...

Страница 50: ...the SET button Press or to select an option and then press the SET button y The edited image will be saved as a new file Choosing the Image with Photo Frame Turn the power on and set the camera to the...

Страница 51: ...s the MENU button then use the four way control to select Copy to card and press the SET button Press or to select Single then press the SET button y To copy all images to a memory card select All Pre...

Страница 52: ...to select Single then press the SET button y To set the DPOF setting for all images select All in this step y To reset all DPOF settings to initial default select Reset in this step Press or to select...

Страница 53: ...ars Set the camera to the Setup Menu page 18 Press or to select S Image then press or the SET button Press or to select a desired option and press the SET button to apply the setting Off Disable the s...

Страница 54: ...ra and the TV Use the supplied AV cable to connect the camera to the TV set Set the TV input signal to Video In y Refer to the documentation included with your TV for more information Display on TV y...

Страница 55: ...presents the memory card Copy images from the card into a directory of your choice on the computer s hard disk Connecting the Camera to a Computer with the USB Cable Install the USB software driver in...

Страница 56: ...ideos and audio files are stored in this folder except for files recorded using the Auction or YouTube mode y _AUCT Captured images using the Auction mode are saved in this folder y _UTUBE Captured vi...

Страница 57: ...display the warning message Folder cannot be created When it appears try one of the following ways y Reset the file number and plug in a new memory card y The folder number and file number are initia...

Страница 58: ...ed Hold the camera steady when shooting picture Image is blurry or out of focus The subject was beyond the range within which the camera can focus Turn the Macro mode on it the subject is within 15 cm...

Страница 59: ...de Program Movie Voice REC Q Mode Portrait Landscape Sunset Backlight Smile Capture Kids Night scene Fireworks Snow Sports Party Candlelight Night Portrait Soft Skin Soft Flowing Water Food Building T...

Страница 60: ...ilt in Speaker Built in Dimension Camera Body W x H x T 91 3 x 56 55 x 23 mm Weight Camera Body w o battery Approx 120 g These specifications are subject to change without notice Get user manuals See...

Страница 61: ...0 z z O z 1 1 2000 z z O z 1 1 2000 z z z 1 1 2000 z z Scene Mode z 1 1 2000 z z O z 1 1 2000 z O O O O O O z 8 1 2000 O O O O z O O z 8 1 2000 O O O O z O z 8 1 2000 O O O O O z O Still Capture z 1 1...

Страница 62: ...O O O O O O O O O O O O O O O O O O O O O O O O O O O O O O O O O O O O O O O O O O O O O O O O O O O O O O O O O O O O O O O O O Scene Mode O O O O O O O O O O O O O O O O O z O O O O O O O O O O O...

Страница 63: ...z z z Scene Mode O z z z z z z O O O O O O O O O O O z O O O O O O O O O O O O O O O O O O O O O O O O O O O O O O O O O O O O O O O O O Still Capture O O O O O O O O O O O O O O O Center Multi Spot...

Страница 64: ...O O O O O z z z z z z z z z O O O O O z z z z O O O O O z z z z O O O O O z z z Scene Mode z O O O O O z z z z O O O O z z z O O O O O z O O O O O O O O O O O O O O O z O O O O O O O O O O O O O O O O...

Страница 65: ...O O O z z O O O O O z O O O O O O O O O O O z O O O O O O O O O O z O O O O O O O O O O O z O O O O O O O O O O O z O O O O O O O O O O O Scene Mode z O O O O O O O O O O O z z O O z O O O O O O O O O...

Страница 66: ...O O z O O O O z z O O O O z Scene Mode O O O O O O O O O O O O z z O O O O O O O O O O O O O O O O O O O O O O O O Still Capture O O O O Off On Off Frame 1 10 Off On Off Auto Mode Function Menu Face T...

Отзывы: