


3
5.
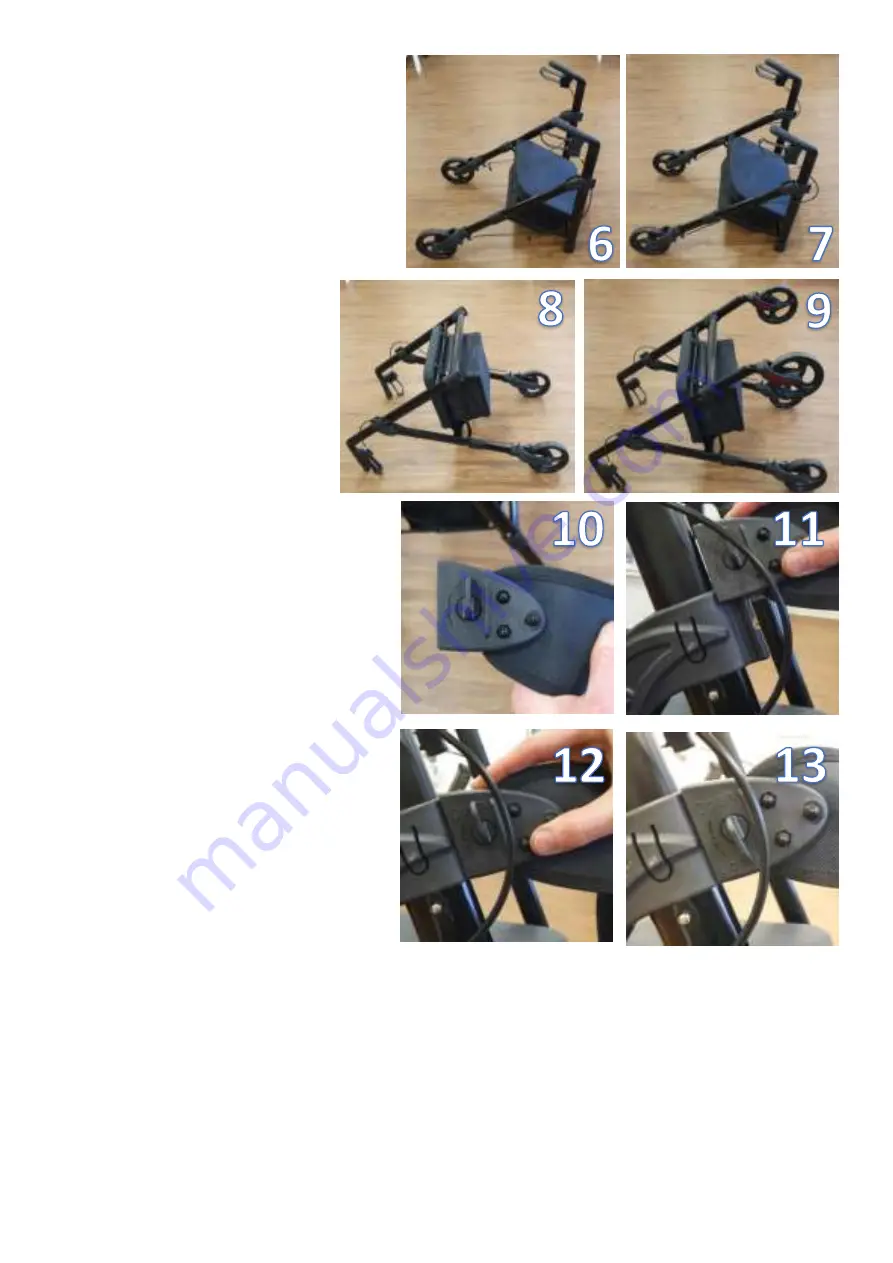
Insert the handle assemblies into the
uppermost tubes until the locking pins
click in place, in the same manner as
the legs (Figure 6).
Note: ensure the
brake cable lies on the
outside
of the
frame, this will reduce the risk of
interference or entrapment.
6.
Use the brake cable clips to clip the
cable to the main upright of the
rollator (Figure 7).
7.
Rotate the rollator and lie it
on its back (Figure 8), this will
make the front wheel
assembly easier. Insert the
front legs until the locking
pins click into place (Figure
9). Ensure the leg is the
correct orientation; with the
rollator on its back the castor should
settle relatively horizontally. If you
have fitted the legs on the wrong
side, the castor will look as though it
is
‘
pointing upwards
’
.
8.
To fit the back rest, turn the locking
key to the vertical
OPEN
position on
both sides of the back rest (Figure
10). Align the groove on the locking
pin assembly to the track on the
plastic connector on the frame
(Figure 11) ensuring the locking pin
text faces outwards. Slide the
assembly vertically downwards until
it comes to a stop (Figure 12). Lock by
rotating the locking pin 180° to the
LOCK
position (Figure 13). Repeat for
the opposite side.