background image

10     

BE-WCGR3xxx  USER MANUAL

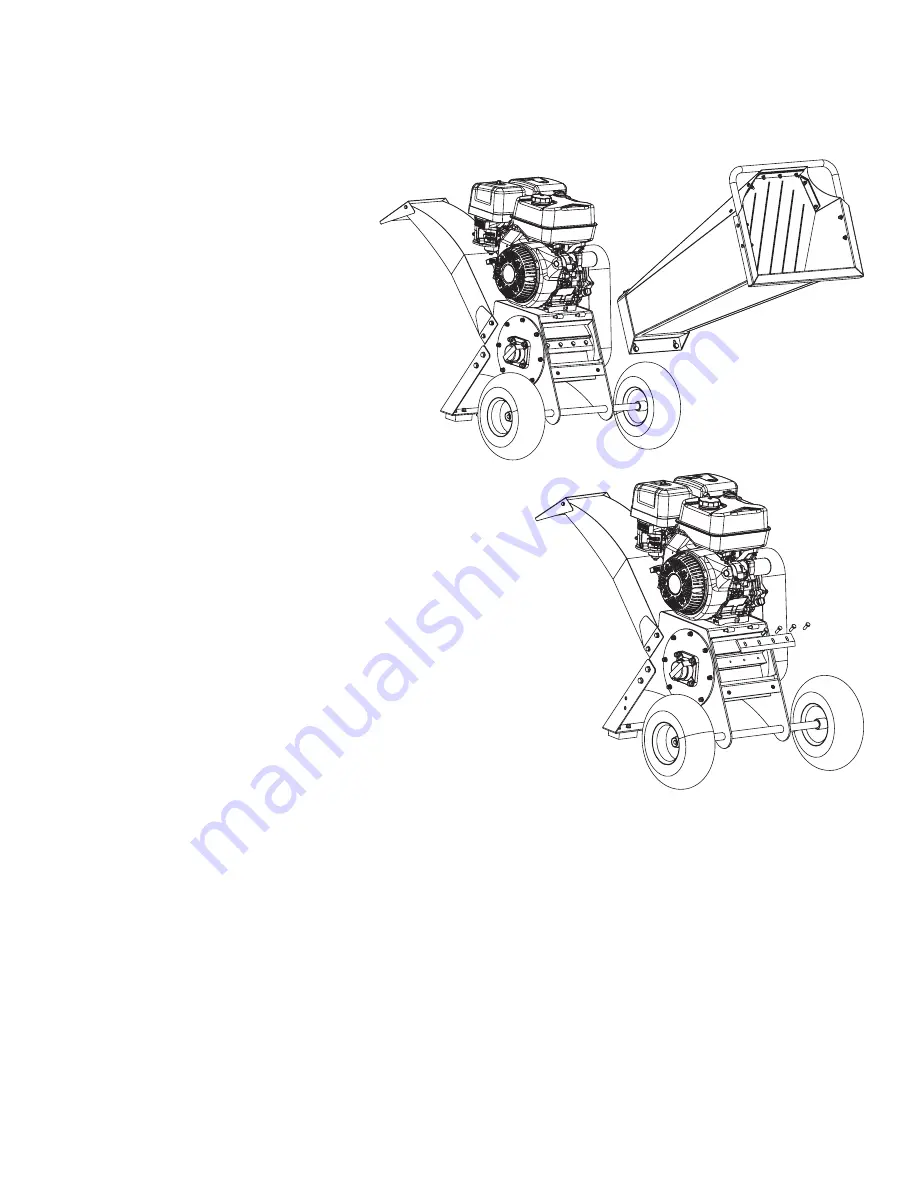
KNIFE REMOVAL AND REPLACEMENT

This chipper shredder is equipped with two chipper knives mounted on the cutting disk. When the knives 

get dull or show visible nicks, the machine will lose its self- feeding action and the material has to be pushed 

in. Often it comes out in long strips. Replace the knifes by following steps.
1.  Remove the In-feed bin.
2.  Remove the old knife and replace the new knife to ensure that the blade is facing down.

3.  Install back the In-feed bin.

GENERAL OPERATION

1.  Be sure to read all information in the Safety and Operation sections before attempting to operate this 

unit. Become familiar with all of the controls and how to stop the unit.

2.  Check all hardware (bolts, screws, etc) before every use for tightness to be sure machine is in safe 

working condition.

3.  Overloading the equipment will shorten its life, and can cause mechanical failures.

Chipper Operation

The chipper of WCSR65 is designed to handle tree limbs and branches up to approximately 3” (7.6cm) in diameter.
The chipper of WCSR13 is designed to handle tree limbs and branches up to approximately 4” (10 cm) in diameter.
The chipping knives also permit the processing of course organic matter like corn stalks. Tree branches must 

be inserted large-end first into the chipper bin. Since occasional kick-backs may occur, always stand off to 

the side of the unit. Allow the self-feeding action of the unit to draw the sticks in.

Содержание BE-WCGR3 Series

Страница 1: ...PURCHASE DATE MODEL NO SERIAL NUMBER DEALER WOOD CHIPPER BE WCGR3XXX OPERATIONS PARTS MANUAL FOR MODELS BE WCGR3R65 BE WCGR3H65 MANUAL CODE 102 105B...

Страница 2: ...xx USER MANUAL INDEX 3 Warning symbols 4 Features Specifications Safety 8 Assembly 9 Knife Removal and Replacement 10 Operation 12 Transporting Storage Maintenance 14 Trouble Shooting 15 Exploded View...

Страница 3: ...small children away from the area while wood chipper is in use Do not allow adults to operate the wood chipper without proper instruction WARNING SYMBOLS AND DEFINITIONS Intended Use Foreseeable Misu...

Страница 4: ...ed Bin Engine Discharge chute Body ITEM NO WCGR3R65 Chipping Capacity Max 3 Chipping Knives 2 Reduction Rate 15 1 Wheel Size IN 13x5 Wheel Material Rubber Wheel Type Pneumatic Gross Weight LB 209 Asse...

Страница 5: ...tay alert for hidden hazards or traffic PRODUCT SPECIFIC SAFETY DANGER THE WOOD CHIPPER HAS SPINNING BLADES THAT CAN AMPUTATE HANDS AND FEET DO NOT PLACE HANDS OR FEET IN THE IN FEEDING BIN OR DISCHAR...

Страница 6: ...rom the spark plug to prevent accidental starting DANGER 1 ENGINES GIVE OFF CARBON MONOXIDE AN ODORLESS COLORLESS POISON GAS CARBON MONOXIDE MAY BE PRESENT EVEN IF YOU DO NOT SMELL OR SEE ANY ENGINE E...

Страница 7: ...siphon fuel by mouth to drain fuel tank 13 Always have an adult fill the fuel tank and never allow children to fill the engine 14 Never allow an adult or anyone under the influence of drugs or alcoho...

Страница 8: ...1 Put the wheel A onto the axle B Make sure the wheel disc flat side faces the machine 2 Fix the wheel to the axle with the external circlips C Install the In feed Bin See Figure 2 1 Position the In...

Страница 9: ...washer E the splash guard A can be adjusted at the desired direction then tighten the handwheel Install the Battery Cord See Figure 5 1 Open the battery box cover A 2 Connect the electric cord to the...

Страница 10: ...his unit Become familiar with all of the controls and how to stop the unit 2 Check all hardware bolts screws etc before every use for tightness to be sure machine is in safe working condition 3 Overlo...

Страница 11: ...NG OR MATCHES IN THE AREA AVOID OVER FILLING AND WIPE UP ANY SPILLS WARNING TO AVOID SERIOUS PERSONAL INJURY FROM ROTATING CUTTING BLADES KEEP HANDS OUT OF INLET WHILE MACHINE IS RUNNING WARNING DO NO...

Страница 12: ...pilot light such as in a water heater Allow unit to cool before storing Storage Perform engine maintenance and storage measures listed in the engine owner s manual This includes draining the fuel syst...

Страница 13: ...heck Safety Labels 1 Service Interval Every spring and fall 2 Check that the safety labels are in place and undamaged 3 Replace any damaged or missing decals Inspect In feed bin Guards 1 Service Inter...

Страница 14: ...position 3 Use fresh unleaded gasoline 4 Clean out passageways using fuel additive Heavy deposits may require further cleaning 5 Connect spark plug cap properly 6 Remove spark plug Clean replace as r...

Страница 15: ...BE WCGR3xxx USER MANUAL 15 11 44 43 43 45 50 49 2 4 1213 7 8 29 25 31 30 33 10 23 39 40 34 35 27 28 54 57 46 47 48 3 9 1 6 55 5 36 37 38 22 26 24 32 41 56 42 EXPLODED VIEW PARTS LIST...

Страница 16: ...M8x30 102 105B 133 4 11 Bearing 102 105B 110 2 42 Socket head cap screw M8x50 102 105B 134 1 12 Clutch 102 105B 111 1 43 Guard plate 102 105B 135 2 13 Clutch support 102 105B 112 1 44 Guard plate 102...

Страница 17: ...BE WCGR3xxx USER MANUAL 17...

Страница 18: ...18 BE WCGR3xxx USER MANUAL PHONE 604 850 7770 FAX 604 850 7774 TOLL FREE PHONE 1 877 588 3311 TOLL FREE FAX 1 800 665 7334 BRABEREQ COM WGSALES BRABEREQ COM...

Отзывы: