Aginova Sentitel Next Скачать руководство пользователя страница 6


Page 6 of 8 


Unless otherwise instructed by Aginova, 
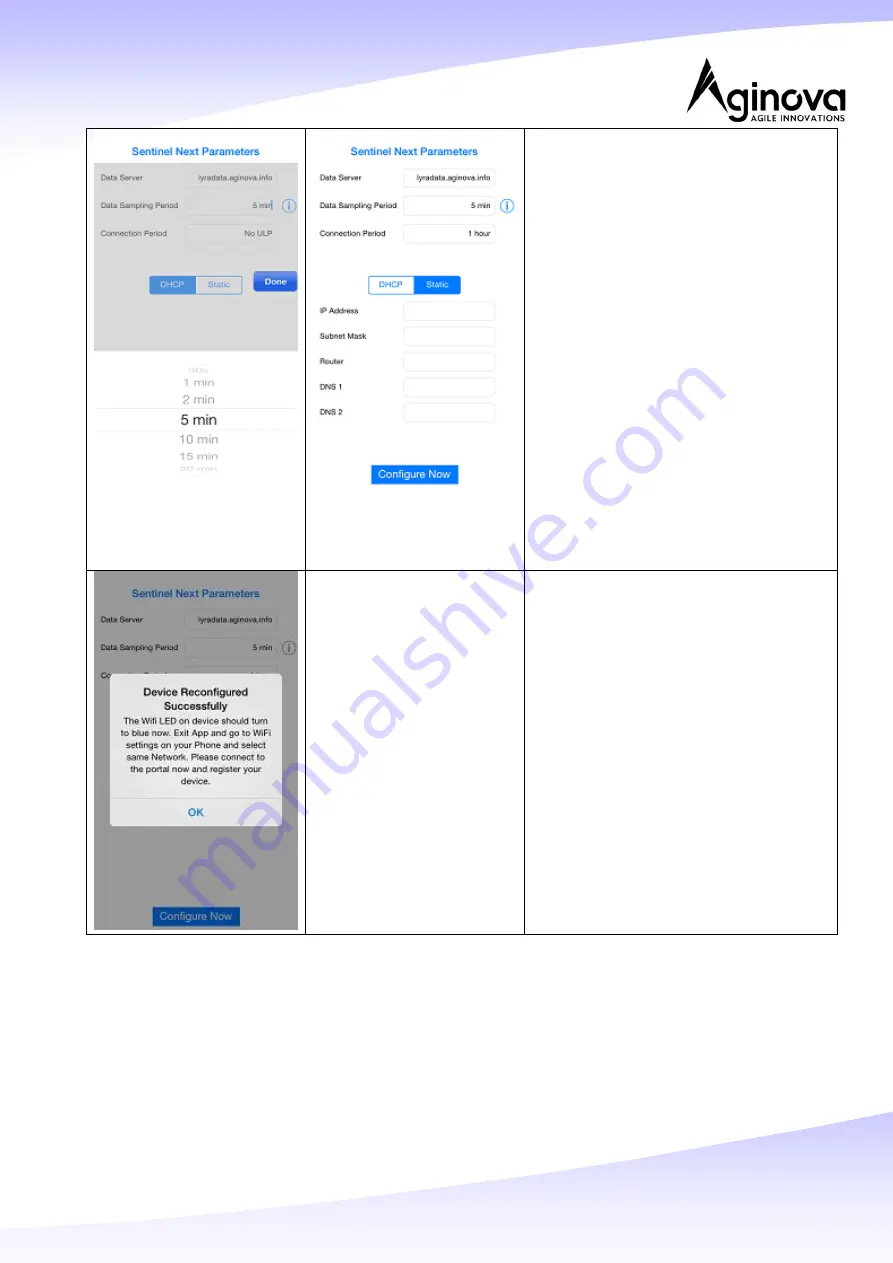
leave the Data Server setting to the 
default value. 
 
Select the Sampling Period you want 
and press Done. 
Select the Connection Period you want 
and press Done. 
 

Sampling means how often the sensor will collect a 
data point.  Connection Period is how often the 
sensor will upload the stored data points to the 
server.  No ULP means sensor will send data every 
time it collects it. 

 
You can also set a Static IP address or 
use DHCP.  We recommend using DHCP. 
Press “Configure Now” to continue. 


The app will display a message 
indicating the sensor was configured 
successfully.  Press “OK” 
 
The Mode LED on the Sentinel Next unit 
will change from solid green to a 
periodic blue blink.  The Mode LED will 
blink at the same rate as your selected 
Connection Period in the previous step. 


Содержание Sentitel Next

Страница 1: ...hosen this option you do not need to perform the setup steps below 1 Download and install the Sentinel Next App Go to the Apple App Store on you iOS device and search for Sentinel Next or click the li...

Страница 2: ...Next sensor The Sentinel Next comes with a pre installed with a 3 6V lithium battery Perform the following steps Connect the probe Press the momentary power button to power the unit on The LED under t...

Страница 3: ...iodic blink Sensor is configured to post data to a server Battery LED Green Battery is fully charged Red Battery is charging Both Mode and Battery LED blinking red Battery is depleted Sensor cannot fu...

Страница 4: ...Then press on Wi Fi to open the Wi Fi menu In the Wi Fi Settings menu find the Sentinel SSID in the list of available networks The SSID will be Sentinel_xxxxxx where xxxxxx the Sensor ID Select the S...

Страница 5: ...see data relevant to the sensor such as current temperature battery voltage firmware version etc Press the Configure Product button near the bottom of the page to begin setup The Sentinel Next will sc...

Страница 6: ...sensor will upload the stored data points to the server No ULP means sensor will send data every time it collects it You can also set a Static IP address or use DHCP We recommend using DHCP Press Con...

Страница 7: ...do not yet have a username and password for the Hosted Portal click the You don t have a login yet link on the log in page and follow the instructions to create your login and register your sensor The...

Страница 8: ...ints Make sure that your WiFi Access Point AP can reach the internet Verify that the AP is correctly configured SSID channels DHCP etc You can use another device PDA laptop to verify that it can reach...

Отзывы: