108
Repairing the Autosampler
Needle Assembly
Needle Assembly
WA R NI N G
To avoid personal injury, keep fingers away from the needle area
during autosampler operation. Do not bend the safety flap away from
its position, or attempt to insert or remove a vial from the gripper
when the gripper is positioned below the needle.
Frequency
When the needle is visibly damaged
When the needle is blocked
Tools required
¼
inch wrench (supplied in accessory kit)
2.5 mm Hex key (supplied in accessory kit)
Parts required
Needle assembly (G1313-87201)
for G1313-87101 or G1313-87103 needle-seat
Needle assembly (G1329-80001)
for G1329-87101 or G1329-87103 needle seat
Needle assembly (900 µl loop cap) (G1313-87202)
for G1313-87101 needle seat
Needle assembly (900 µl loop cap) (G2260-87101)
for G2260-87101 needle-seat
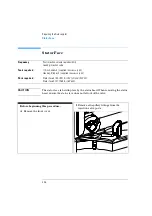
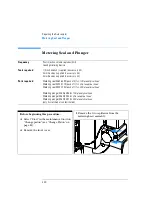
Before beginning this procedure:
❏
Select “Start” in the maintenance function
“Change Needle” (see “Change Needle” on
page 81).
❏
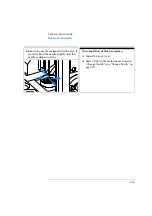
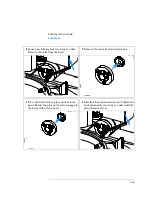
When the needle is positioned 15 mm above
the needle seat, remove the front cover.
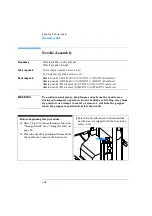
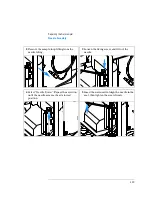
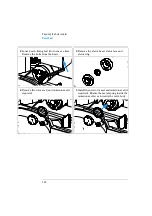
1
Select the “Needle Down” button until the
needle screw is aligned with the hole in the
safety cover.
Содержание G1313A
Страница 1: ...s1 Agilent 1100 Series Standard Micro and Preparative Autosamplers Reference Manual ...
Страница 3: ...Reference Manual Agilent 1100 Series Standard Micro and Preparative Autosamplers ...
Страница 12: ...12 Contents ...
Страница 39: ...2 2 Optimizing Performance How to optimize the autosamplers to achieve best results ...
Страница 49: ...3 3 Troubleshooting and Test Functions The modules built in troubleshooting and test functions ...
Страница 93: ...93 Troubleshooting and Test Functions Step Commands ...
Страница 159: ...5 5 Parts and Materials Detailed illustrations and lists for identification of parts and materials ...
Страница 160: ...160 Parts and Materials Main Assemblies Main Assemblies Figure 19 Autosampler Main Assemblies 5 3 4 2 1 9 8 7 6 ...
Страница 166: ...166 Parts and Materials Analytical Head Assembly Figure 21 Analytical Head Assembly 2 3 4 5 6 1 ...
Страница 191: ...191 Parts and Materials Remote Cables NOTE START and STOP are connected via diodes to pin 3 of the 3394 connector ...
Страница 216: ...216 Introduction to the Autosampler Electrical Connections ...
Страница 217: ...7 7 Theory of Operation Theory of operation of mechanical hardware electronics and instrument interfaces ...
Страница 244: ...244 Theory of Operation The Main Power Supply Assembly ...
Страница 265: ...265 Introduction to the Control Module Diagnostics and Tests ...
Страница 268: ...268 Introduction to the Control Module Diagnostics and Tests ...
Страница 269: ...9 9 Specifications Performance specifications of the Agilent 1100 Series Standard Micro and Preparative Autosamplers ...
Страница 274: ...274 Specifications Performance Specifications ...
Страница 275: ...10 Legal Safety and Warranty Information ...
Страница 286: ...286 Agilent Technologies on Internet ...
Страница 290: ...290 Index ...
Страница 291: ......


