


Getting Started
Ovation!
5
The printer can also be connected to the host with a parallel
connection. In addition, the printer has a unique feature where if
you connect both the serial and parallel cables to the printer at the
same time, the printer will automatically interface to the first
connection, (serial or parallel) that transmits valid data. After a
connection has been made, the printer must be turned off and then
back on again to change the interface connection.
1.6
Loading Media
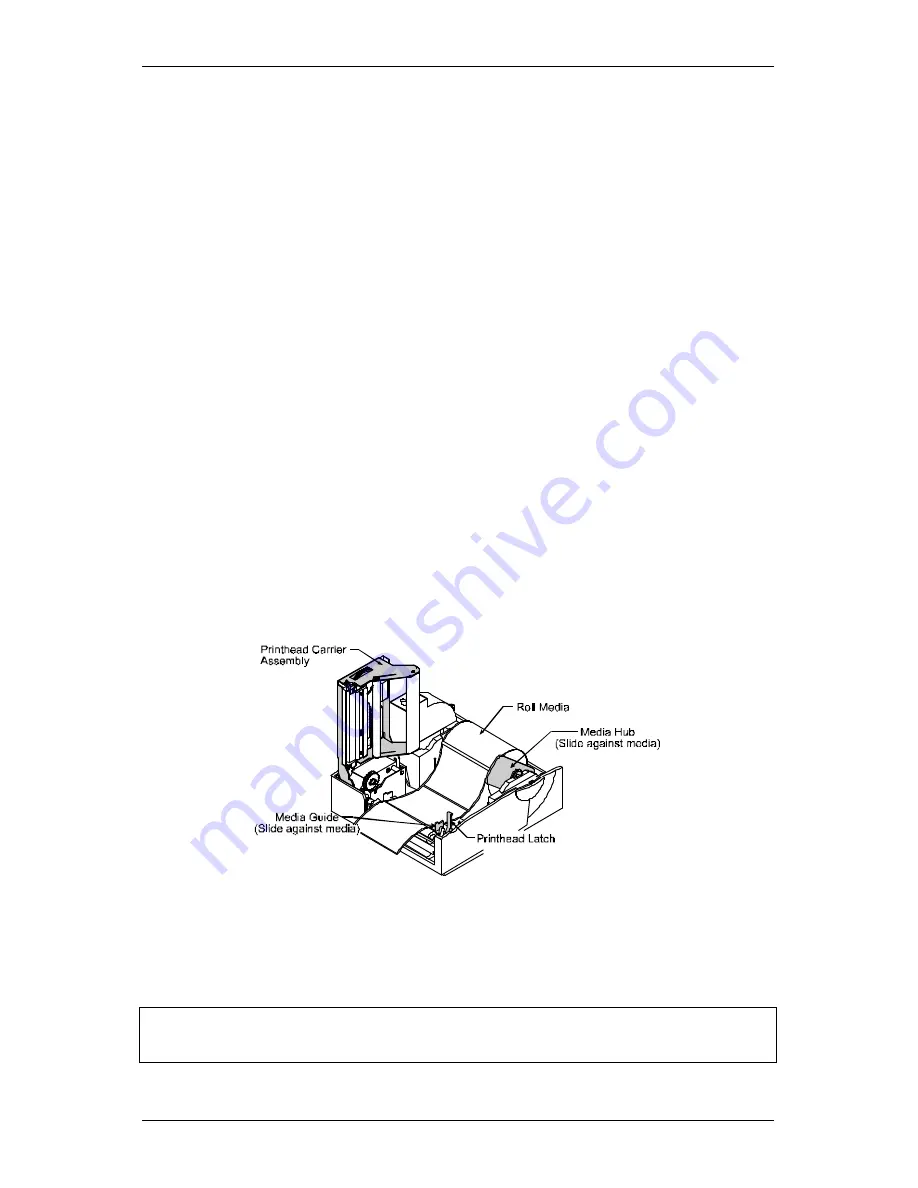
1. Open the cover.
2. Push the printhead latch toward the back of the printer and
raise the printhead carrier assembly.
3. Place a roll of media (labels facing up) on the media hub and
insert them into the printer. Slide the media hub against the roll
of media
4. Pull 6
″
(152 mm) of media from the media roll in the printer.
5. Slide the media guide to the edge of the media.
6. Close the printhead carrier assembly and press down until it
locks into place.
Figure 1-5 Loading Media
7.
Close the cover and press the ‘feed’ button several times to feed the
media and ensure proper tracking.
Note:
The printer is factory set for 4-inch media and ribbon, when
using different width media/ribbon please refer to Section 1.9.
Содержание Ovation!
Страница 1: ...Ovation Operator s Manual ...
Страница 4: ......
Страница 6: ......
Страница 25: ...Getting Started Ovation 17 ...
Страница 44: ......
Страница 50: ...Printer Specifications B 4 Ovation ...
Страница 60: ...Error Codes D 2 Ovation ...
Страница 64: ...Warranty Information E 4 Ovation ...
Страница 66: ...Warranty Information E 2 Ovation ...


