60
61
Measurement Units:
mg/dL
Alarms:
7 programmable alarms
Result Range:
20 to 600 mg/dL
Hematocrit:
20% to 60%
Operating Relative Humidity:
Up to 90%
Operating Temperature:
50 °F to 104 °F (10 °C to 40 °C)
Control Solution Storage Temperature:
36 °F to 86 °F (2 °C to
30 °C)
Test Strip Storage Temperature:
46 °F to 86 °F (8 °C to 30 °C)
Memory:
1865 blood glucose and control solution test results
with date, time, and averaging (14, 30, 90 days and mealtimes)
Power Source:
Two replaceable CR2032, 3 volt, lithium batteries
Automatic Deactivation:
3 minutes after last user action
Size:
1.81” x 3.27” x 0.79” (4.6 cm x 8.3 cm x 2.0 cm)
Weight:
48 g (including batteries)
Equipment not suitable for use in the presence of flammable
mixtures.
This meter complies with the applicable standards for
Electromagnetic Compatibility; however it is not recommended
that it be used in the presence of strong electromagnetic
fields. When using this meter, keep away from sources of
electromagnetic disturbances such as electric motors or radio
transmitting equipment. This meter should not affect the
normal operation of other devices. If this does occur, provide
more distance between the meter and the affected device.
Meter Specifications
23
CHAP
TE
R
Assay Method:
Dynamic Electrochemistry
Maximum Altitude:
10000 feet (3048 meters)
Calibration:
Plasma equivalent
Coding:
No Code
Sample:
Whole blood, capillary
Sample Size:
0.5 microliters
Average Glucose Test Time:
6 seconds
When using your meter, avoid getting dirt, dust, blood,
control solution, water or any other liquid into the test strip
port and battery compartment. Clean the outside of the
meter or the lancing device using a cloth dampened with
mild detergent or mild soap. If you wish to clean the lancing
device cap only, remove the cap, wash it in warm water, rinse
well, and dry.
CAUTION: Never immerse the meter or the body of the
lancing device in water or any other liquid solution.
Caring For Your
Meter and Lancing Device
22
CHAP
TE
R
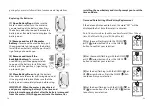
[5]
Set the minute (flashing) with the DOWN (
)
or UP (
) arrow buttons. Press the CHECK ( )
button to confirm your selection. If the meter was
activated via strip insertion, pressing CHECK ( )
allows you to perform a test. If the meter was
activated via the CHECK ( ) button, the meter will
enter menu mode.
Содержание Jazz
Страница 1: ...OWNER S GUIDE Advanced Blood Glucose Monitoring System ...
Страница 34: ......

