20
n
n
Avoid using any abrasive cleaners including cream
cleaners on brushed stainless steel surfaces.
n
n
Never use caustic or abrasive cleaners as these will
damage the surface.
Griddle
(Optional Extra)
Always clean the griddle after use. Allow to cool completely
before removing. Immerse the griddle plate in hot soapy
water. Use a soft cloth or, for stubborn stains, a nylon washing
up brush.
Note:
If the griddle is washed in a dishwasher then some
dishwasher residue may appear on the back. This is normal
and will not affect the performance of your griddle.
Control Panel and Oven Doors
The control panel and control knobs should only be cleaned
with a soft cloth wrung out in clean hot soapy water – but
take care that no surplus water seeps into the appliance. Wipe
with a clean dampened cloth then polish with a dry cloth. The
oven doors should only be cleaned with a soft cloth wrung
out in clean hot soapy water.
Removing the Oven Door Outer Panel
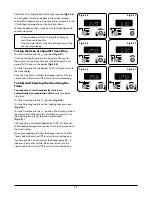
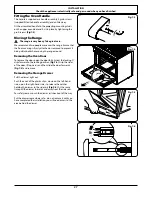
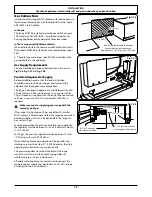
The outer door panel can be removed so that the inside of
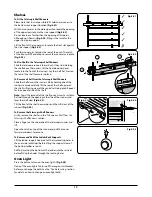
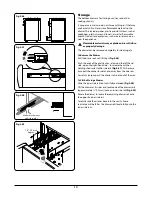
the glass can be cleaned. Undo the 4 screws (2 each side)
in the door
(Fig.6-4)
. Open the door slightly and, using the
handle, carefully lift the door outer upwards.
Refit in reverse.
Self-clean Oven
n
n
WARNING!
Remove all cookware, racks, and the rack supports
from the oven before using the self-clean function. If
the racks and supports are left in the oven they will
discolor and become rough.
n
n
DO NOT clean the door gasket: the door gasket is
essential for a good seal. Care should be taken not to
rub, damage or move the gasket.
n
n
DO NOT use oven cleaners: no commercial oven
cleaner or oven liner protective coating of any kind
should be used in or around any part of the oven.
n
n
Clean only parts listed in this User Guide.
n
n
DO NOT use the oven light while in self-cleaning mode.
To Remove and Refit the Telescopic Rack and Runners
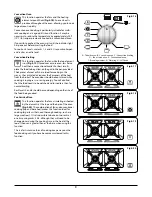
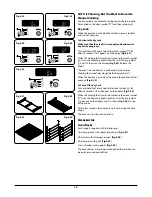
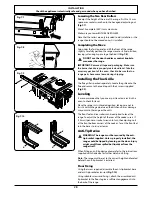
Slide the rack out on the runners. While holding one of the
runners securely, carefully lift the rear of the rack upwards:
the rack will spring clear of the central restraining tab. Repeat
for the opposite side of the rack.
Note:
To aid the removal of the rack you can insert a suitable
flat tool through the opening in the side of the runners and
lever the rack clear
(Fig.6-5)
.
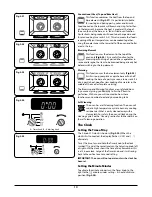
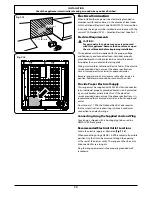
Tilt the front of the rack downwards and then lift clear of the
runners
(Fig.6-6)
.
Fig.6-5
Fig.6-6
ArtNo.272-0015 - 90DF - Pro+ - Removing the outer door panel
Fig.6-4
Содержание Professional 90 Dual Fuel
Страница 1: ...90 Dual Fuel User Guide Installation Service Instructions U110246 01 Professional ...
Страница 45: ...43 ...
Страница 46: ...44 ...


