


38
ADJUSTING THE LCD DISPLAY
Item
Function
Operation
Range /
Value
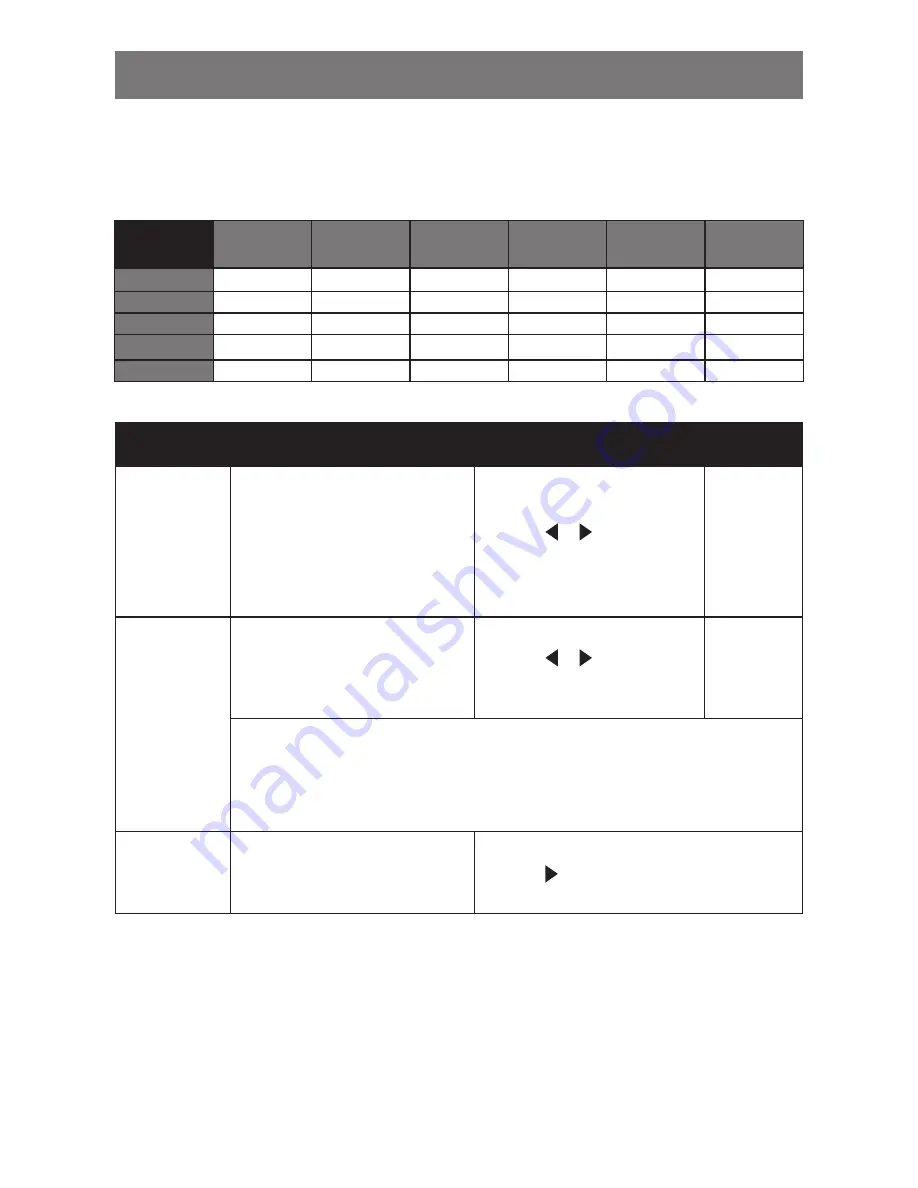
Sub Pic. Size
(Sub Picture
Size)
Allows you to select the size of the
sub source image. Available only in
PIP mode.
•
1
- Small image size.
•
2
- Medium image size.
•
3
- Large image size.
Touch the or buttons to
select the value.
1
2
3
Sub Pic. Pos.
(Sub Picture
Position)
Allows you to select the position of
the sub source image. Available only
in PIP mode.
Touch the or buttons to
adjust the value.
L+U
R+U
L+D
R+D
•
L+U
- Sets the image on the upper left corner of the screen.
•
R+U
- Sets the image on the upper right corner of the screen.
•
L+D
- Sets the image on the lower left corner of the screen.
•
R+D
- Sets the image on the lower right corner of the screen.
Swap
Swaps the main source and sub
source signals.
Touch the button to swap the image sources.
Table 5.1 PIP Compatibility Table
Main
VGA
DVI
HDMI
CVBS1
CVBS2
S-VIDEO
Sub
VGA
X
X
X
O
O
O
DVI
X
X
X
O
O
O
CVBS1
O
O
O
X
X
X
CVBS2
O
O
O
X
X
X
S-VIDEO
O
O
O
X
X
X
Note:
Any input signal may be set as the main or the sub source signal. However, some input signals are not
supported to be paired together as the main and the sub source signals.
Refer to the following table for compatibility options.


